BRYGS

Category: Cycling

  • Zwift Play and the Wahoo Kickr Bike

    Zwift Play and the Wahoo Kickr Bike

    (Originally posted June 18, 2023, with updates at the end)

    If you own the Wahoo Kickr bike, you already have handlebar-mounted buttons for things like using power-ups, turning left and right, making u-turns, etc., so you might be wondering how much value there might be to adding the new Zwift Play controllers to your system. Well, I did, by rationalizing the $99 introductory price as a pretty small upgrade after the $3000+ cost of the bike. (Another victory for mental accounting!) Anyway, here’s one user’s story:

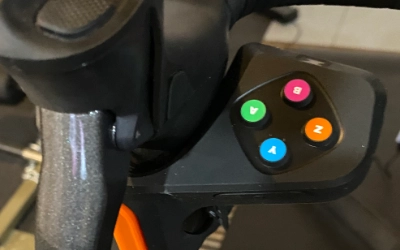
    The Zwift play controllers are two controllers which attach to your handlebars and provide gaming console-like buttons (the classic up-down-left-right and “A-B-Z-Y”, because if your company name starts with Z you need a Z button more than you need an X button) as well as broad paddles you can push or pull. So, it’s eight buttons (that can differentiate between press and long-press) and two two-way paddles to add to the various buttons already on the Zwift bike’s handlebars.

    Installing the Zwift Play paddles on a Wahoo Kickr Bike

    Installation could not have been easier. They go on just like in the video, no spacers needed. And the fit is snug, too… on my bike at least there was less deflection in the controllers when pushing a button (though maybe I just have a softer touch than the person in the video). They do a pretty good job of keeping out of the way, though you should consider your grip. Riding on the hoods is fine but sometimes I put my hands just behind the hoods, and it is just a little harder to get my thumbs out of the way when I do. I think I’ll adjust, it’s not enough of an annoyance to be a deal-breaker.

    Zwift Play quality of workmanship

    The Zwift Play controllers seem nice. The have good heft to them and it doesn’t seem like they’re prone to break down soon. The buttons do seem a bit stiff for my taste. They look like X-Box buttons, but they don’t have nearly as good a feel. This is probably due to the rubber membrane that sits over the buttons, and since I’m a lot more likely to sweat on my Zwift Play controllers than I am my X-Box controller, I think it’s probably a good trade-off.

    The Good

    Having the Zwift Play controllers on my Wahoo Kickr bike eliminates just about every need I had to touch my iPad (or pick up my Apple Remote) during gameplay. Hitting the “up” button would call up the in-ride menu, and navigation from there was pretty easy using the left-right buttons to change options and the “A” and “B” buttons for OK and cancel, respectively. There are also a couple of actions such as returning a “ride-on!” which I was never able to do using the iPad or Zwift Companion interfaces. 

    Pulling either of the handlebar paddles in the outboard direction activates steering, and it does seem to me to be smoother than using the buttons on the Wahoo Kickr bike. Steering is still a feature I don’t use much in Zwift, but it works better now, and who knows? If enough people adopt the Zwift Play then the developers might integrate steering more into the game. Since steering by button or paddle is still the part of the bike interface that is the least analogous to its real-world counterpart it still feels like a weak link in the interface, despite being the best implementation of steering yet.  

    Pushing the handlebar paddles in the inboard direction activates braking, and this braking is different from how it’s implemented on the Wahoo Kickr bike. On the bike, using the physical brake handles, the braking mechanism slows the flywheel on the bike, but that doesn’t translate into braking in the game. Zwift doesn’t care how fast your flywheel is turning, just in how much power you’re applying to it. So coasting and braking (using the Kickr bike’s brakes) are the same thing.

    The Zwift Play brakes, on the other hand, brake the in-game bicycle. This could be immensely useful for those time when you are dropping your pacebot, which I unfortunately seem to do at the top of a lot of hills). 

    If you’ve been using your computer as your Zwift interface, you probably could do all of this all along, but for people like me who have been playing on an iPad or an AppleTV, it’s like a brand-new feature!

    (I also noticed during my first ride that Zwift finally did add the “teleport” option, which I have been extremely eager to have. It’s not related to the Play, as far as I know, but I was pretty stoked to see it)

    The Bad

    I can’t say that there’s anything I’d call “bad” about the new Zwift Play controllers. Using them does not preclude you from using the buttons on the Wahoo Kickr bike, so if you’d rather hit the bike’s button for a power-up, you still can. I’ve mentioned the stiff buttons and the slightly intrusive mounting, but these are not huge issues.

    What’s Missing

    What I really want is to be able to set my own commands for the Zwift Play buttons. There is some overlap between the Play and the Kickr bike, and by having both you have two buttons for power-ups, two for u-turns, and redundant controls for steering (though, as I mentioned above, the Play does it better). Let me re-map one of those buttons so I could quickly look behind myself to see who’s behind and catching up. That would be sweet.

    Final Word

    I am pretty excited about the Zwift Play. I didn’t have the effect on my Zwifting that getting moving from my bike-on-a-trainer to the Wahoo Kickr bike did, but then again it’s only $100. I hope that this will open the door to more users adopting it, because if a critical mass of Zwift riders have steering (and braking, for that matter), it would open the door for Zwift to making a bigger commitment to those features in the game. It’s great that Zwift can be played on many different setups, but it does mean that game development must necessarily be focused on the lowest common denominator. If the Zwift Play becomes part of people’s base setups, it will create opportunities for everyone.

    Final, Final Word (update, May 2024)

    Well, it’s about a year later, and I have to say that I’m not using the Zwift Play anymore. For my setup, it just didn’t add value. The Kickr Bike provides a lot of the same buttons (turning, power-up, etc) and I because I ride with the Zwift companion on my phone on my handlebars and because the iPad I use for display is within reach, there just isn’t much I can do with the Play that I can’t already do elsewhere. I think braking might be the only thing that the Play does that the Kickr Bike doesn’t (the Kickr Bike has brakes but they don’t affect the game — rather they affect the actual flywheel) but I can’t recall the last time I wanted to use my brakes in the game. Maybe something technical like Repack Ridge would benefit from it, but in my humble opinion that’s all still a gimmick. The Play’s turning controls are a little more to my liking than the Kickr Bike’s buttons, but that’s just not enough to make it worth it.

    In the end, I found that the Play’s mounting position got a bit in the way when I was riding. In particular, when riding uphill it became a little bit of an annoyance figuring out where I could put my hands so that my fingers could grasp the handlebars comfortably.

    I still think the Play is a nice bit of gear, and if I was still using my road-bike-on-a-trainer setup that I had before I moved to the Kickr Bike, I think it would be a terrific addition. Since so much of the functionality is duplicated on the Kickr Bike, though, in the end I just wouldn’t recommend it for those users.

  • Zwift vs Rouvy vs MyWhoosh

    Zwift vs Rouvy vs MyWhoosh

    ABOUT ZWIFT:

    Zwift is a leading virtual cycling and running platform that has revolutionized indoor fitness by combining interactive technology with immersive gameplay. Designed for cyclists and runners of all levels, Zwift transforms stationary training into a social and engaging experience. Users can connect their smart trainers or treadmills to the platform, allowing Zwift to adjust resistance or incline based on the virtual terrain they’re traversing. This dynamic interaction provides a realistic and challenging workout, mimicking the feel of outdoor cycling or running.

    At the heart of Zwift is its vast virtual world, featuring stunning landscapes inspired by real locations. Users can explore these visually rich environments, ranging from city streets to picturesque countryside, while interacting with other participants from around the globe. Zwift’s social aspect is a key component, enabling users to join group rides, participate in races, or embark on solo adventures. The platform also supports structured training plans and workouts tailored to individual fitness goals, making it a versatile tool for both casual enthusiasts and competitive athletes seeking effective indoor training.

    Zwift has cultivated a vibrant and supportive community, fostering a sense of camaraderie among users. Whether engaging in friendly competitions, collaborative group rides, or pursuing personal fitness objectives, Zwift brings together individuals with a shared passion for cycling and running. Its seamless integration with various devices, compatibility with popular smart trainers, and regular updates to enhance the virtual experience contribute to Zwift’s status as a leading platform in the realm of interactive indoor fitness.

    ABOUT ROUVY:

    Rouvy stands out as a dynamic and immersive indoor cycling platform designed to elevate the indoor training experience for cyclists of all levels. What sets Rouvy apart is its emphasis on augmented reality routes, offering users the opportunity to ride through real-world locations via a library of video routes and virtual routes. This unique feature allows cyclists to experience the thrill of cycling on iconic roads, enhancing the realism of their indoor training sessions. Whether navigating challenging ascents or cruising through scenic landscapes, Rouvy strives to bring the outdoor cycling experience indoors.

    The platform’s focus on realism extends beyond just visuals. Rouvy enables users to compete against fellow cyclists in real-time multiplayer races, fostering a sense of competition and camaraderie. With compatibility for various smart trainers and devices, cyclists can seamlessly integrate their equipment with the platform, allowing for responsive adjustments to resistance and terrain changes. Rouvy also provides structured training plans and workouts, catering to users seeking targeted and effective training sessions.

    Rouvy’s community aspect thrives on the shared love for cycling. Users can participate in multiplayer races, challenges, and events, creating a social and engaging environment for indoor training. The platform’s commitment to delivering a realistic and challenging experience, combined with its diverse library of routes and community-driven features, positions Rouvy as a compelling choice for cyclists looking to stay motivated and connected while training indoors. For those seeking a virtual cycling experience that goes beyond basic simulations, Rouvy offers an exciting and authentic alternative.


    1. **Zwift:**
    – **Type:** Virtual Cycling and Running Platform.
    – **Key Features:**
    – Offers an immersive virtual environment for cycling and running.
    – Provides interactive workouts, group rides, races, and social features.
    – Compatible with various smart trainers and sensors.
    – Integrates with third-party apps and devices.
    – **Community Aspect:**
    – Boasts a large and active user community worldwide.
    – Allows users to ride with friends, join group rides, or participate in organized events.
    – **Training Plans:**
    – Offers structured training plans and workouts for different fitness levels.

    2. **Rouvy:**
    – **Type:** Indoor Cycling Platform.
    – **Key Features:**
    – Focuses on realistic augmented reality routes for cycling.
    – Provides a library of real-world video routes and virtual routes.
    – Enables users to compete against other riders in real-time.
    – Compatible with various smart trainers and devices.
    – Offers training plans and workouts.
    – **Community Aspect:**
    – Rouvy has a community of cyclists sharing and riding real video routes.
    – Users can participate in multiplayer races and challenges.

    3. **MyWhoosh:**
    – **Type:** Fitness Tracking and Virtual Challenges.
    – **Key Features:**
    – A fitness app that allows users to set and track fitness goals.
    – Offers virtual challenges, allowing users to compete against others.
    – Users can sync their activities from various fitness trackers.
    – Provides a social platform for connecting with friends and other users.
    – **Community Aspect:**
    – MyWhoosh fosters a sense of competition and community through virtual challenges.
    – Users can engage in friendly competition and share achievements.

    **Comparison Points:**
    – **Focus:**
    – Zwift and Rouvy focus on virtual cycling and running experiences.
    – MyWhoosh focuses on fitness tracking and virtual challenges.
    – “Systm” (if a specific platform) would need more details for a comparison.

    – **Features:**
    – All platforms offer features like virtual challenges, social aspects, and compatibility with fitness trackers.

    – **Community:**
    – Zwift and Rouvy have active user communities, emphasizing group rides and events.
    – MyWhoosh fosters a sense of competition and community through challenges.
    – “Systm” needs clarification to provide specific details on its community aspects.

    Since I don’t have specific details about “Systm,” consider checking its official website or documentation for the most accurate and up-to-date information. Additionally, features and offerings may evolve, so it’s always a good idea to check the latest details directly from the platforms.

  • Rouvy or Zwift?

    Rouvy or Zwift?

    Recently I decided it was time to give another indoor riding environment a try. After 1,000 rides on Peloton and grinding through more than 40 levels of Zwift, I was beginning to feel like I had exhausted those platforms, and with so many options I wanted to try something new. Enter Rouvy (like Zwift, another product whose name is always auto-corrected into something else).

    I’m a pretty enthusiastic Zwifter, having logged about 400 hours on the platform. I still enjoy it very much, but as is true for most games, eventually I had completed all the challenges and acquired all the stuff that the game has to offer, and most days are just more of the same (which is why I’m so excited when new routes are revealed!)

    A month or so ago, I met a Rouvy fan, who could not speak highly enough about it and urged me to try it. So this week, rather than another mind-numbing set of loops around Fuego Flats, I downloaded the Rouvy app and decided to give it a try.

    What Rouvy has to offer 

    The thing that impressed me the most about Rouvy is how, in a lot of ways, it is the most realistic cycling simulator I’ve tried. No, there’s no braking and no turning (even through clicking a button on an app), so on that level it’s the same as Zwift, but the overall experience is much more like riding in the real world, and I’m not talking about the graphics. What I’m talking about is that things like distance, incline and decline feel more real in Rouvy.

    Rouvy reveals that Zwift is the miniature golf of cycling

    Riding a course in Rouvy really brings in to focus a feeling I’ve had about Zwift for a long time. Although I don’t have any data to suggest that a mile in the game is more or less the same as a mile in real life, it does seem odd that one can ride up a mountain, through foothills, a desert, and a beach all in a ride that takes less than an hour. To give an example, it takes about ten minutes to ride to the top of the volcano from sea level. According to some maps, the height of the volcano is about 125m above sea level (about 410 feet) and the course that ascends it is only 3.75 kilometers (2.3 miles) despite circling the volcano several times. This volcano is tiny.

    Zwift is sort of the NFL Red Zone of cycling. It’s all highlights. It’s one thing after another. And absolutely there’s a place for that soft of thing. The constant variation is what makes it fun and because the graphics are very basic, Zwift can get pretty boring pretty fast if you’re not about to transition from the plains to the hills, or to the mountains, or whatever is just up ahead.

    But real cycling is generally not so dramatic. It’s long stretches with relatively modest changes in incline. Depending, of course, on what route you select, there’s generally a decent wait between truly challenging sections, but because you are watching real video the rides manage to stay interesting even as you grind out some of the less dramatic miles.

    Another key difference in the feel of Rouvy vs. Zwift is very noticeable for users of the Kickr Climb or Wahoo Bikes, and that is how they handle inclines and declines.

    On Zwift, inclines and declines are presented only in whole percentages, and as a result, you are pretty much always aware of a pitch change while riding. Rouvy, however, presents incline as tenths of a percent, so it is very possible for a grade to change gradually over time without you ever really being aware of it. In fact, during my introductory ride (which has only gentle inclines and declines) I wasn’t sure that the bike’s incline feature was working at all. Now that I have a few Rouvy rides under my belt, the Zwift changes seem jarring and unnatural by comparison. (Well, they always felt unnatural, but I had nothing to compare to.)

    Rouvy’s ride library

    Rouvy has a fairly large set of curated rides available, from all around the world, and they are pretty fun to ride. I’ve noticed, though, that certain routes work better than others.

    The least-good ride (I hesitate to call it the worst, because it wasn’t bad) I experienced was a ride through downtown Sydney, Australia. As you can imagine, there are some stoplights in downtown. Rouvy doesn’t actually make you stop at the stoplights, but the transitions that the video needs to make to account for this are a little jarring. Still better than having to actually stop, to be sure, but in a congested downtown, where you hit a lot of stoplights, it starts becoming something of a regular occurrence.

    More in general, the videos work best when the camera car (and for the rides I’ve taken it does always seem to be a car) can travel at a constant speed. As you can imagine, the video playback speed increases or decreases based on your speed, but the algorithm really has its hands full when trying to sync to your bike and deal with managing the variable speeds of the videographer.

    An aside here… it’s really mind bending to be riding Rouvy after so much Zwift. I can remember being in a ride and noticing how the roadside trees moved by faster than the distant mountains and thinking, “wow, they really nailed the motion parallax” before realizing that yeah, it’s just a video of trees and mountains so it should look realistic! Another crazy thing is riding and seeing another cyclist ahead, except that this cyclist was actually in the video and not part of the augmented reality overlay. As I do outdoors, I accelerated in order to tuck in behind this cyclist (there is drafting in Rouvy as there is in Zwift and IRL) before realizing that if I speed up, the cyclist ahead will, too. The question of whether I’d ever catch him is whether the person who shot the video caught him. If the videographer never overtook the cyclist, I would never do it, either, regardless of how hard I tried.

    The most successful Rouvy videos are long, open roads where the camera car can maintain a constant speed and there are no cyclists in the video itself. Those are the conditions that show off Rouvy best.

    Create your own rides with Rouvy and explore its limitations

    The thing that really attracted me to Rouvy, though, was the potential for uploading my own rides. One thing that I learned from doing centuries and longer rides is that it is very useful to know what to expect. I think it would be terrific if I could upload the route of an upcoming event and pre-run it. To me, that would be Rouvy’s killer feature.

    Unfortunately, it’s not really ready for prime time. I have high hopes that this will evolve over time, but there is, as my father would say every time I brought home my report card, “room for improvement”.

    I tried two different user-created routes, one with video (which I did not create myself) and one without (which I did create myself). The route with video was fun to ride, as it went through a national park near where I live. I recognized the route and it was fun to ride on familiar roads.

    It wasn’t perfect, though. For one thing, the elevation changes often didn’t truly sync with the video. Sometimes I would see myself ride up a short, steep grade but my bike didn’t elevate or get any harder to pedal. Then, five seconds after getting to the top, then the bike catches up. It’s a bit disorienting to experience. I don’t know if this is just a limitation of the available data (I’m not really clear on how the service actually syncs the video with the GPS data) or whether better data would have resulted in a better outcome.

    The second user-generated route was one that I created myself. I don’t have a video camera, so this was a data-only route. In my research, I was aware that you could create your own route without video, but I couldn’t find anything on the web about what that experience is like. If you go this route (no pun intended), what you get is a Google Earth-like map with a line showing the route and a dot representing your progress. This actually worked pretty well for me because it was a route I knew very well. I knew the hills were coming and I think to my muscles it was probably a pretty good approximation of an actual ride. I’m not really sure how much I would enjoy a video-less ride over a route I was not familiar with. If it’s for pre-running a route that I am going to do in IRL, I suppose it’ll do the trick. Would be nice to have something like RGT’s Magic Roads, though. I’ll do a post about that soon.

    Rouvy or Zwift?

    Zwift. If I had to choose one, Zwift is clearly superior. I definitely enjoy doing longer rides on Rouvy and enjoying the scenery (though I was disappointed that the “Grand Canyon” ride I did this morning offered only one or two glimpses of the actual canyon). I like that elevation is graduated in tenths of a degree instead of entire degrees as they are in Zwift. In the end, though, I can’t see myself spending $15/month for the few things that Rouvy does better than Zwift. I certainly wish them the best, and will probably check back in a year or so from now and see how they’ve progressed.

  • on Replacing your Peloton Pedals

    on Replacing your Peloton Pedals

    What pedals should I replace my Peloton pedals with?

    Peloton shoe - underside

    I have been asked that question numerous times since I wrote my blog post on broken Peloton pedals and the need to replace them periodically (about every 12 months, according to Peloton). You’re a busy person, so I’ll give you the short answer first…

    Answer: just about any “delta” or “look”-style pedal will do.

    Why these particular pedals? The answer has to do with the Peloton shoes and not the bike. As you can see from the photo, the Peloton shoe has three screw holes for the cleat, arranged in a triangle pattern (a.k.a. a “delta”, which is what gives the delta-style clip its name). So, you need to find a pedal that uses a compatible cleat. You’ll get a pair of cleats in the box with your new pedals, so if you’re the only Pelotoner in the family you are all set. If not, you may need to buy cleats for the other riders, as there can be variations between the different delta-style manufacturers that could necessitate new cleats. Fortunately, cleats aren’t all that expensive if you need to buy them.

    On my road bike, I have SPD pedals, which make it easier to clip-in and clip-out and therefore more to my liking for actual road use. Neither of these things is particularly important for Peloton use, at least in my experience. Needless to say, if you’re not using your Peloton shoes, SPD might be an option for you. (If your shoes are SPD ready they’ll have two screw holes side-by-side, close to one another near the centerline of the shoe.)

    There aren’t too many variables when buying pedals and cleats, but one you should be aware of is “float“. Float has to do with how much lateral motion is allowed when clipped in, meaning how much your heel can swing in or out before you actually unclip. Float can range from zero to a few degrees of angle. I don’t have any reference information to back me up, but I believe the stock Peloton cleats have zero float — you’re pretty locked-in on those. Whether you want to go with something a bit more permissive is really up to you.

    My best advice is to ask at your local bike shop. You could even bring your shoes. Any pedals they sell you will work because the threaded holes on the crank arm is standard, so the fact that you are shopping for pedals for a Peloton bike and not a road bike doesn’t really make a difference.

  • Ban the Tron Bike?

    Ban the Tron Bike?

    Just about every time I ride Zwift, I wish I hadn’t won the Tron Bike. I still remember how much I wanted it at the time, and I remember how hard it was to get, but now that I’ve had it for a while, I am actually a little sad that this part of the Zwift story is over for me.

    The Tron Bike

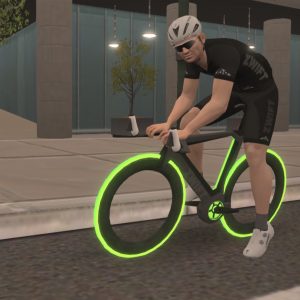
    If you’re reading this post, you’re probably already familiar with the Zwift Concept One bike, which is far better known by its nickname, the “Tron Bike”. Unlike most other bikes in the game, it can’t be bought, it has to be earned by completing the Everest Challenge and then climbing another 50,000 meters. It’s something within the reach of any Zwifter with enough perseverance (you don’t have to do it in one climb, after all!) but it can take a long time. Even Zwift authority and podcaster Simon Schofield famously has yet to earn his Tron bike (his co-hosts rib him in practically every episode over it, too!).

    You get a Tron Bike! And you get a Tron Bike!

    The Zwift Concept One bike is the ultimate Zwift bike, and therein lies the problem. Once you have it, you’ve essentially won the bike acquisition game, and then what are your drops for? I have literally millions of drops and counting, but nothing to spend them on.

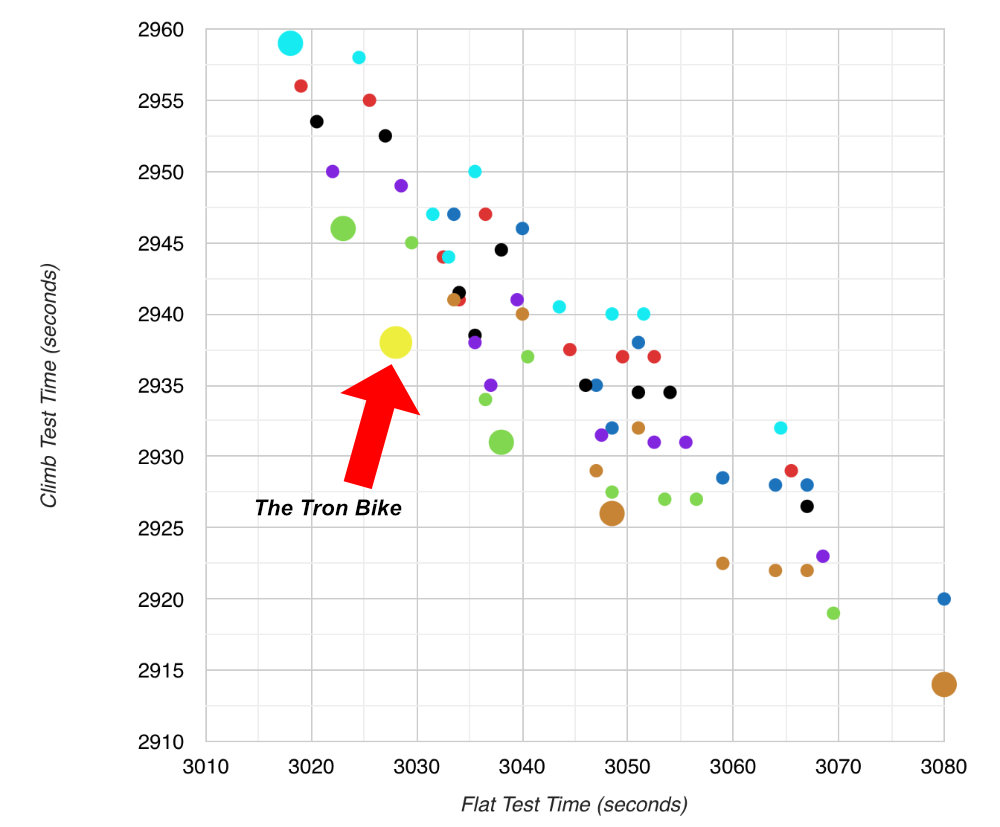
    Now, technically, there are bikes that do just a little better climbing, and a few others that do a bit better on the flats, but for an all-around bike, nothing is superior to the Tron Bike.

    the Tron Bike, as it compares to other available bikes, in climbing and flat-road speed. See Zwift Insider’s analysis for full details.

    And that is precisely the problem! The whole part of the game where you sweat to unlock enough levels and earn enough drops to level-up your bike is essentially short-circuited by the Tron Bike. Yes, I do have a bike for when all I’m doing is climbing the Alpe and another bike for pool-table flat routes (not to mention a mountain bike when I’m forced to go offroad) but most of the time I am riding on some kind of mix of flats and hills, and for that there may be other bikes that are arguably as good, but none clearly better than the Tron Bike.

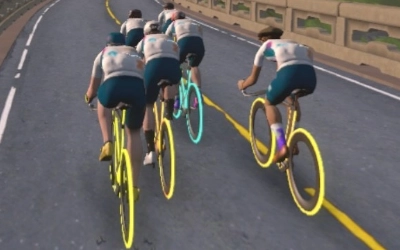
    Maybe this wouldn’t annoy me so much of the Tron Bike weren’t so boring. Yes, you get to pick the color of your wheels, but in reality there are only about five colors to choose from. Your bike has no water bottle, so you don’t get the drinking animation, nor do you get the standing animation on hills (only for sprints). When you’re in the draft, the Tron Bike rider doesn’t sit up like the riders of other road bikes, so it’s a little more difficult to know when you’re in the draft. In short the Tron Bike rider is the least-animated rider in the game. And it seems that a quarter of the riders in the game have a Tron Bike, sometimes I even lose track of which one I am in a peloton. As hard as it is to get this bike, it’s still too easy, and once you have it you have it forever.

    Which one am I? Sometimes, in the events where we all wear the same jerseys, I have trouble telling which is me, which can be a drawback when sprinting.

    (since I’m on the subject, I also have the Century Kit, which you are awarded after a 100 mile ride in Zwift. Again, a real pain to accomplish, and again more or less –in my opinion, anyway– the ultimate accomplishment as far as special kit goes. But it’s just basic black and, like the Tron Bike, that gets boring after a while. Ah, well.)

    Make it hurt

    Everyone who has a Tron Bike knows that when it comes to fitness, the rent is due every day. Sure, you can coast for a little while, but your fitness has to be re-earned on a regular basis. Maybe the same thing should be true for the Tron Bike. Maybe you need to climb a few thousand meters a month in order to keep the bike. Something. When somebody shows up with a Tron Bike, it should inspire shock and awe. It should be rare, it should be hard to get, and it should be hard to keep.

    I don’t want to end the post on a down note, so let me close by saying that the Tron Bike is a cool piece of gear, no question about it. The first thing I did when I got mine is head to the volcano, because when you see that bad boy light up inside the lava caves, well, that is priceless.

  • On the Peloton Strive Score

    On the Peloton Strive Score

    Before I begin discussing the Strive Score, let me note that I’m not a doctor or any other type of accredited authority. I’m just an ordinary Pelotoner who likes data. This blog should not be used in place of advice from a real medical expert.

    On April 30th, 2021, Peloton announced a new heart rate-related metric across all workouts. They call it “Strive Score” and here’s how they describe it:

    Strive Score is a personal, non-competitive metric that measures your performance in every workout—from equipment to the floor. All you need is a compatible heart rate monitor…and some good old-fashioned motivation.

    Peloton PR

    The Holy Grail, not just for Peloton but for all on-and-offline fitness programs is finding some way to quantify effort in a way that is meaningful regardless of your personal physiology and fitness level. This sort of universal measurement has so far eluded sports science, and is a huge barrier in the automation of any sort of personalized training program. Some day, when science has evolved sufficiently, we will look back at the sort of metrics we use today as being very crude, but nevertheless today this is what we have to work with.

    Peloton’s best metric in this regard is the good ol’ FTP number. FTP, Functional Threshold Power, is a number which is arrived at by actual experimentation on the athlete. Basically, to find your FTP score, you work as hard as you possibly can for a period of time, and however much work you can do (a multiplier might be involved depending on how long your test is) becomes your FTP. Your workout intensity is then based on that number (10 minutes at 80% FTP, 5 minutes at 110% of FTP, etc). Periodically, you re-test to recalibrate, and use the new FTP number as the basis of future workouts.

    The Strive Score explained

    Many people do not want to endure the FTP test, and that’s understandable. Unfortunately, if you’re not going to be using a benchmark that was at least arrived at using real-world data about you individually, you really have no choice but to fall back to something that is far more generic. This is where heart rate comes into the picture. Heart rate correlates to effort, of course. Your heart rate is slowest during most phases of sleep, and is highest when doing strenuous work such as running or climbing stairs. We’re all individuals when it comes to how quickly our heart rate increases under stress and how quickly it recovers when resting, but it’s generally safe to say that you’re generally working harder when your heart rate is higher, and working less hard when it is lower.

    The Strive Score seeks to quantify heart rate over time. Even sitting still you’ll generate a strive score value over time (at a rate of about 0.0048 points per second), as long as your heart is beating. The longer you go, the higher the score rises (so a ten minute effort at constant heart rate will yield double the score of a five minute effort at the same heart rate). Raising your heart rate above a certain percentage of your maximum heart rate* triggers a bonus multiplier (starting at 2x for heart rates above 65% of maximum).

    Peloton’s heart rate zones. Zone 1: < 65% max, Zone 2: 65%-75%, Zone 3: 75%-85%, Zone 4: 85%-95%, and Zone 5: > 95% maximum

    Since the heart rate multiplier and time are the only variables, it is fairly easy to calculate the theoretical minimums and maximums of the Strive Score, and they are as follows**:

    MinutesMinimumMaximum
    51.411.6
    102.923.2
    154.334.8
    205.846.4
    308.769.6
    4513104.4
    6017.4139.2
    9026.1208.8

    Note that the strive score is incremented every second, so you will not be able to hit the max score for an interval unless your heart rate is the maximum zone going into it.

    Reading the table: The table above lists the minimum and maximum attainable values for the indicated duration. For example, if your heart is beating, you cannot get less than a 1.4 score in five minutes of exercise, because you will be in zone 1 the entire time. If your heart rate is in zone 4 or above for the entire five minutes, your five-minute maximum would be 11.6 points. If you effort is not strictly zone 1 or zone 4+, your strive score will be somewhere between these minimums and maximums, depending on how many seconds you spend in each zone.

    Strive Score or FTP, which is best?

    I think I can say without fear of contradiction that the FTP test result, if arrived at after a valid test, is the best available metric of fitness available to us. It’s what I use to track my own fitness, and I rely on it more than I do heart rate or Strive Score.

    Another nice thing about FTP is that it is not a Peloton concept, but rather it is used in other areas of sport. Zwift has a very nice feature to calculate FTP, for example.

    All that said in favor of the FTP, the Strive Score has one very intriguing feature that FTP lacks, and that it is intended to be an indicator of effort rather than an indicator of achievement. As your fitness improves, it actually becomes easier and easier to hit your FTP numbers (which is why you need to re-test and re-calibrate periodically), because FTP is a measure of achievement, and when you’re fitter you can achieve more (or, in this case, achieve the same with less effort). Strive Score, as a measure of effort, should be less affected by your relative fitness (though it is, to some extent). For people seeking to improve their fitness, and who are looking to get some sort of feedback that they’re putting in the right amount of effort (at least, as compared to other attempts), the Strive Score could be a useful metric for that sort of information.

    * Maximum heart rate is estimated using age.

    ** The per-second strive point value of 0.00483 was arrived at through experimentation. Please let me know if you get markedly different results, and I will try to refine this value. I confess that I expected to find it to be a “rounder” number, such as 0.005, but it doesn’t actually seem to be quite that high.

  • Wahoo Kickr AXIS Action Feet review

    Wahoo Kickr AXIS Action Feet review

    If you’re a Zwifter, chances are that you’re running (or wish you were running) the Wahoo Kickr smart trainer. The Kickr, which is now in its fifth generation, may not be the absolute best trainer out there, but it is the established leader in the space, and when you’re dealing with a system such as Zwift that has components from so many different manufacturers involved, there is safety in numbers.

    Wahoo Kickr Axis Action Feet
    Photo from Wahoo showing the new parts (in black)

    Competitors are always trying to find an edge, of course, and some of those competitors started to explore bikes that lean, something the Kickr does not do. Saris introduced the MP1 Nfinity Trainer platform, a $1200 boogie board for your bike, which I am going to try out as soon as $1200 doesn’t seem like a ton of money to me. (Attention Saris: I’m an influencer! Send me one of these!) Manufacturers like RealRyder and Bowflex have bikes that lean (though, notably, Wahoo’s own $3500 Kickr Bike doesn’t), and although those machines aren’t direct competitors to Wahoo’s Kickr, you have to imagine that all of these cycling products will converge over time and that market share matters.

    I don’t have any insider information, but it certainly seems to me that Wahoo felt the need to respond to this trend, and their response comes in the form of AXIS Action Feet, a product whose very name seems like a desperate bid to generate excitement.

    What are the Kickr AXIS Action Feet?

    axis foot for side
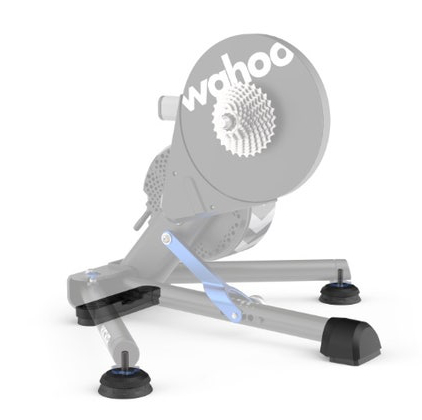
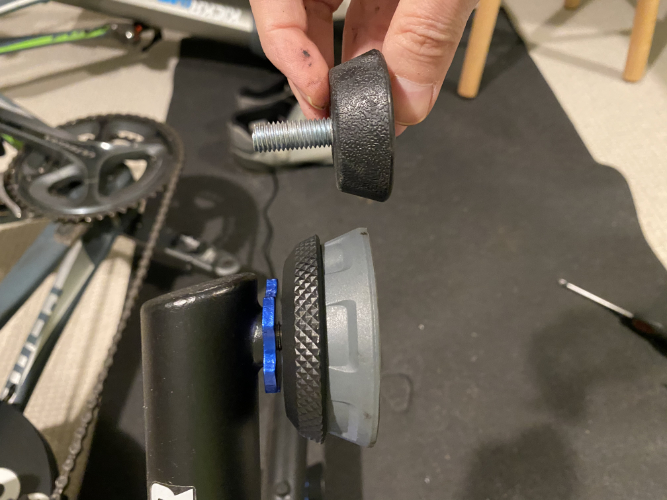
    The biggest difference with the AXIS Action Feet are on the sides, where larger, thicker feet (shown attached to the Kickr replace the much smaller original feet.

    The AXIS Action Feet are standard issue for the new Wahoo Kickr devices, and available as a retrofit for older models, at a not-insignificant price of about $80. Still, after one spends a couple grand on a bike and at least a thousand dollars for a Kickr setup, an additional eighty bucks might seem like a trivial amount to pay for an improvement in the experience. Still, eighty dollars is eighty dollars.

    The AXIS Action Feet (I’ll just call them “Feet” with a capital “F” from now on) is a replacement set of feet for the Wahoo Kickr.

    installing the Kickr AXIS Action Feet

    Installation of the Feet is very simple, and can even be done without removing the bike from the trainer, if you’re lazy. Just push one of the Kickr arms back to the center and lay the whole assembly on its side. You might get a bit of grease on your fingers but it’s not a dirty job.

    The front and back replacement feet require a Phillips screwdriver. The side Feet just screw in. The blue aluminum retainer is a stock piece and you can just swap them over to the new feet. Installation is a ten minute job, and there is very low risk of damaging anything or injuring yourself, as long as you’re careful.

    The difference between Action Feet and the stock feet

    axis foot for front
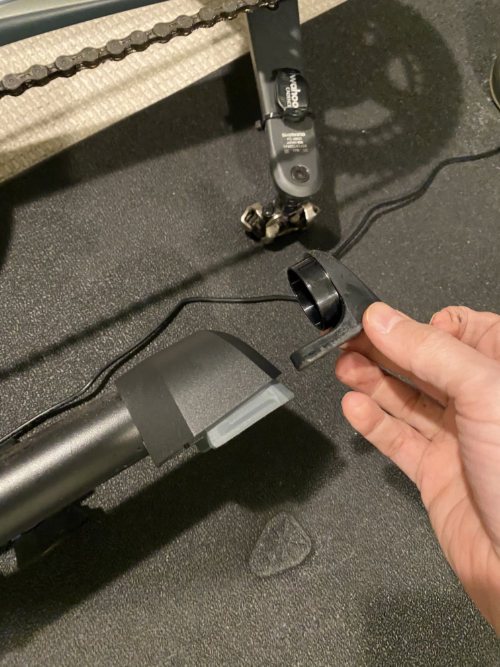
    The front replacement foot (seen attached to the Kickr) is much beefier than the stock foot, but functionally isn’t really any different.

    Two of the feet are along the centerline of the bike and are basically needed only because the other two feet, the ones that are attached to the arms, are taller requiring the centerline feet to be taller as well. So, the forward and aft centerline feet aren’t very remarkable, they’re just slightly beefier versions of the stock feet.

    The only Feet in a position to make any difference (literally and figuratively) are the two Feet attached to the stabilizing arms of the Kickr. These replacement Feet are, as you can see from the photo above, considerably beefier than the ones they replace. They are also bigger in surface area, so they will perhaps help a bit in keeping your Kickr from sinking into the carpet or your mat. As with the stock feet, you can height-adjust the two “side Feet” to level the bike.

    Do the Wahoo Kickr AXIS Action Feet make a difference?

    Answer: No.

    Oops. That’s far too short an answer considering I’m making a whole blog post out of this topic, so I’d better elaborate, and maybe provide some caveats.

    I’ll start with the caveats. One is that I didn’t perceive a noticeable difference, and that doesn’t mean you won’t. Second, my bike is on top of a thin mat which itself is on top of a reasonably thick carpet. I think that if the bike were directly on a cement slab, then maybe I’d have a better chance of detecting a difference. As it is, I really don’t think I can tell the difference.

    Axis foot for rear
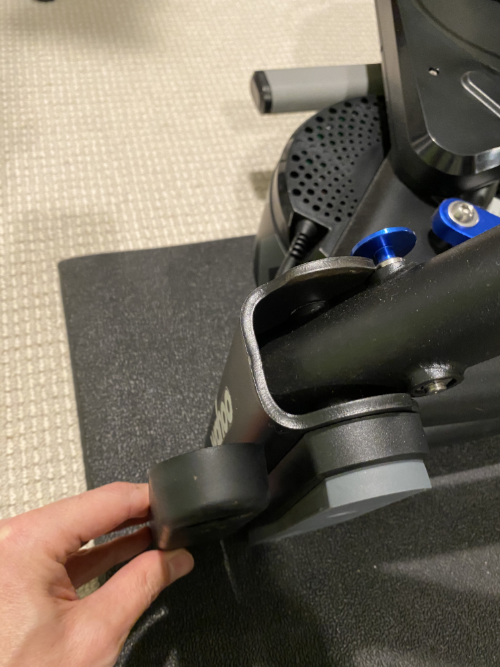
    The rear foot (seen installed on the Kickr) is, like the front foot, pretty much just a spacer lift the trainer a bit to accommodate the thicker side feet.

    The Action Feet ride experience

    As I said, in my experience, the experience of riding with the Feet isn’t noticeably different from the experience of riding with the stock feet, but I don’t know if altering the feet of the Kickr ever really had a chance of success. The front of the bike is not anchored at all, of course, so when I am really mashing the pedals for a stiff uphill (which is where I think one would see the most side-to-side stress), the sensation of having the front of the bike relatively free and the back of the bike much more rigidly fixed is very unnatural. It’s not as though Wahoo could have made this product much better and didn’t, this type of trainer architecture just seems to have this limitation that the back end of the bike is sort of anchored to the floor while the front is free to move, and I don’t see how one can really get around that.

    Unless you have the Saris trainer platform, maybe. That thing seems prohibitively expensive to me, but it’s very existence suggests that the engineers over at Saris recognize this problem with the trainer architecture and are betting company R&D money that the best way to fix it is to put the entire assembly on top of a movable platform.

    The Saris training platform retails for $1,200. If you save money by not buying the Kickr AXIS Action Feet, then that cost is a mere $1,120, which still feels a lot like twelve hundred dollars.

  • Zwift Century vs. Actual Outdoor Century Ride

    Zwift Century vs. Actual Outdoor Century Ride

    Which is harder, a 100-mile century ride on the road or a 100-mile century ride in Zwift? Is zwift harder than riding outside? Riding 100 miles isn’t particularly easy even under the best circumstances, and involve many hours of cycling, but there’s definitely a difference between Zwift and riding outside. Having done both, I thought a quick comparison might be of interest to someone who has done one and is contemplating the other. This isn’t a scientific comparison, and I don’t claim that I’m an authority on Century rides, but I think maybe I can provide some insights…

    Riding the centuries both in the real world and online

    The Road Century

    For me, at my level of fitness and in the moderately hilly area I live in, a road century is about a seven-hour affair, when rest stops are factored in. I wrote about my first and second centuries in this blog, and I found the experience to be fairly similar in both. I was better prepared for the first one, but the second was easier, and in the end they both felt like they took more or less the same effort. Anyway, please check out those blog entries if you haven’t done a road Century and want to hear a little more about that experience.

    The Zwift Century

    The Zwift platform (along with technologies such as the Wahoo Kickr and Climb) does a lot to bridge the gap between riding on, say, rollers and riding outdoors. It’s certainly not the same experience, though, and after having done a metric century on Zwift, I was curious to see what the full Century experience would be like.

    Well, when I said I was curious, I mean I was curious in the sense of “I wonder what that would be like?”, not in the sense that I really planned to find out. Still, as a completionist, that black Zwift jersey —exclusive to those who’ve done a 100 mile ride— did beckon to me. Then again, I knew that even if it was easier it was still going to be several hours on the trainer, and that part wasn’t terribly enticing.

    Finally, fate intervened, and the indoor Century plan was back on. The Main Line Animal Rescue bike event went “virtual” this year (2020), and they moved it up to June to boot. Although this is the event for which I do all of my fundraising, I have to admit that this year I nearly sat it out. I was getting tired of all of the usual outdoor events being canceled or converting to “virtual” events (“virtual” basically means “do whatever you want to do”), and with the local bike club canceling their group rides I was really having trouble finding any motivation.

    There was about a week to go before the event when I realized that if I did take a pass this time, I would certainly regret it when October rolled around and there wasn’t a big bike event fundraiser for me to get involved in. After all, the dogs and cats still needed care, and with so many people out of work and/or afraid to leave their homes, it hasn’t been a great year for fundraising in general. So although I usually spend a couple of months fundraising, this time I had a week and I had to figure out what to do as my virtual event.

    My first thought was to do a Century ride in Zwift, mostly because it seemed like a kooky idea that would appeal to donors and also felt like the sort of thing that wasn’t really as hard as it sounds. And I hadn’t really trained for this, so I was definitely looking for something that wasn’t as hard as it sounds!

    Back to Fuego Flats

    At the risk of suffering an even greater level of boredom than I experienced in my metric century, I decided that my 100-miler would be done on a route called “Tempus Fugit” in the Fuego Flats area of Watopia, Zwift’s main bicycling paradise. Fuego Flats is, like it sounds, just about completely flat, with grades ranging from -1% to 2%. There are no stop signs, no stop lights, no traffic (except other bicycles and runners that you cannot collide with) and no weather except the weather in my basement. This should be just about optimal for a long ride.

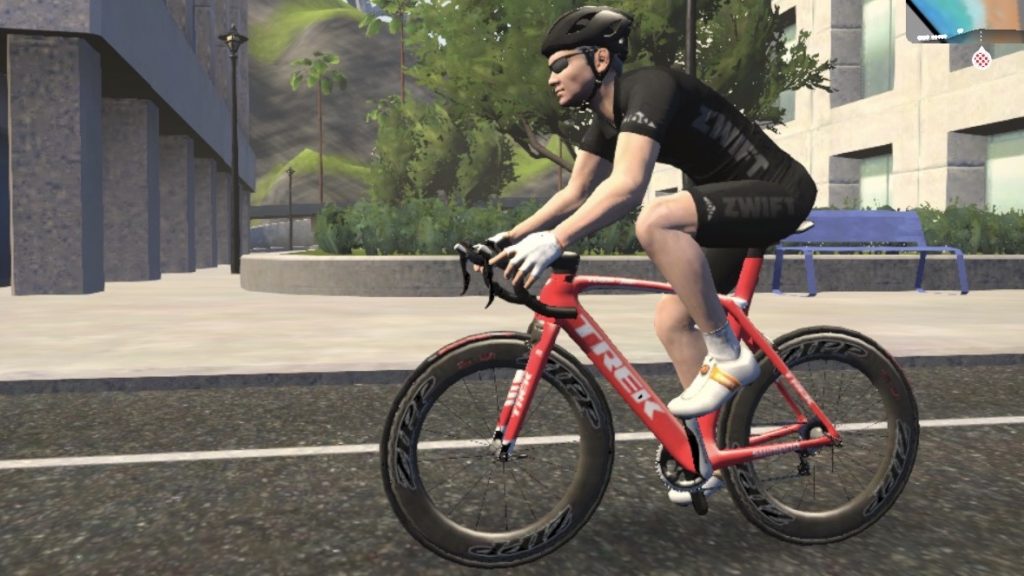
    Unlike the metric Century Zwift ride, I opted not for the TT bike but for my regular (Zwift) bike, the Trek Madone with the Zipp 808 wheels. My thinking was that on a Sunday morning (particularly with most of the world still in pandemic lockdown and riding indoors) there would be a lot of other cyclists on the route and it wouldn’t be so hard to find another person or two to draft off of. Also, since the TT bike does not benefit from the draft and you cannot crash into other bikes, when you’re riding the TT bike the others on the road are completely irrelevant, and that was just a little more boring than I was ready to deal with. I am not entirely sure whether riding a TT bike or a bike like the Madone in the draft is faster, but did try a little experiment in the week leading up to this ride and I believe the regular bike in the draft is faster.

    As it turns out, on the day of the event I got even more help than anticipated. My brother joined me on the ride and rode the first segment (the first forty miles) as my domestique, so I always had someone to draft off of. That was, predictably, my fastest segment, averaging somewhere between 23-24 mph. Nowhere in the real world have I ever gone that fast for that long. I’ve never had the opportunity to cycle in a Fuego Flats type of environment with people to draft off the whole way, so I have no way of knowing whether I’d be able to pull off speeds like that in the real world, but suffice to say this seemed like pretty much ideal circumstances.

    Speed and output graph
    Speed and output for the Tour of My Basement

    I took a ten minute break at the 40 mile mark, where I lost my domestique (strangely, he had other things to do that day than sit in his own basement and spin, but I thank him greatly for the help). I re-started much the same as I had left off, but to stave off boredom I started watching one of the ESPN 30 for 30’s (the Lance Armstrong one, naturally. Spoiler alert: this guy has no self-awareness). Since I couldn’t watch TV and try to find people to draft off I switched then to the TT bike for the remainder of the ride. Slower than the Madone had been, but probably faster in clean air. You can see from the chart that my speed drops off noticeably after the 40 mile mark, but I can’t really say how much of that is aero and how much of that is just good old fatigue.

    The Mile 70 Wall

    I have noticed that on each of the Century rides I’ve done there’s a psychological barrier at the 70 mile mark. Miles 70-80 are the worst, and although I am not entirely sure why that is I suppose it is because at that point I’ve been riding long enough to be feeling sore, but I’m not close enough to the end to start focusing on my post-ride meal(s).

    Just like the outdoor centuries, the mile 70 wall was still a thing. I didn’t really contemplate quitting as I have done before, but it is definitely the psychological low point of the ride. I had decided on breaks at 40, 70, and 90 miles (and I was happy later with those choices) to give myself a little break before the stretch at 70 miles, and I’m happy I did. I grabbed myself a bread roll and started rationing my Bloks. I had one GU left over for this ride, but it was one of the chocolate outrage ones, and those things are like candy and best saved for the end of a ride.

    The break at mile 90 was similar to the last rest stops on my outdoor Centuries, just long enough to reset. At that point in a ride, it’s pretty hard to get re-started, so you don’t want the break to be too long. Plus, at that point you’re only 10 miles from the end, and I was definitely ready to be done.

    As the graph shows, I was gradually slowing down. This ride is a little over 9 laps of Tempus Fugit, I think, and Zwift gives you a time for the lap (1/2 lap, actually) so I was quite aware during the ride that my last few laps were each about 2-3% slower than the one before. I was slowly running out of gas. Additionally, although the grade on the route only varies between -1% and 2%, at this point in the ride I didn’t even have to see the screen to know what the gradient was. When I hit the 2% section I thought to myself “oh, no, the hill again!”

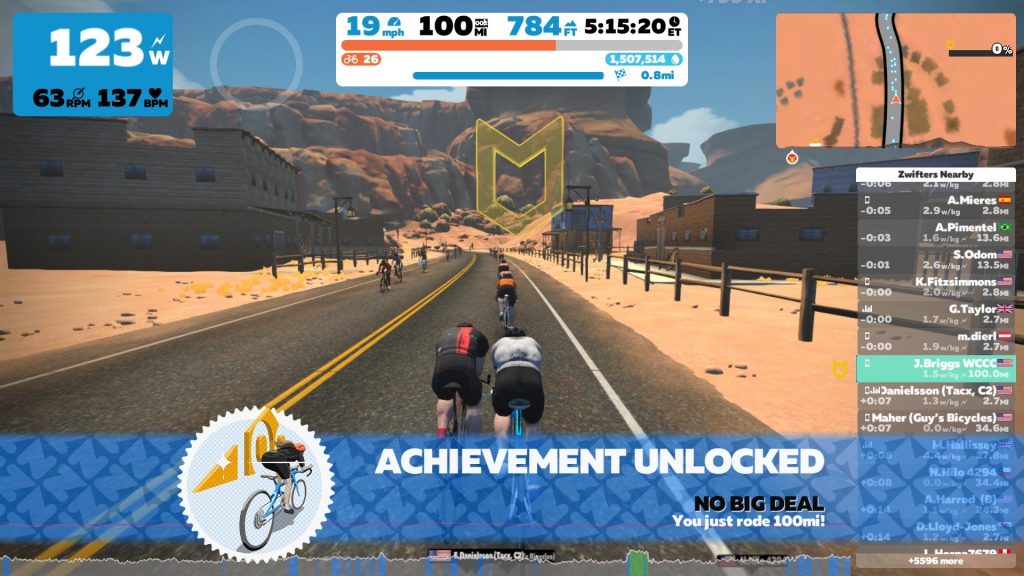
    But then, with fairly little fanfare (just the banner announcing that I’d gotten the badge for the hundred mile ride, which Zwift calls the “No Big Deal” badge), it was over.

    Badge unlock screen

    So, now the question you’ve been waiting to be answered…

    Is riding a Century in Zwift harder or easier than riding a Century outside on the road?

    Based on my limited experience, I’d have to say it was easier. Definitely easier, and for one major reason: because there are no stop signs, stop lights, blind corners, traffic, or any other reason why you’d need to stop, your average speed in Zwift will be way faster than anything you could achieve on normal roads. In fact, my time for the “Tour de Mon Sous-Sol” as I call it was more than an hour faster than my fastest outdoor Century. After five plus hours on the bike doing this, I was very happy to not have to ride for another hour or more. Plus, my ride was climate controlled and I had complete discretion over the rest stops, etc. (and my wife came down every now and then to take photos for our social media posts — this was a fundraiser, after all!)

    All of that said, if I were properly trained up I think I would pick the outdoor Century every time. The indoor ride was boring, and I don’t think it would have been significantly less boring if I hadn’t chosen to do 8 or 9 laps of Tempus Fugit. Outdoors there is scenery, navigational challenges to exercise your mind, comraderie, all the things that make cycling fun. Plus, this indoor century was almost completely in the saddle, and it is considerably less comfortable than the variability you get when riding outside. (I’ve spoken in earlier posts about the way the bike is clamped to the trainer and the unnatural feeling that results.) I’m very happy to be a Zwifter, but it’s still second best to riding outdoors.

    Final Thoughts after the Zwift Century

    In the end, I raised $1060 for Main Line Animal Rescue, which I was super-excited about. I even had donors who found the fundraiser through this blog! It’s a great feeling to be able to help out the dogs and cats of MLAR, so on that account alone it was definitely worth it.

    Plus, I now have the coveted black Zwift jersey. My avatar is never going to take it off.

    The coveted black Zwift jersey
    Rocking the Zwift Century kit
  • On badge addiction

    On badge addiction

    Badge Addiction – (noun): an irrational fixation on the pursuit of intangible awards or the mental illness and compulsive behavior resulting from the dependency.

    The phrase “gamification” was coined in the not-too-distant past, to describe the introduction of game-like elements (most notably, achievements and awards) into everyday activities. As a result of gamification, ordinary people like myself can bury themselves in digital medals and badges. While satisfying on at least a superficial level, there are a few gamification fails out there I’d like to rant about for a minute.

    Silver Medal: Peloton’s Seasonal Challenge badge

    My vote for the least satisfying in-game fitness badge is Peloton’s seasonal challenge badge. The seasonal challenge involves doing a Peloton workout (of any kind) every day for a given month. Why is that seasonal? Not sure. But that’s the topic for another day.

    The reason why I think the seasonal challenge is the least rewarding of all the badges is that for all but the last day of the month, you are greeted with the message “unearned” whenever you view the challenge. The badge remains unearned until you complete a workout on the last day of the month. Only then is it earned, and you can bask in the glory for the rest of that day, until the challenge is over and the badge ends up in your badge closet.

    Look at it this way: Unearned. Unearned. Unearned. Unearned. Unearned. Unearned. Unearned. Unearned. Unearned. Unearned. Unearned. Unearned. Unearned. Unearned. Unearned. Unearned. Unearned. Unearned. Unearned. Unearned. Unearned. Unearned. Unearned. Unearned. Unearned. Unearned. Unearned. Unearned. Unearned. Earned. The end.

    So, you stare at “unearned” for twenty-nine days and then you get one day to see the word “earned” — that is, if you log back onto Peloton after finishing your first workout of the day. If you just do the one workout, then you probably never see the “earned” message, and depending on the workout you may not see the badge in your workout summary for the one workout. Besides, the workout’s over, time to move on.

    I suppose you can go to your badge closet to reminisce about these old challenges, but even I don’t do that. For the sake of research for this post, I just glanced into my Peloton badge closet and counted 1,707 badges. Is that a lot? I really don’t know how it compares to other people, but it sounds like a big number. Looking at my Apple Watch achievements, it seems I only have accumulated 1,292 of those. I’m not an extraordinary athlete by any stretch of the imagination, but I have piles of badges. (In the early days of Peloton, you got a badge for three consecutive workouts, and then you got that badge again if you did a fourth, and then again if you did a fifth — plus the badge you get for doing five in a row. Do six in a row and you get two badges. As much as 1,707 sounds like a lot of badges, I was positively swimming in them before the algorithm changed a year or two back.)

    I have badges for Black History Month, Hispanic Heritage Month, Pride Month, Women’s History Month, and all sorts of other clicktivism badges. Trouble is, as much as I’d like to think I’m striking a blow for social justice when I ride my exercise bike, I’m having trouble seeing the connection.

    Gold Medal: Strava’s Global challenges

    What might be the least motivating motivator out there is Strava’s monthly global challenges. I got an email yesterday, for example, congratulating me on the “May Cycling Climbing Challenge”, awarded to anyone who climbs some distance (I think it’s 7500m). “Nice work!” it said, before informing me that my rank was #25,696 out of about 310,336 people. Now, I guess I should be proud that I seem to be in the top 10% or so, but I am having a hard time getting over the fact that more than twenty-five thousand people have accomplished more. That’s four times the population of the town I live in. Way to keep me humble, Strava!

    The strange thing about all of this gamification is, even though I don’t think I see any value in collecting all of these virtual badges, I really can’t deny that I’m motivated by them. The gamification of workouts has been a strong driver for me, and I seriously doubt that I would have been able to integrate regular workouts into my daily routine for the first time in my life if it hadn’t been for the badges.

    There are certain phenomena in behavioral economics, such as anchoring, that have been proven to exist even when they’re fully exposed. That is, you can be fully informed about a bias and yet still be subject to that bias. It seems that badges fit that category (at least for me). Even though I know the badge is completely made up, not worth anything, and completely ephemeral, I will get up early in the morning and sweat for hours to get it.

    Although I want to think that I am smarter than all of this, evidently I’m not. At least it’s good for my health.

  • Replacing Peloton Crank Arms

    Replacing Peloton Crank Arms

    Can I replace the crank arms on a Peloton bike?

    Yes, you can, but you can’t just substitute your own crank arms (as you can with the pedals, cleats, or shoes). The Peloton crank arm on the left side of the bike is fairly conventional, but the one on the right is welded to the plate that is bolted to the drive wheel. I imagine that only a Peloton part will serve.

    How do I replace a Peloton crank arm?

    Peloton used to have a video explains how to change out flywheel bearings, a process that includes pulling one of the crank arms, but that video became private (not sure, except that with the new bikes, it seems you can remove the drive belt cover without removing a crank arm.

    I located this user-provided video that demonstrates the process. Needless to say, this isn’t official Peloton instructions, but for all of you right-to-repair types, you know what you’re risking. You will need a 8mm Allen wrench and a crank arm puller. The process is the same as it would be for just about any bicycle, so if you’ve done one of those, this should be familiar.

    Will this fix the problem I’m having with my pedals?

    I wrote a previous blog post regarding broken Peloton pedals, in response to what seemed to be a rash of broken pedals back in 2018. Although not much seemed to have come from “pedalgate”, the post still gets comments from users who have problems with their pedals. It seems that if you have problems with your pedals detaching from the bike, it could be one of three issues:

    1. The pedal breaks at the post. This is the issue that inspired my earlier post, and if this happens to you it seems likely that you will have to replace the crank arm. If the pedal post actually shears off, the broken piece will remain in the crank arm, and you likely cannot remove it with a wrench. (If you can remove it with a wrench, then you can replace the pedals without removing the crank arms).
    2. The pedal falls out of the post. Though an uncommon occurrence, pedals can work their way free. If this happens, you should be able to put the pedal back on and tighten (15mm wrench, tighten to 25 ft-lb).
    3. The pedal was cross-threaded. If this happens, the pedal will fall out, and you will not be able to reattach it. It is necessary to replace the crank arm. You’ll know the difference between this issue and #2 above because you should be able to see and feel (watch for sharp edges!) the threads in the crank arm. If the hole in the crank arm is more or less smooth, the threads are gone and you will not be able to attach a pedal.

    EVERY 3 TO 5 RIDES: Tighten any loose pedal with the included 15 mm wrench. Pedals should be tightened to 25 lb-ft of torque. Turn clockwise to tighten the right pedal and counterclockwise to tighten the left pedal.

    — PELOTON owner’s manual