The Blog (or, “The Web Log” if you’re over 30)

Zwift Century vs. Actual Outdoor Century Ride

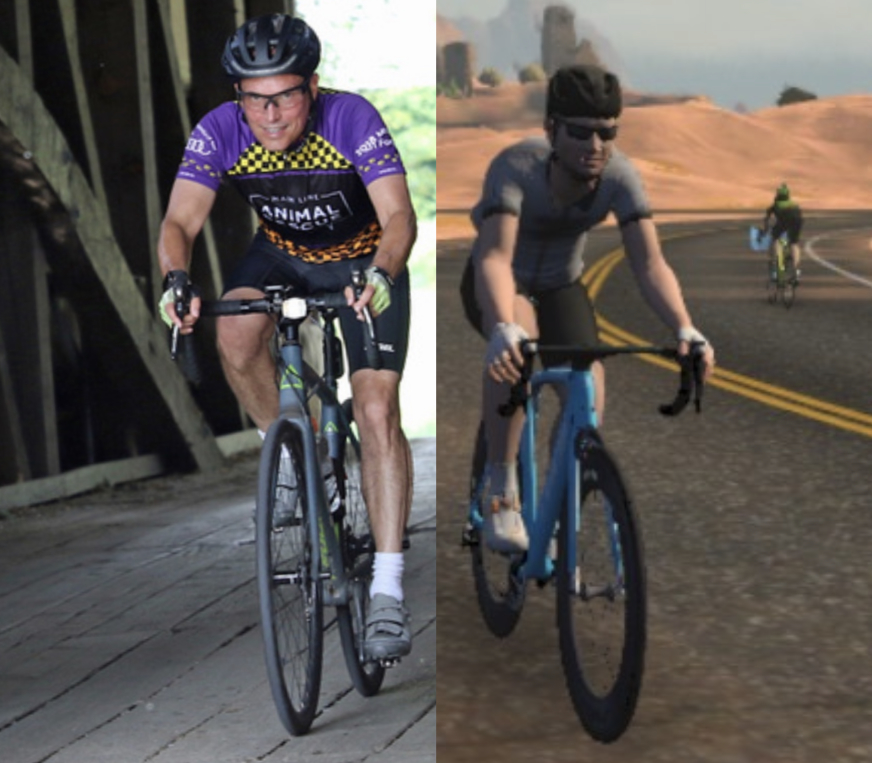
Which is harder, a 100-mile century ride on the road or a 100-mile century ride in Zwift? Is zwift harder than riding outside? Riding 100 miles isn’t particularly easy even under the best circumstances, and involve many hours of cycling, but there’s definitely a difference between Zwift and riding outside. Having done both, I thought a quick comparison might be of interest to someone who has done one and is contemplating the other. This isn’t a scientific comparison, and I don’t claim that I’m an authority on Century rides, but I think maybe I can provide some insights…
Riding the centuries both in the real world and online

The Road Century

For me, at my level of fitness and in the moderately hilly area I live in, a road century is about a seven-hour affair, when rest stops are factored in. I wrote about my first and second centuries in this blog, and I found the experience to be fairly similar in both. I was better prepared for the first one, but the second was easier, and in the end they both felt like they took more or less the same effort. Anyway, please check out those blog entries if you haven’t done a road Century and want to hear a little more about that experience.

The Zwift Century

The Zwift platform (along with technologies such as the Wahoo Kickr and Climb) does a lot to bridge the gap between riding on, say, rollers and riding outdoors. It’s certainly not the same experience, though, and after having done a metric century on Zwift, I was curious to see what the full Century experience would be like.

Well, when I said I was curious, I mean I was curious in the sense of “I wonder what that would be like?”, not in the sense that I really planned to find out. Still, as a completionist, that black Zwift jersey —exclusive to those who’ve done a 100 mile ride— did beckon to me. Then again, I knew that even if it was easier it was still going to be several hours on the trainer, and that part wasn’t terribly enticing.

Finally, fate intervened, and the indoor Century plan was back on. The Main Line Animal Rescue bike event went “virtual” this year (2020), and they moved it up to June to boot. Although this is the event for which I do all of my fundraising, I have to admit that this year I nearly sat it out. I was getting tired of all of the usual outdoor events being canceled or converting to “virtual” events (“virtual” basically means “do whatever you want to do”), and with the local bike club canceling their group rides I was really having trouble finding any motivation.

There was about a week to go before the event when I realized that if I did take a pass this time, I would certainly regret it when October rolled around and there wasn’t a big bike event fundraiser for me to get involved in. After all, the dogs and cats still needed care, and with so many people out of work and/or afraid to leave their homes, it hasn’t been a great year for fundraising in general. So although I usually spend a couple of months fundraising, this time I had a week and I had to figure out what to do as my virtual event.

My first thought was to do a Century ride in Zwift, mostly because it seemed like a kooky idea that would appeal to donors and also felt like the sort of thing that wasn’t really as hard as it sounds. And I hadn’t really trained for this, so I was definitely looking for something that wasn’t as hard as it sounds!

Back to Fuego Flats

At the risk of suffering an even greater level of boredom than I experienced in my metric century, I decided that my 100-miler would be done on a route called “Tempus Fugit” in the Fuego Flats area of Watopia, Zwift’s main bicycling paradise. Fuego Flats is, like it sounds, just about completely flat, with grades ranging from -1% to 2%. There are no stop signs, no stop lights, no traffic (except other bicycles and runners that you cannot collide with) and no weather except the weather in my basement. This should be just about optimal for a long ride.

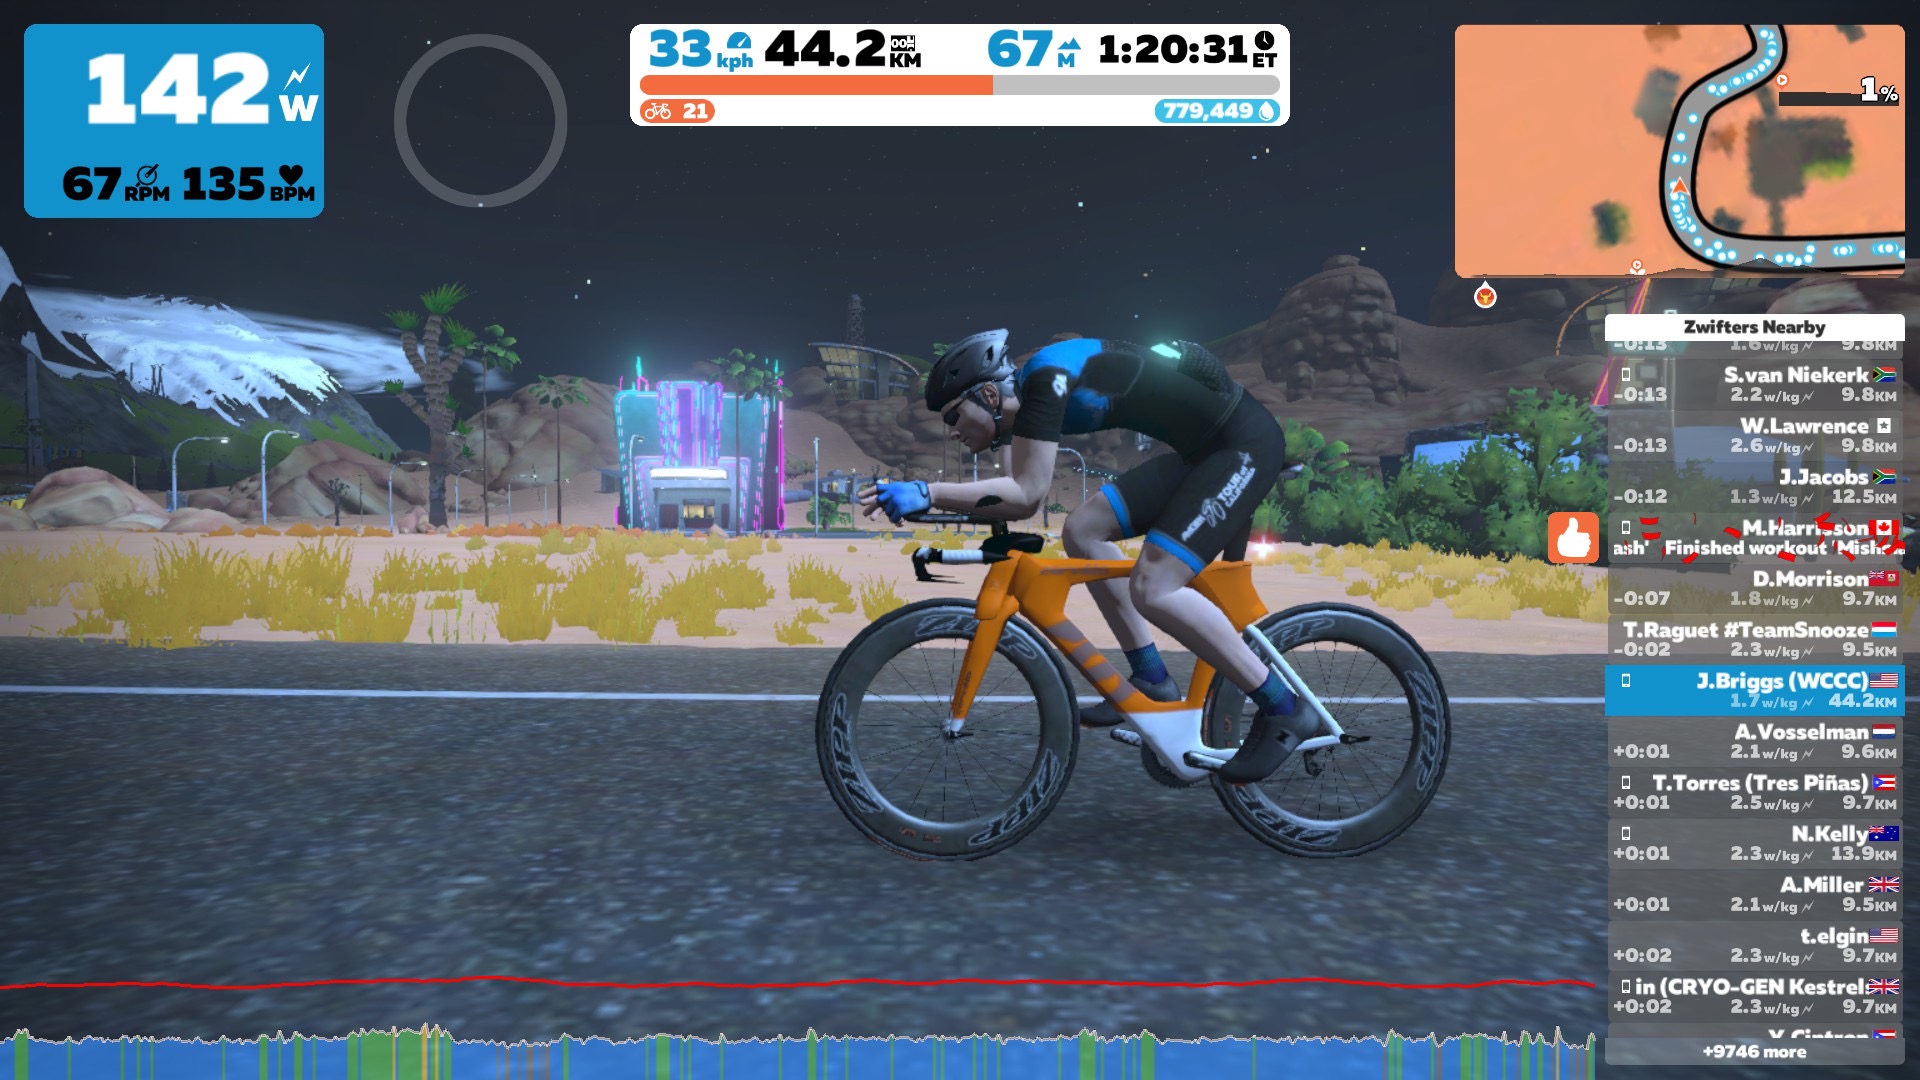
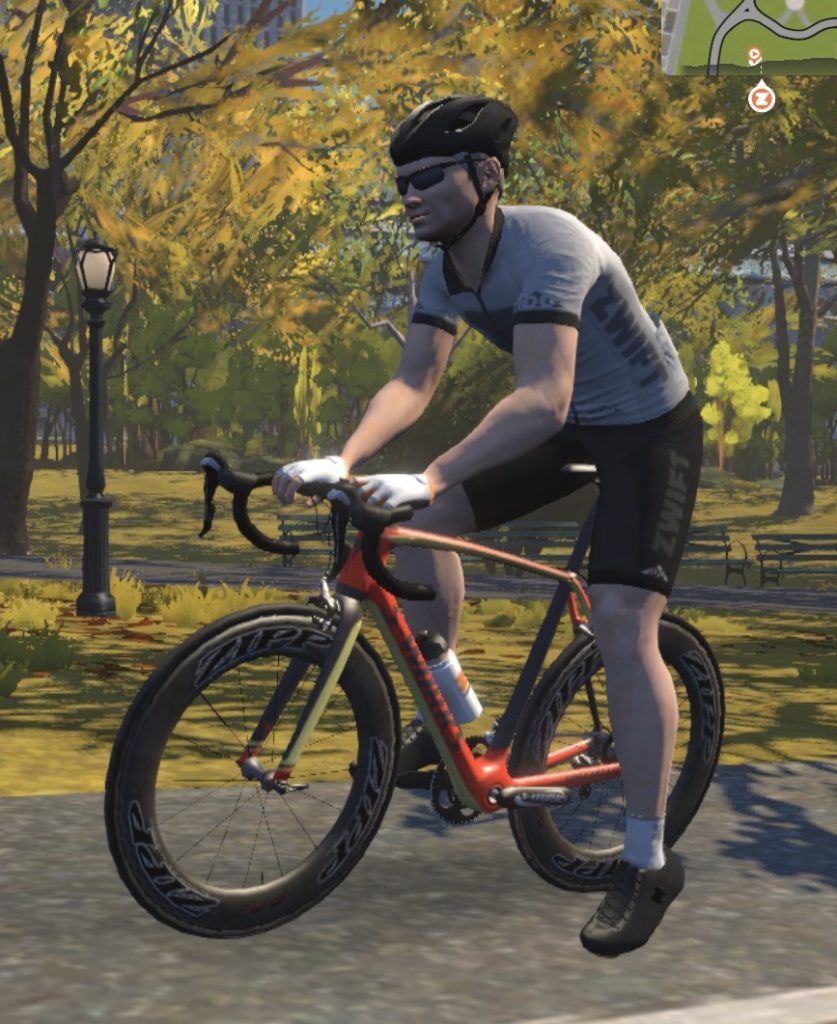
Unlike the metric Century Zwift ride, I opted not for the TT bike but for my regular (Zwift) bike, the Trek Madone with the Zipp 808 wheels. My thinking was that on a Sunday morning (particularly with most of the world still in pandemic lockdown and riding indoors) there would be a lot of other cyclists on the route and it wouldn’t be so hard to find another person or two to draft off of. Also, since the TT bike does not benefit from the draft and you cannot crash into other bikes, when you’re riding the TT bike the others on the road are completely irrelevant, and that was just a little more boring than I was ready to deal with. I am not entirely sure whether riding a TT bike or a bike like the Madone in the draft is faster, but did try a little experiment in the week leading up to this ride and I believe the regular bike in the draft is faster.

As it turns out, on the day of the event I got even more help than anticipated. My brother joined me on the ride and rode the first segment (the first forty miles) as my domestique, so I always had someone to draft off of. That was, predictably, my fastest segment, averaging somewhere between 23-24 mph. Nowhere in the real world have I ever gone that fast for that long. I’ve never had the opportunity to cycle in a Fuego Flats type of environment with people to draft off the whole way, so I have no way of knowing whether I’d be able to pull off speeds like that in the real world, but suffice to say this seemed like pretty much ideal circumstances.

Speed and output graph
Speed and output for the Tour of My Basement

I took a ten minute break at the 40 mile mark, where I lost my domestique (strangely, he had other things to do that day than sit in his own basement and spin, but I thank him greatly for the help). I re-started much the same as I had left off, but to stave off boredom I started watching one of the ESPN 30 for 30’s (the Lance Armstrong one, naturally. Spoiler alert: this guy has no self-awareness). Since I couldn’t watch TV and try to find people to draft off I switched then to the TT bike for the remainder of the ride. Slower than the Madone had been, but probably faster in clean air. You can see from the chart that my speed drops off noticeably after the 40 mile mark, but I can’t really say how much of that is aero and how much of that is just good old fatigue.

The Mile 70 Wall

I have noticed that on each of the Century rides I’ve done there’s a psychological barrier at the 70 mile mark. Miles 70-80 are the worst, and although I am not entirely sure why that is I suppose it is because at that point I’ve been riding long enough to be feeling sore, but I’m not close enough to the end to start focusing on my post-ride meal(s).

Just like the outdoor centuries, the mile 70 wall was still a thing. I didn’t really contemplate quitting as I have done before, but it is definitely the psychological low point of the ride. I had decided on breaks at 40, 70, and 90 miles (and I was happy later with those choices) to give myself a little break before the stretch at 70 miles, and I’m happy I did. I grabbed myself a bread roll and started rationing my Bloks. I had one GU left over for this ride, but it was one of the chocolate outrage ones, and those things are like candy and best saved for the end of a ride.

The break at mile 90 was similar to the last rest stops on my outdoor Centuries, just long enough to reset. At that point in a ride, it’s pretty hard to get re-started, so you don’t want the break to be too long. Plus, at that point you’re only 10 miles from the end, and I was definitely ready to be done.

As the graph shows, I was gradually slowing down. This ride is a little over 9 laps of Tempus Fugit, I think, and Zwift gives you a time for the lap (1/2 lap, actually) so I was quite aware during the ride that my last few laps were each about 2-3% slower than the one before. I was slowly running out of gas. Additionally, although the grade on the route only varies between -1% and 2%, at this point in the ride I didn’t even have to see the screen to know what the gradient was. When I hit the 2% section I thought to myself “oh, no, the hill again!”

But then, with fairly little fanfare (just the banner announcing that I’d gotten the badge for the hundred mile ride, which Zwift calls the “No Big Deal” badge), it was over.
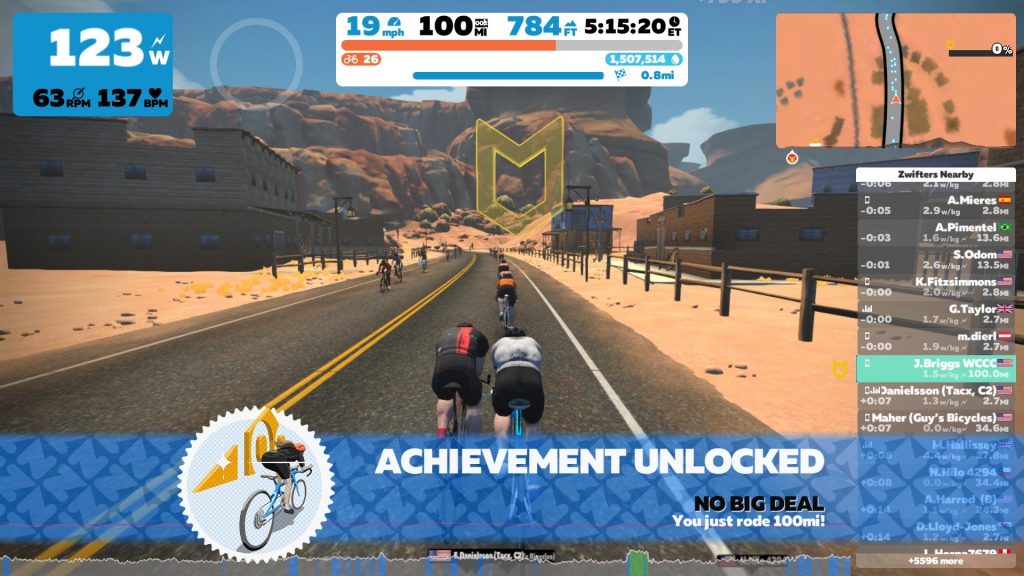
Badge unlock screen

So, now the question you’ve been waiting to be answered…

Is riding a Century in Zwift harder or easier than riding a Century outside on the road?

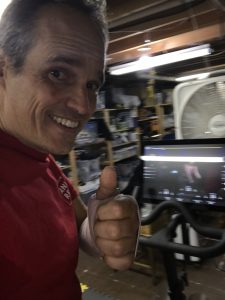
Based on my limited experience, I’d have to say it was easier. Definitely easier, and for one major reason: because there are no stop signs, stop lights, blind corners, traffic, or any other reason why you’d need to stop, your average speed in Zwift will be way faster than anything you could achieve on normal roads. In fact, my time for the “Tour de Mon Sous-Sol” as I call it was more than an hour faster than my fastest outdoor Century. After five plus hours on the bike doing this, I was very happy to not have to ride for another hour or more. Plus, my ride was climate controlled and I had complete discretion over the rest stops, etc. (and my wife came down every now and then to take photos for our social media posts — this was a fundraiser, after all!)

All of that said, if I were properly trained up I think I would pick the outdoor Century every time. The indoor ride was boring, and I don’t think it would have been significantly less boring if I hadn’t chosen to do 8 or 9 laps of Tempus Fugit. Outdoors there is scenery, navigational challenges to exercise your mind, comraderie, all the things that make cycling fun. Plus, this indoor century was almost completely in the saddle, and it is considerably less comfortable than the variability you get when riding outside. (I’ve spoken in earlier posts about the way the bike is clamped to the trainer and the unnatural feeling that results.) I’m very happy to be a Zwifter, but it’s still second best to riding outdoors.

Final Thoughts after the Zwift Century

In the end, I raised $1060 for Main Line Animal Rescue, which I was super-excited about. I even had donors who found the fundraiser through this blog! It’s a great feeling to be able to help out the dogs and cats of MLAR, so on that account alone it was definitely worth it.

Plus, I now have the coveted black Zwift jersey. My avatar is never going to take it off.
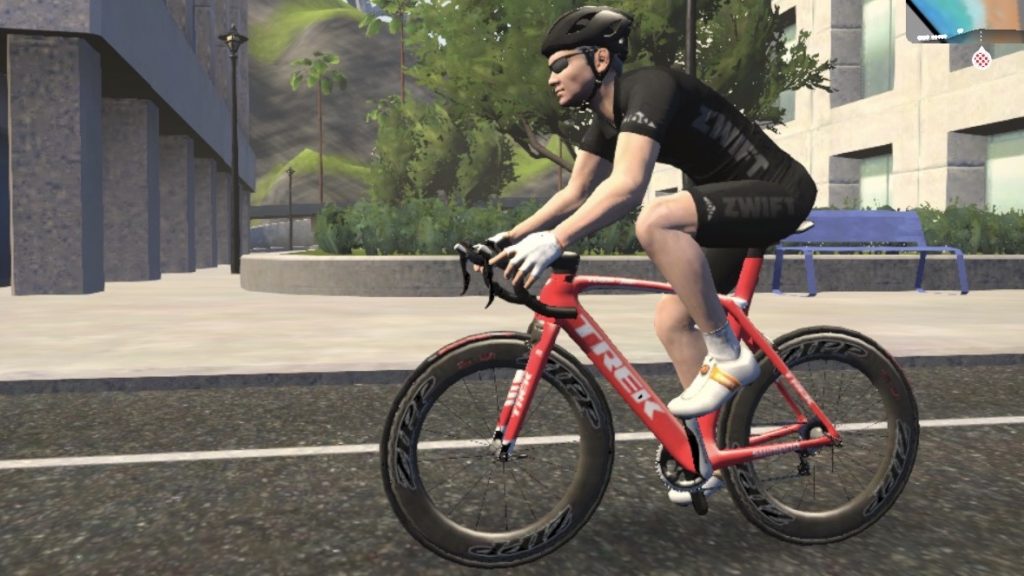
The coveted black Zwift jersey
Rocking the Zwift Century kit

On badge addiction

Badge Addiction – (noun): an irrational fixation on the pursuit of intangible awards or the mental illness and compulsive behavior resulting from the dependency.

The phrase “gamification” was coined in the not-too-distant past, to describe the introduction of game-like elements (most notably, achievements and awards) into everyday activities. As a result of gamification, ordinary people like myself can bury themselves in digital medals and badges. While satisfying on at least a superficial level, there are a few gamification fails out there I’d like to rant about for a minute.

Silver Medal: Peloton’s Seasonal Challenge badge

My vote for the least satisfying in-game fitness badge is Peloton’s seasonal challenge badge. The seasonal challenge involves doing a Peloton workout (of any kind) every day for a given month. Why is that seasonal? Not sure. But that’s the topic for another day.

The reason why I think the seasonal challenge is the least rewarding of all the badges is that for all but the last day of the month, you are greeted with the message “unearned” whenever you view the challenge. The badge remains unearned until you complete a workout on the last day of the month. Only then is it earned, and you can bask in the glory for the rest of that day, until the challenge is over and the badge ends up in your badge closet.

Look at it this way: Unearned. Unearned. Unearned. Unearned. Unearned. Unearned. Unearned. Unearned. Unearned. Unearned. Unearned. Unearned. Unearned. Unearned. Unearned. Unearned. Unearned. Unearned. Unearned. Unearned. Unearned. Unearned. Unearned. Unearned. Unearned. Unearned. Unearned. Unearned. Unearned. Earned. The end.

So, you stare at “unearned” for twenty-nine days and then you get one day to see the word “earned” — that is, if you log back onto Peloton after finishing your first workout of the day. If you just do the one workout, then you probably never see the “earned” message, and depending on the workout you may not see the badge in your workout summary for the one workout. Besides, the workout’s over, time to move on.

I suppose you can go to your badge closet to reminisce about these old challenges, but even I don’t do that. For the sake of research for this post, I just glanced into my Peloton badge closet and counted 1,707 badges. Is that a lot? I really don’t know how it compares to other people, but it sounds like a big number. Looking at my Apple Watch achievements, it seems I only have accumulated 1,292 of those. I’m not an extraordinary athlete by any stretch of the imagination, but I have piles of badges. (In the early days of Peloton, you got a badge for three consecutive workouts, and then you got that badge again if you did a fourth, and then again if you did a fifth — plus the badge you get for doing five in a row. Do six in a row and you get two badges. As much as 1,707 sounds like a lot of badges, I was positively swimming in them before the algorithm changed a year or two back.)

I have badges for Black History Month, Hispanic Heritage Month, Pride Month, Women’s History Month, and all sorts of other clicktivism badges. Trouble is, as much as I’d like to think I’m striking a blow for social justice when I ride my exercise bike, I’m having trouble seeing the connection.

Gold Medal: Strava’s Global challenges

What might be the least motivating motivator out there is Strava’s monthly global challenges. I got an email yesterday, for example, congratulating me on the “May Cycling Climbing Challenge”, awarded to anyone who climbs some distance (I think it’s 7500m). “Nice work!” it said, before informing me that my rank was #25,696 out of about 310,336 people. Now, I guess I should be proud that I seem to be in the top 10% or so, but I am having a hard time getting over the fact that more than twenty-five thousand people have accomplished more. That’s four times the population of the town I live in. Way to keep me humble, Strava!

The strange thing about all of this gamification is, even though I don’t think I see any value in collecting all of these virtual badges, I really can’t deny that I’m motivated by them. The gamification of workouts has been a strong driver for me, and I seriously doubt that I would have been able to integrate regular workouts into my daily routine for the first time in my life if it hadn’t been for the badges.

There are certain phenomena in behavioral economics, such as anchoring, that have been proven to exist even when they’re fully exposed. That is, you can be fully informed about a bias and yet still be subject to that bias. It seems that badges fit that category (at least for me). Even though I know the badge is completely made up, not worth anything, and completely ephemeral, I will get up early in the morning and sweat for hours to get it.

Although I want to think that I am smarter than all of this, evidently I’m not. At least it’s good for my health.

Replacing Peloton Crank Arms

Can I replace the crank arms on a Peloton bike?

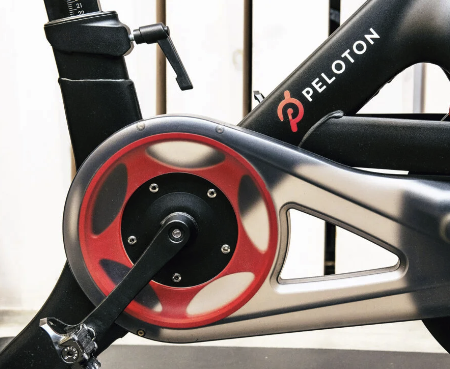
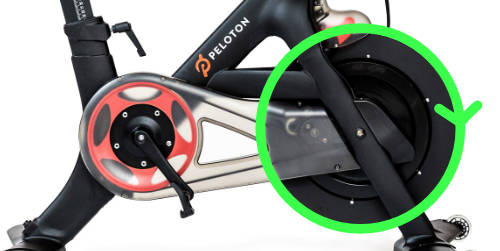
Yes, you can, but you can’t just substitute your own crank arms (as you can with the pedals, cleats, or shoes). The Peloton crank arm on the left side of the bike is fairly conventional, but the one on the right is welded to the plate that is bolted to the drive wheel. I imagine that only a Peloton part will serve.

How do I replace a Peloton crank arm?

Peloton used to have a video explains how to change out flywheel bearings, a process that includes pulling one of the crank arms, but that video became private (not sure, except that with the new bikes, it seems you can remove the drive belt cover without removing a crank arm.

I located this user-provided video that demonstrates the process. Needless to say, this isn’t official Peloton instructions, but for all of you right-to-repair types, you know what you’re risking. You will need a 8mm Allen wrench and a crank arm puller. The process is the same as it would be for just about any bicycle, so if you’ve done one of those, this should be familiar.

Will this fix the problem I’m having with my pedals?

I wrote a previous blog post regarding broken Peloton pedals, in response to what seemed to be a rash of broken pedals back in 2018. Although not much seemed to have come from “pedalgate”, the post still gets comments from users who have problems with their pedals. It seems that if you have problems with your pedals detaching from the bike, it could be one of three issues:

  1. The pedal breaks at the post. This is the issue that inspired my earlier post, and if this happens to you it seems likely that you will have to replace the crank arm. If the pedal post actually shears off, the broken piece will remain in the crank arm, and you likely cannot remove it with a wrench. (If you can remove it with a wrench, then you can replace the pedals without removing the crank arms).
  2. The pedal falls out of the post. Though an uncommon occurrence, pedals can work their way free. If this happens, you should be able to put the pedal back on and tighten (15mm wrench, tighten to 25 ft-lb).
  3. The pedal was cross-threaded. If this happens, the pedal will fall out, and you will not be able to reattach it. It is necessary to replace the crank arm. You’ll know the difference between this issue and #2 above because you should be able to see and feel (watch for sharp edges!) the threads in the crank arm. If the hole in the crank arm is more or less smooth, the threads are gone and you will not be able to attach a pedal.

EVERY 3 TO 5 RIDES: Tighten any loose pedal with the included 15 mm wrench. Pedals should be tightened to 25 lb-ft of torque. Turn clockwise to tighten the right pedal and counterclockwise to tighten the left pedal.

— PELOTON owner’s manual

Metric Century in Zwift

This morning I decided that the time had come to snag that cool gray jersey that Zwift awards you when you do a 100km ride. Here’s how I went about it.

Before I start, let me be clear that this post is not about preparing for a metric century in Zwift … you can prepare for it just the same way you’d prepare for an on-the-road MC. I’ll talk a bit about the difference between the “real” metric century and the Zwift version, but as far as preparation I think there are a lot of resources out there to get you prepared (including Zwift’s own Fondo training courses). This post is about the decisions I made about how to approach it in-game, and the experience of actually doing it.

I’m a 100 mile/week rider (if you count the Peloton in there) and have done a few centuries, both the metric and full 100-milers. I’d started a couple of Zwift rides in the past intending to go 100km, but for one reason or another I never actually went the distance. With the local weather somehow locked into a cold, rainy pattern for the past few weeks and not a whole lot to do at home during the lockdown, I decided that today would be the day.

The easy way or the fun way?

I had considered two strategies for tackling the MC in Zwift. One was to pick a longish course such as the Uber Pretzel and just ride it. That was how I had started my last 100k attempt, but after I saw how long it took me to do the first 30k or so I bailed out, figuring it’d take most of the day to do the rest. I am not entirely sure how long it would take me to do that ride… there’s a fair bit of climbing, but in the real world if you begin and end a ride in the same place the ascents and descents are literally equal so the extra effort going up is rewarded by rest coming down. I’m not sure that the same can be said for Zwift. I never really seem to coast through sections like Titan’s grove the way I can through similarly hilly areas near my home. I feel like Zwift cheats me on the downhills… not a big deal since I’m on the thing to train, but still I don’t think the ascents and descents cancel each other out on Zwift nearly as much as they do in real life.

The other approach to doing 100k, the one I chose, was to set things up for myself so that I could complete the 100k as quickly as possible. So the course I chose was Tempus Fugit, the flattest, fastest route in Watopia, and a favorite of people who just want to maximize their MPH (or KPH, as the case may be). 100k on Tempus Fugit has only about 500 feet of climb.

After selecting the course I had to decide on the bike, and I had a conundrum. Should I pick a TT bike for its aero, or should I pick a fast road bike and rely on the draft? You may be aware that in Zwift, you get no aero advantage from drafting behind other riders (they may draft you but you can’t draft them). So if you go TT you’re on your own. With other bikes, you can take advantage of a healthy aero boost when drafting behind a rider (and even more if the group is four or more riders), but that means that others dictate your pace to some extent. Today, being quarantine day #1zillion, there were so many riders on Fuego Flats it was, as they say, a conga line. Finding drafting partners would not be a problem.

After some thought and fruitless googling, I decided to go the TT route, just to simplify things. I selected the Cervélo P5 for the ride. Why that bike? It happened to be in my garage. It was probably the best bike I could afford the last time I did a TT ride and considering how few TT rides I do I wasn’t going to buy another just for this. So the P5 it is.

Getting ready

Although I generally don’t like to eat before a bike ride, most of my Zwift rides are an hour or less so it hardly matters. For what was fixing to be a 3+ hour ride, I was going to need some fuel, so I made myself a breakfast of oatmeal and an orange, and was ready to go. (NB: I am very far from being a sports nutritionist, but this worked for me).

Riding Fuego Flats on a TT bike is just about as dull as Zwift can get. Fuego Flats is, as the name would suggest, pool-table flat, with gradients between -1° and 2°. It’s so monotonous that I could actually feel the one degree changes in gradient, which normally are imperceptible. Add to that that the TT bike cannot draft behind others, and you pretty much can completely ignore the other riders. After all, you can’t crash into them, and you can’t draft off them, so it really doesn’t matter where they are. Riding alone or in a pack of a hundred riders, it’s exactly the same experience. Pick a gear, grind out the miles, and that’s about it. I chose a 33-34 kph pace so I could finish in three hours and settled in.

I took a break around the 50k mark. Just like in real life, I’m looking for a bio-break after about hour #1. I decided to hold out until I was past mid-way, because I wanted to have more behind me than ahead of me when I got back on the bike. I grabbed a bread roll (it was the only thing I could see in there that I could eat while on the bike) and got started again before I got too comfortable not pedaling.

Around the 80k mark, I opened up a pack of Gu. I’m not really into snacking on my ride, but it may just be that I don’t know what I’m doing. I did notice that my time on “Fuego Flats Reverse” seemed to drop about 2-3% each time through, so I was definitely running out of gas. Would the right snacks help? I really don’t know. I do like Gu, though, it’s like candy. My favorite flavor is Chocolate Outrage, but if you’re actually in the middle of a big ride it’s a little hard to get down, so I generally go for the salted caramel. (In case you’re wondering, I am not compensated by Gu for this mention, though at about $1 per gel, I certainly wouldn’t mind them throwing some free product my way)

The 100k mark came and went without a whole lot of fanfare. There was the usual blue banner saying that I’d gotten the badge, followed by the orange banner saying that I unlocked the Metric Century jersey (the whole reason I was doing this, to tell the truth). I was getting close to finishing the timed Fuego Flats Reverse, so I went ahead and finished that. Then I was close to getting 105 km, so I did that, too. (If it weren’t for completionism, I’d probably have half as many Zwift miles as I do!)

Final thoughts

So, after all that, how does a Zwift metric century compare to the real thing? I suppose in terms of effort, it was about the same. I live in a fairly hilly area, so the metric centuries I have done have usually had 3-4000 feet of climb to them, which both requires extra effort at times but also provides some relief. I’ve never just sat and cranked out three hours at a constant pace, and it’s hard to compare.

I think I found it a little less comfortable doing a distance ride on the trainer because the trainer has the bike more or less locked in place. On the road, the bike can sway just a little from side to side as you pedal. That’s particularly noticeable on hills but you still feel it on the flats as well. The trainer doesn’t give you the same jinba ittai that you get on the road, which is a shame. I am not sure I ever plan to do a full 100 mile century ride indoors for just that reason. Then again, if it doesn’t warm up soon around here I will probably be looking for new things to try.

One other thought: if you’re doing an organized event, then the rest stops are set at intervals of the organizer’s choosing, but of course on Zwift you’re making that decision for yourself (assuming you’re not in a group ride), and that may change things a little bit.

In summary, I think I can safely say that if you have completed a metric century in either Zwift or the real world, you probably wouldn’t have trouble doing one in the other. Jumping on your TT bike and heading for Fuego Flats is probably the fastest way to get in your 100k, but exciting it is not.

Peloton or Zwift?

For your indoor-riding money, which is better: Peloton or Zwift? I have both, and although Peloton riders and Zwift riders each have more or less the same goal of getting a good cycling workout, they almost could not be more different. After about 1,000 Peloton rides (just about every day for a couple of years), I switched entirely over to Zwift a few months ago, but am now splitting my time between the two. I’ll explain why…

Riding the Peloton bike
The author, riding the Peloton bike with a broken arm and multiple broken ribs. The Peloton bike is heavy and stable, more so than my Zwift setup, and it’s pretty hard to crash when you’re riding indoors!

The Peloton Experience

For this comparison, I am going to by relying on my own history with both the Peloton bike and the Zwift experience, and talk about the pros and cons of each. You’ll see that sometimes the comparisons are apples-to-oranges (after all, one is hardware with streaming content and the other is an app to which you bring your own interface) but I think it is possible to make some valid comparison since at the end of the day it’s all variations on indoor cycling / spinning.

My Introduction to the Peloton Bike

I bought my Peloton bike a couple of years ago after hearing my brother go on and on about how the Peloton had improved his fitness. It was hard to miss that he’d lost 70 pounds in the year he’d owned it, and that summer when members of our extended family climbed Mt. Mansfield he certainly did seem to be up to the task (we rewarded him by making him carry the backpack). Even so, my friends who know me as a cheerleader for the bike that goes nowhere might be surprised to learn that I left my first visit to the showroom unimpressed.

In August of 2017, my wife and I went to our local Peloton showroom (yeah, we live in a place like that) where we got to sample the bike. The salesperson showed me that you watch the class on the screen and turn the resistance knob when the instructor tells you.

“If the bike knows the resistance should go up, why do I have to turn the knob?” I asked. This was a dumb bike. Nicely made, and super smooth action (thanks to a drive belt instead of a chain), but just plain dumb.

Eager to please, she showed me a feature called “just ride” that featured beautiful movies of rides on trails and roads that I could just follow, bringing my own soundtrack if I wanted to. “So, if the road goes uphill in the movie, does the ride get harder?” I asked. “No,” she replied. The fact is, the experience on the bike has nothing to do with what you see on the screen. Again, dumb.

My wife and I left without buying a bike. I am not sure exactly how she felt about it at the time, but I was disappointed. I wanted a bike I could ride in the winter, and this didn’t seem to be it. I had never taken a spin class and wasn’t all that enthusiastic to, either. And, for all the hype, the Peloton experience is just a spin class beamed to you over the Internet. I mean, let’s keep some perspective.

The Peloton is not a biking simulator

Over the next few days, I actually found myself starting to reconsider my first impression. I had been disappointed in the Peloton bike because wasn’t the indoor bike simulator I wanted, but then again, it wasn’t trying to be. I realized on reflection that a big factor in my disappointment was my expectations and not anything to do with the bike itself. The following weekend, my wife and I went back to take a sample class on the bike.

This time, I started to think of the Peloton as a training tool, a piece of equipment that could make me a better cyclist not though a true simulation, but by focusing on very specific elements of the experience, namely building up my cardiovascular endurance and my leg muscles. The Peloton bike is a direct-drive setup (like a fixie) and there is no coasting on the Peloton — something that took some getting used to… I felt like George Jetson on the treadmill sometimes! With no coasting, there really isn’t any “downhill” on the Peloton, either. You can lighten up the resistance to next to nothing, but you are still spinning even when your are in so-called “active recovery,” which is the closest thing to rest that you’re ever going to get as long as class is in session.

This is what happens when you coast on your Peloton bike.

Given how happy I am with my Peloton bike today it’s funny to think that purchasing it was such a close call. Even after the second visit, I was still on the fence. After all, start-up cost for the bike was north of $2,500, and I’d pretty much agonize over that sort of spend if I didn’t end up using it. My wife seemed interested, though, and in the end each of us rationalized the purchase by telling ourselves that we were doing it for the other.

Does the Peloton really work?

Yes. Yes it does. You have to actually ride it, though. Get yourself on a schedule where you’re doing, say, three or four 45 minute rides a week and I can’t imagine how you won’t see a difference. And cycling is one of the lowest-impact exercises there is, so if you’ve got the motivation you can do it every day.

On the topic of the Peloton’s effectiveness, I’d say that for building cardiovascular fitness it’s probably even better than actual cycling out on the road. On the Peloton, there really is no downhill-as I mentioned before there is no coasting. You also don’t ever need to stop for traffic lights or stop signs or anything like that. It is one continuous workout. In fact, the only way I’d say the Peloton bike was easier than the road bike is that on the Peloton you choose your own resistance and can increase or decrease it at any time, whereas on the road bike the hills are what they are, and although you get to select your gearing you still have to get up the hills on your route.

So, if you love your Peloton, why did you pony up for a Zwift setup?

After about two years riding (generally daily) on the Peloton, I was starting to wonder if there might be more in life. We had a couple of great years, and at the end of it I was in excellent shape, maybe twenty pounds lighter, and able to keep up with riders half my age (and drop them on the hills — priceless!). The Peloton is a low-impact exercise and it’s something you can do every day, and I really couldn’t ask for more. Still, I had started seeing the Zwift demo bikes set up in the bike shop and was being bombarded constantly on YouTube by Zwift ads, and I started to think, “it really would be fun to actually do a bike riding / racing simulator.”

I didn’t take the plunge right away. After all, although I owned a road bike I didn’t have the other equipment needed to get started. For the uninitiated, it’s important to know that Zwift is an internet service / app(s), and not a hardware/software/service combination the way Peloton is. The hardware component of Zwift is BYO, and the cost can be significant, particularly if you don’t have a bike. (On the other hand, if you do have a bike some Zwift setups can be relatively inexpensive.)

Since I didn’t already have an indoor trainer, I used Zwift’s website for guidance and settled on a Wahoo Kickr / Wahoo Climb combo. I already had an Apple TV and (as I mentioned) a bike, so I wouldn’t have to purchase anything else, but the Wahoo gear ran north of  $1500 all by itself. Zwift is a subscription service with a monthly fee, too, so if depending on what equipment you have already the Zwift experience cost can rival that of the Peloton (though over time the much higher Peloton subscription cost will make a big difference). Setting up Zwift wasn’t too difficult, but unfortunately that is only half the battle in this case, because the trainer itself needs to be set up. Getting my bike connected to the Wahoo (I bought the wheel-off model) and dialed in took a fair amount of time, so advantage Peloton in the “getting started” matchup. 

Closer, but still not a perfect simulator

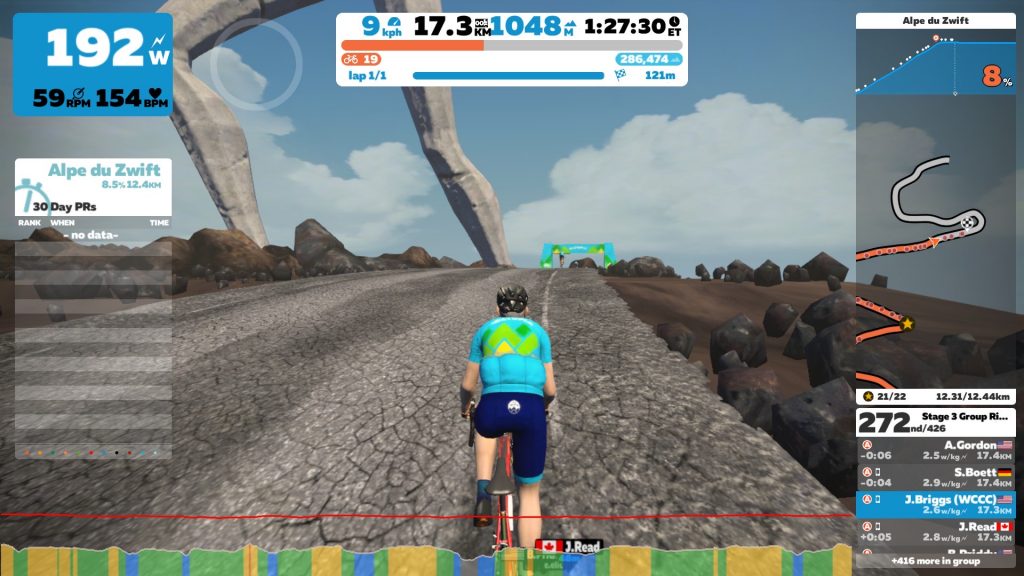
Zwift in-game screen
Heading to the top of Mt. Zwift on a climb known as the “Epic KOM”. A mountain goat greets you at the finish line.

Although I enjoy the Zwift very much, it is sadly not a perfect bicycling simulator, either. Now, I’m aware that most of the shortcomings I’m about to detail have to do with the (Wahoo) hardware and not the Zwift program, exactly. But you can’t Zwift without hardware, and I’m using what seems to be their preferred setup, so at the end of the day I don’t think it’s really off the mark to call these things issues with Zwift.

The first shortcoming that becomes obvious is that there is no braking in Zwift. I think there’s a keyboard key for slowing down, but practically speaking there’s no braking. That’s not nearly as big a problem in the virtual world as it would be in the real one, because Zwift has no collision detection so there is no chance of colliding with your fellow riders or obstacles, and there is no chance of you not being able to make a corner due to excessive speed. Still, drafting is a thing in Zwift (and some opine that it’s an even greater force there than IRL) and it can be tricky to tuck in behind another rider when you can’t actually tap the brakes. Complicating things is the subtle latency between the trainer and the app, and positioning yourself for drafting becomes an art form.

Along the same lines there is no steering in Zwift. You can make route-level decisions such as turning left to go to the volcano or turning right to climb a mountain, but that’s as far as that goes. As I mentioned, there are no collisions in Zwift, so you don’t have to worry about steering all that much (in fact, sitting in the middle of a pack of fifty riders is no big deal in Zwift!) but as Zwift is trying to expand into dirt and gravel simulations, the lack of steering is a barrier to having any sort of technical riding. For road riding, I don’t find it a big deal.

Another shortcoming, and the one I still notice on a daily basis, is that the feel of the bike isn’t the same, particularly when pedaling hard. Because my bike is locked into the trainer, it has none of the natural rocking from side to side that is part of pedaling. This isn’t so noticeable at pace speed, but when sprinting or climbing it feels very restrictive. 

Speaking of climbing, that, too, is somewhat unnatural. While I appreciate the Climb’s ability to raise the front fork of my bike to change the geometry for climbing, if I get out of the saddle to make it up a particularly steep grade the whole assembly gets to be a bit unbalanced, and sometimes the rear end lifts a little. It’s not terrible, but it’s not “normal”, either, and inhibits all-out efforts at climbing.

As I said before, these things could easily be called shortcomings of the trainer rather than of Zwift, but since they’re part of the Zwift experience I think it’s fair to include them. Wahoo has recently released their own Wahoo bike (which, at over $3000, is more expensive than my road bike!) and Saris (among other companies) have introduced wooden “bike surfboards” to allow for more natural motion, so it’s clear that the issues are known and people are hard at work trying to find solutions. Indeed, it seems to be a badly kept secret that Zwift is working on it’s own trainers, if for no other reason than to standardize a feature set. As of this writing, though, there is still work to do.

So, with those gripes out the way I have to say that I do love riding on Zwift. It doesn’t take the place of riding outdoors, but it’s a fun diversion. Zwift races are fun, and Zwift group rides (which everyone just understands are races, too) are great. I even did a “meetup” with about a half-dozen of friends from the cycling club and we ran one of the courses together (using discord to chat). It’s a great way to spend a couple of hours, and I am very much looking forward to seeing the platform grow over time. 

Even though I’m really enjoying Zwifting, that doesn’t mean I’ve turned my back on the Peloton. In fact, in recent weeks I’ve been spending even more time on the Peloton than on the Zwift. I’ll explain below…

Why Zwift is better than Peloton

Zwift is more fun. I think I can say that without reservation. On Zwift you climb mountains (including a faithful reproduction of the Alpe D’Huez, which is close to an hour and half of unremitting uphill), ride underwater (through a see-thru tunnel, though I suppose in the game even that isn’t needed), past dinosaurs and volcanos. There is visual interest in the landscape, and it doesn’t get boring any more than your local outdoor rides do.

The summit of the Alpe du Zwift. There is nothing on the Peloton as satisfying as reaching the top of a Zwift mountain.

I also think that I work a bit harder in Zwift. On the Peloton, I may be asked to pedal for thirty more seconds at a high resistance, but on the Zwift I know I’m pedaling hard because I’m near the top of a hill — I can even see the mountain goats hanging out at the summit. On the Peloton, I may be chasing the person above me on the leaderboard, but it’s really just by following a number (the number of kilojoules they’ve output as compared with me) which is dry to say the least. In fact, Peloton very deliberately de-emphasizes competition while in Zwift even the group rides are races. And when you’re chasing someone in Zwift you literally see them up the road, and you can viscerally feel the gap closing or widening. Dropping a friend in Zwift is every bit as satisfying as dropping them in the real world.

So, if Zwift is more fun and I get a better workout, why ever go back to the Peloton? Well, Peloton does have its own strengths.

Why Peloton is better than Zwift

I find the consistency of the Peloton workouts to be an advantage. Although there are different types of rides (tabata, hills, intervals, etc), one forty-five minute class seems to me to be much like another, so I can compare outputs and distances across rides much more evenly. By contrast, on the Zwift, I might be trying to compare a thirty-minute climb of Mt. Zwift this week to an hour on the desert flats last week and really have no idea how they match up. On the Peloton bike, I find that the consistency of the challenge makes it easier for me to gauge my efforts and to track my progress.

I also find the Peloton experience a bit more civilized than the Zwift experience. Of course, my choice of bike and Wahoo trainer is not Zwift’s doing, but since I’m using the preferred setup I think a comparison can be made. The Peloton bike is heavy and sturdy, easily adjustable for things like seat height and handlebar height, and nearly silent in operation due to its belt-driven mechanism. By contrast, my Zwift setup seems exceedingly cramped and noisy. It’s my own bike that I selected and set up, so you’d think that’d be perfect for me, but because it is clamped into the Wahoo trainer it feels unnaturally rigid. The chain and derailleurs are considerably more noisy than the Peloton’s belt, and that noise is amplified by the indoor setting — I never thought of the bike as noisy when it was outdoors.

Another big advantage that the Peloton has over the Zwift is that there is less involved at the start of each workout. Even if I have to adjust the bike after my wife’s used it (sharing a bike is not really even an option in the Zwift world unless both riders are exactly the same size) I can jump on the bike and be ready to start a workout within a minute or so. With Zwift I need to turn on the TV, turn on the Apple TV, choose the Zwift app, launch the Zwift companion on my phone (because of the limited Bluetooth connections on the Apple TV), start my Kickr and Climb, pair the bike to the companion app, and choose a ride using the horrible Apple TV remote (which is a lot like dialing your phone from five feet away using a pool cue). It takes several minutes. And, because every Zwift “event” is a race, I’d better be good and warmed up well before the official start! What it all comes down to is that when I have limited time it is far easier for me to grab my chest strap and my shoes and jump on the Peloton. Sometimes, there is something to be said for freedom from choice.

So, Peloton or Zwift?

Not many people are going to want to invest in both Peloton and Zwift. After all, you are getting the same sort of exercise with each, and you obviously can’t ride both at the same time. I’m going to answer this question with an “it depends”, which feels like a bit of a cop-out, but I’ll try to explain myself.

The Pelotoner wants to work out. It’s a pure workout machine. It may not be as much fun as the Zwift, but there is an enthusiastic instructor and (hopefully) good music, and as long as you challenge yourself you can get the best bang for your buck for the time you have to spend riding.

The Zwifter is the cyclist, who is driven indoors either by weather or expediency. The workouts are quite varied, and some can be much more challenging than a typical Peloton class (and Zwift does have a “workout” mode with intervals pegged to different power zones), but it’s a little more difficult to do a Zwift workout if you have a hard stop at the other end (most Zwift rides are distance-bound, rather than time-bound).

So, if I had to choose, which one would be my pick? Because I ride outdoors during the season (and whenever I can), I think I’d pick the Peloton. It helps me maintain my fitness, and because the classes are all time-bound I can more easily fit the workout into my schedule. If, for some reason, I somehow found myself unable ride in the real world (which is what got me into all this in the first place), I’d pick the Zwift as the platform that can hold my interest better.

Final Thoughts

After I finished this blog post, I realized that there was one angle I really hadn’t discussed, and that is, which of these two platforms can best simulate the other? The answer, I think, is clearly Zwift. There is a training mode in Zwift which lays outs an exercise plan based on power zones, just like the Peloton Power Zone rides. There is an FTP test and then the zones are used for the training courses. In fact, the Zwift training courses have a cool feature where, if you are doing a multiple-workout course, after finishing one the next might not be available for a day or two, forcing you to rest (or at least encouraging it). There is also a limit to how long you can wait to do the next workout, so not only do you have to rest but you can’t rest too long and still complete the course as it’s prescribed.

By contrast, the Peloton doesn’t have anything that really simulates an actual bike ride, and because it’s up to you to set the resistance, it never will. It’s just not baked into the DNA. I am still a big Peloton fan, but the fact is it rather unapologetically does just one thing. If that one thing is the one thing you want, then there’s your answer to whether Peloton or Zwift is the right pick.

How Your Peloton Bike Calculates Speed

Among the metrics displayed on your Peloton screen is “speed”, presented in MPH with no explanation. I have been a daily Peloton rider for years, and I have always wondered how that speed is calculated. Recently, I though it would be nice to know how many watts I’d have to produce during a workout to cover a certain distance, and in order to do that I knew I would have to crack the speed code. Following is a rather lengthy examination of Peloton bike speed and a formula for calculating speed from output.

Speed is not simply how fast the wheel spins

My first thought when considering the Peloton concept of speed is that the speed of the bike should be calculable using the circumference of the flywheel multiplied by the RPMs, divided by time. It was pretty much immediately obvious that this was not correct. If it were, then resistance would have no bearing at all on speed; speed would be purely a function of cadence (a minute on the bike will be enough for you to see that it is not).

Flywheel RPMs are not directly used for calculating Peloton speed.
Speed is NOT simply the circumference of the wheel x RPMs / time.

Conceptually, it’s important to understand that your Peloton bike is not simulating a fixed gear (“fixie“) bike, with resistance a substitute for hills. Looking at it, you’d be forgiven for likening the flywheel to the drive wheel on a bicycle, but that’s not the case. You can think of the flywheel as the chainring instead (even though the bike already has a chainring, er, “beltring”). The flywheel and the chainring are locked and move at the same relative speeds, so although when you look at the bike it seems logical that the flywheel is the drive wheel, if you can get your head around the idea that it’s the chainring, the rest makes sense. The flywheel is the chainring, and the resistor magnet is the rear derailleur. If that doesn’t make sense, don’t worry about it. You don’t really need to be able to conceptualize this if you will trust me that the flywheel speed is not the bike speed. So, let’s get on with it.

Speed and output are very highly correlated

Although Peloton has not shared with me the secret speed formula, my data suggests strongly that speed is a function of output alone. Basically, the harder you’re working, the faster you’re going. You can spin fast with a light resistance, or crank down on the resistance and pedal slower, but if you’re generating the same output, you’re going to be traveling at more or less the same speed.

Body weight’s role in calculating Peloton speed

It would seem that body weight, gender, resistance and cadence are not direct factors in the speed calculation. I mean, some are part of the calculation, because they factor into the output calculation, but it would seem that output is the only variable in the speed calculation.

The Data

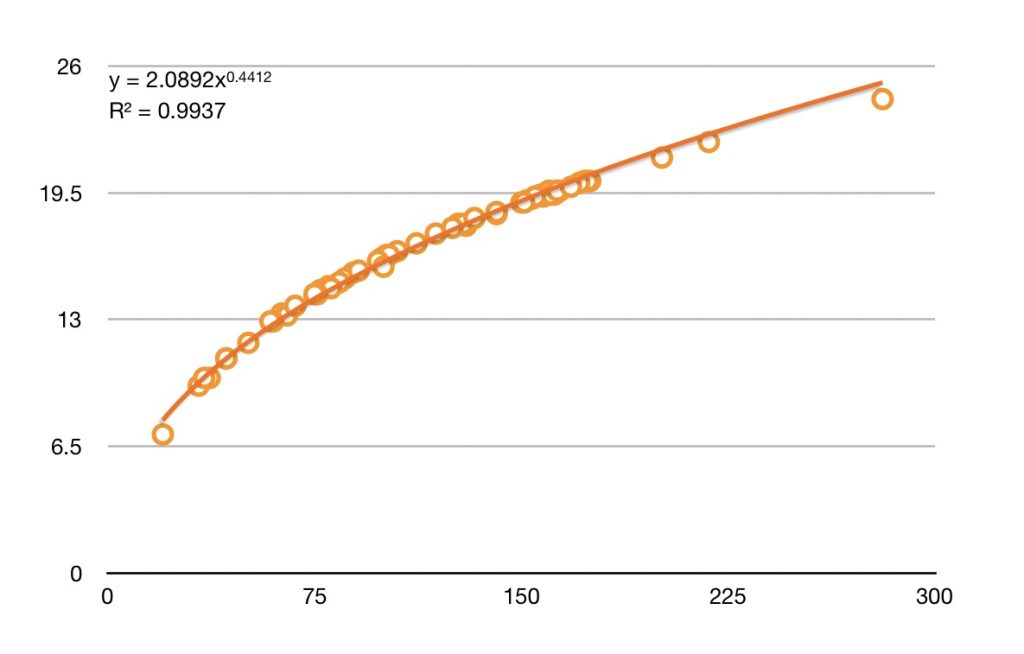
I have put together more than a hundred data points (Peloton rides) from five riders of both genders, ages between 17 and 53. Observed wattages fell in the range of 20 – 281. The R2 value of over .99 indicates that the formula very accurately describes the relationship between output and speed for all of these rides.

The Formula

Working backward from a set of data points correlating average output with average speed, the formula for finding speed is:

V = 2.1w0.44

Where V is the speed in mph and w is the output wattage (the wattage at the moment of measurement, not the total output).

This is not a prank, this is actually what my data tells me. If you think this looks needlessly complicated, I totally agree with you. That said, the data correlates very strongly with this formula (R2 > 0.99).


Output (X-axis) vs. Speed (Y-axis)

Almost perfect

As I mentioned above, the data fits the formula very well, so it would seem like I can wish everyone happy riding and close this post. I have to confess, though, that I’m not entirely satisfied with the equation I’ve posted above. It’s just so messy! For one thing, those are some odd number to use (I’m rounding as it is), and for another, even with an R2 value as high as it is it still seems odd to me that the data points to map even more exactly to the trend line. This is an equation with only one variable… I would expect the points to be absolutely spot on, and they’re not, and I don’t really have a good explanation as to why. Perhaps the sampling frequency plays into it. I have also noticed that the Strava data for the rides varies slightly as to total output and average speed, so the whole data collection may be a little less precise than it seems like it should be.

If and when time permits, I plan to create a handy chart mapping output and speed, similar to the Watts/kJ charts that I’ve done. Meanwhile, if you have any comments or information to share on the topic of output and speed, please share. Thanks!

The Red Baron

a Biography of Rittmeister Manfred Albrecht Freiherr von Richthofen

NOTE FROM THE AUTHOR: In February 1999, when this page was originally posted, this was the Internet’s primary resource on the Red Baron. Wikipedia has pretty much put an end to pages like this, but I leave it here, in more or less its original state, for posterity.

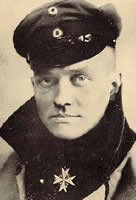
Manfred von Richthofen was born on May 2, 1892 in Breslau, Germany (now Wroclaw Poland). He died on April 21, 1918, age 25, in the skies over Vaux sur Somme, France. His people called him der rote Kampfflieger (The Red Battle-Flyer), The French called him le petit rouge, and he is known in the English speaking world as the Red Baron. In a time of wooden and fabric aircraft, when twenty air victories insured a pilot legendary status and the coveted Pour Le Mérite (the famous “Blue Max”) , Richthofen had eighty victories, and is regarded to this day as the ace of aces. This page was initially intended to provide only a brief outline of Richthofen’s career. However, due to feedback from visitors, it’s been expanded to provide some biographical details of Richthofen’s life.

Manfred von Richthofen was born the son of Major Albrecht von Richthofen, a Prussian nobleman, and his wife, Kunigunde. (The name Richthofen means “court of judgement” and was bestowed by the Holy Roman Emperor Leopold I.) Manfred was the eldest of three sons (the eldest child was his sister, Ilse). He was enrolled at age 11 at the military school at Wahlstatt, and then attended the Royal Military Academy at Lichterfelde. Manfred was a far better athlete than he was a scholar, and applied his horseback riding skills to become a cavalry officer. He was commissioned in April, 1911 in the 1st Regiment of Uhlans Kaiser Alexander III. He was promoted to Leutnant in 1912. 

Unfortunately, twentieth century warfare had little use for mounted cavalry. The invention of the machine gun had led to the need for combat operations to be carried out from the relative safety of trenches dug into the countryside. When war broke out in August, 1914, Richthofen looked to the air service for a new challenge. He initially joined the Fliegertruppe (air service) in 1915 as an observer because the training course was shorter and would get him to combat faster. After meeting Oswald Boelcke, who would remain his hero and idol, Manfred was committed to becoming a pilot. After only 24 hours of flight training from his friend, Oberleutnant Georg Zeumer, he made his first solo flight on October 10, 1915. (He crashed his plane attempting to land.) 

1915 – Richthofen takes to the air

September – In his second air combat (still as an observer), Richthofen exchanges fire with a French plane. The Allied plane dropped away and crashed, but Richthofen was not credited with the victory as the enemy plane crashed behind French lines (and could therefore not be confirmed). Later in his career, Richthofen would not be held to this restriction: he was taken at his word for his kills.

1916 – Richthofen becomes a pilot, first victories 

Apr 24 – Richthofen shoots down his first plane as a pilot. The craft, a French Nieuport, crashed behind enemy lines, and again the victory was not officially credited to Richthofen. 

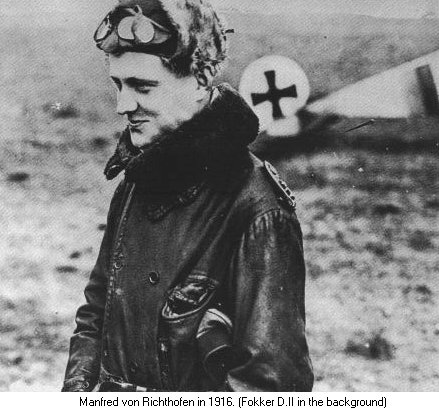
Sep 1 – At Oswald Boelcke’s invitation, Richthofen reports for duty on the Western Front. He begins his career with Jagdstaffel 2 in an Albatros D.II biplane. Although it was the Fokker Dr.I triplane with which Richthofen is remembered, he spend the vast majority of his time flying biplanes like the Albatros D.II and D.III. 

Sep 17 – Richthofen scores his first confirmed air victory. 

October: After 40 victories, Oswald Boelcke is killed in a mid-air collision during combat. Some accounts blame Richthofen’s enthusiasm for the collision which caused pilot Erwin Böhme’s undercarriage to collide with Boelcke’s upper wing. Others place the blame on Böhme, or call it simply an accident not attributable to anyone’s mistake.

Nov 23 — Richthofen, with the help of a superior aircraft, makes British ace Major Lanoe Hawker his eleventh victim. 

1917 – Richthofen’s rise, fall, and return 

Albatross D.III

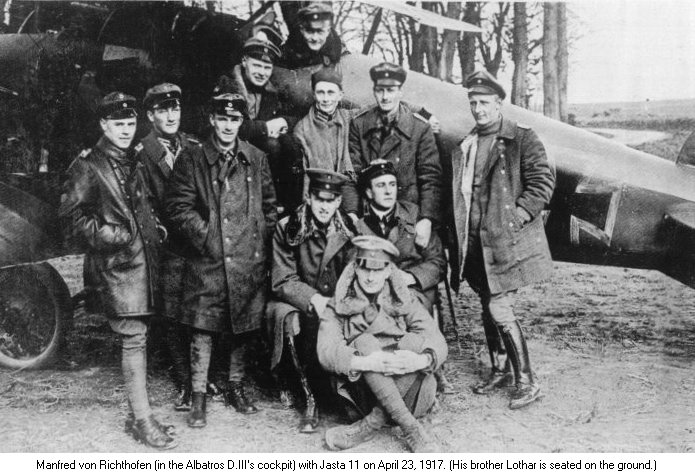
Jan 4 — Richthofen scores his 16th air victory, making him the top living German ace. On January 12th, Richthofen receives the Orden Pour le Mérite (aka the “Blue Max”). He is given command of Jasta 11. Richthofen decides to paint parts of his aircraft red, in part to identify himself easily to his allies on the ground (whom he feared would otherwise shoot at him). It has been suggested that he chose red because it was the color of his old Uhlan cavalry regiment. This begins a series of traditions: each plane in his squadron begins to display some red coloring to show solidarity. Later in the war, some British planes bore red noses, announcing their intention to hunt down the Red Baron. 

Jan 24 — The lower wing of Richthofen’s Albatros D.III breaks off in flight (a common problem for that type).

Mar 9 — Richthofen is shot down over Oppy, but was flying again the same day. 

Apr 7 — Richthofen is promoted to Rittmeister (Cavalry Captain) 

Apr 8 — The lower wing of the Albatros D.III flown by another member of Jasta III breaks off in flight. Richthofen writes an angry letter to Berlin, and is visited by aircraft designer Anthony Fokker, who literally goes to the trenches to observe his aircraft in action. The result of this visit (in which he was able to observe the British Sopwith Triplane) led to Fokker’s development of the Dr.I triplane. 

Apr 29 — Richthofen shoots down four planes in one day, a personal best. April, 1917 is known as “Bloody April”. Britain lost 912 pilots and observers during the month, while Richthofen scored an incredible 21 victories during the same period. After his 41st victory, Richthofen was ordered on leave. Turning command over to his brother Lothar, Manfred left the front on May 1st and did not return until early June. He spent his vacation hunting in his home town, on propoganda tours, and meeting with Kaiser Wilhelm. 

Jun 24 — Jagdgeschwader 1 (Fighter Wing 1) is formed, with Manfred von Richthofen in command. The wing would later be renamed “Jagdgeschwader Frieherr von Richthofen” in his honor. 

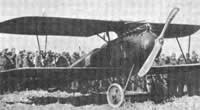
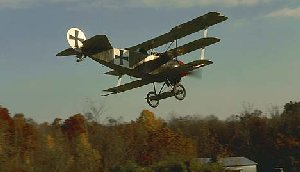
Fokker Dr.I Dreidecker 

Service Dates: 1917 to 1918 (320 built)
18′-11″L 23′-7″W 9′-8″H 
Weight: 1,289 lbs (893 empty)
Maximum Speed: 103 mph 
Maximum Range: 125 miles 
Maximum Altitude: 14,000 ft 
Engine: Oberursel UR II (110 hp) 

July: Richthofen is shot down by Capt. Douglas Cunnel and 2nd Lt. Albert Woodbridge. Though he lands safely, he has suffered a serious bullet wound to the head. Manfred would suffer from terrible headaches until the end of his life, but there were other ramifications. German command, recognizing the propaganda value to the enemy of Richthofen’s loss, begins to pressure him to retire from air combat, going so far as to forbid him from flying unless absolutely necessary (a loophole Richthofen exploited at every opportunity). 

Richthofen began to spend more and more of his time in more administrative and public relations roles. Eventually he returned to the front full-time when Germany’s leaders realized that no matter the risks, they could not afford not to let Richthofen do what he did better than anyone else. 

August: The first Fokker triplanes are delivered to Jagdgeschwader 1. 

September 1 — Richthofen scores his 60th victory, his first in the Dr.I triplane. On September 6th, he took a leave of convalescence, and when he returned in the next month he went back to flying the Albatros D.V.

1918 – The death of the Red Baron

April: Richthofen achieves two victories flying Fokker Dr.1 triplane (number 425/17). Though he flew biplanes for nearly all of his career, and most of these were only partly painted red, it is the Dr.1 triplane, blood-red from cowl to tail, which is commonly associated with the Red Baron.

On April 21, Richthofen followed the Sopwith Camel of Wilfred May far into British territory. The end of the war was only months off by this time, and the Germain air command faced both ever-improving British airplanes and their own dwindling numbers. The thrill of the hunt was all but gone for Baron von Richthofen, as most of his peers had already been killed and his own wounds agonized him. Though the German air doctrine he himself wrote stated that “one should never obstinately stay with an opponent which, through bad shooting or skillful turning, he has been unable to shoot down while the battle lasts until it is far on the other side”, he chased his British quarry far deeper into enemy territory and far lower to the ground than his own doctrine permitted. May later said that it was only his erratic, untrained piloting which saved him. Richthofen followed the erratic path of the novice pilot until a single bullet, shot from behind him, passed diagonally through his chest. The shot is commonly believed to have come from Australian gunners on the ground, but might have also come from the guns of Canadian flier Arthur “Roy” Brown who was coming to May’s aid. Manfred von Richthofen crashed into a field alongside the road from Corbie to Bray. His body was recovered by British forces, and he was buried with full military honors. 

Manfred’s brother, Lothar (also a Pour le Mérite recipient) was himself recovering from being shot down when his older brother was killed in combat. He returned to Jagdgeschwader 1 and carried on the Richthofen tradition of fearlessness in combat in a blood-red fighter. Lothar was shot down again on August 13th, 1918, and forced into retirement with 40 kills. Manfred’s eventual successor was Hermann Göring (who would later become the head of the Luftwaffe and a particularly infamous Nazi), who chose to paint his aircraft completely white, ending the reign of the blood-red German fighters. 

Career Air Victories by Month

1916
JULAUGSEPOCTNOVDEC


3354
1917
JANFEBMARAPRMAYJUN
33102104
JULAUGSEPOCTNOVDEC
122020
1918
JANFEBMARAPRMAYJUN
00116

Books on Manfred von Richthofen and WWI Aviation available from Amazon.com

(Please, if you plan to purchase any of these books, please do so by following these links to Amazon’s site.

Red Baron resources on the Web

Partial Bibliography
I have received many requests for a bibliography (students don’t go to the library anymore, it seems). Information for this page has come from numerous sources, most of which I cannot recall. In addition to the books above, the following also provided information for this page:

  • Red Baron: An Ace for the Ages by Shane Simmons, ©1995 Aviation History (magazine, July 1995 issue). 
  • Ace of Aces episode of A&E Biography. 

NOTE: All attempts are made to ensure that the information on this page is accurate, but errors may remain. Thanks to RedBa7210 at AOL and Thorsten Pietsch either for correcting errors or helping me clarify information on this page. 


(This quaint postage icon was originally used to allow people to contact me, using the old “mailto:” attribute. That was state-of-the art in 1999!)
Before you write:
I appreciate your feedback. I especially appreciate mail which will help enhance or clarify the information on this page. If presenting such information, please let me know what your source is for corroboration. Also, please note:

  • This page is intended to present a capsule biography of Manfred von Richthofen. It is not intended to suggest that no other pilot has equaled or surpassed his success in combat. The fact that he is called the “Ace of Aces” is simply a matter of historical record. Historians have argued for eight decades whether Richthofen was shot down from the air or ground. The issue will not be settled here. 
  • Many people e-mail me asking for more links with information on Richthofen…. all the ones I know of are listed right here.
  • Many thanks to Dr_GloPos, who found a typographic error in the Victories table above (in 2022, twenty-three years after publishing!)

What I learned from my second Century

I wasn’t completely sure I was going to be finishing the French Creek Iron Tour until I passed mile 80. Around mile 70 the course heads out of the wooded hills into farmland where the sun and the wind start to make you think, “how much do I really want this?” I really do enjoy cycling, and I enjoy the long rides… there is a peacefulness that you discover after a couple of hours of riding that just can’t be found on shorter rides. That said, there comes a point after five or so hours where it ceases to be fun, and I was there.

So when I did finally reach the finish line, about seven and a half hours after starting, I was pretty sure this was going to be both my first and last 100 mile bike ride. As much as I enjoy a nice, long ride, there really isn’t anything (except maybe for sleeping) that I really want to do for seven and a half hours straight. Riding a century is like climbing a mountain: you don’t particularly enjoy doing it, but you enjoy the satisfaction of having done it. As such, it doesn’t seem like there’s a whole lot of incentive, once you’ve done a century, to want to do another one. (I’ve climbed a few mountains in my life, and I can’t recall ever climbing one twice).

Never Say “Never”

Still, within just a few days of finishing the French Creek Iron Tour, I found myself reviewing the way I’d prepared … my eating, my workouts, and most of all the tapering phase in the week leading up to the ride, and I began to wonder if I really had done it right. Specifically, I was surprised during the century that I didn’t feel a bit stronger early on. Some fatigue started to set in around mile 40 that I really didn’t expect until mile 60 or so, and even though I had done several rides longer than a metric century, I felt more tired at the 60 – 80 mile distances than I thought I would be.

Each time I set out to do a ride that is longer than the previous one I had trouble knowing how to prepare because I had no frame of reference to tell me whether I should be doing more or less of this or that. Even when I could call upon similar experiences, there usually weren’t enough of them that I could make any real conclusions. Still, now I had a century under my belt, and I began to wonder how much easier it would be, then, to do it again.

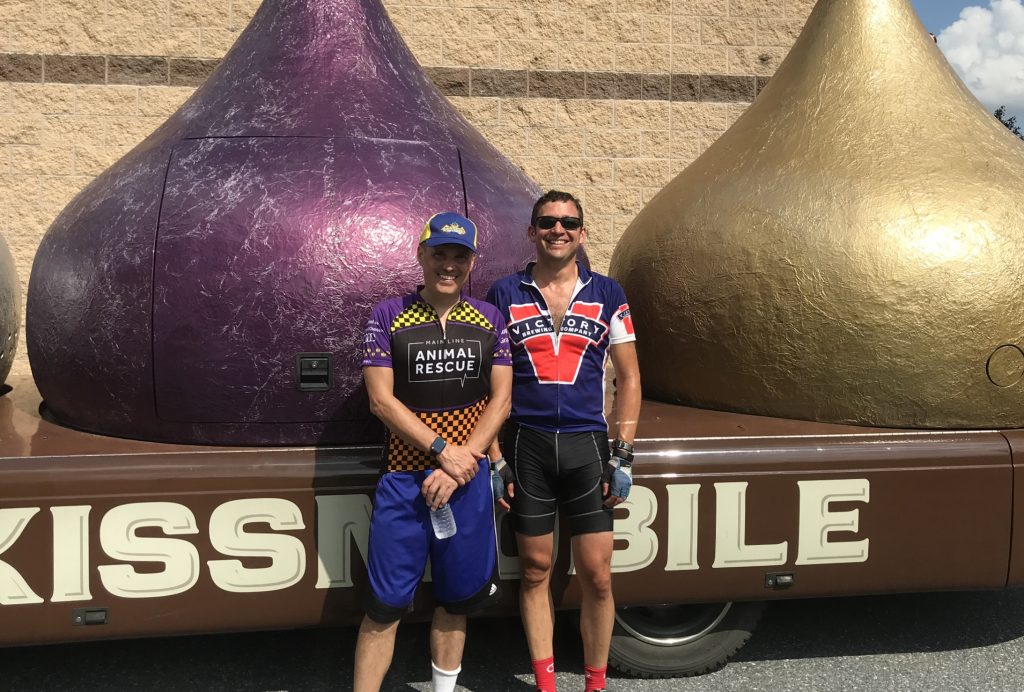
It just so happened that a friend wanted to attempt his own first century a couple of months later, so we signed up for the Penn State Chocolate Tour (so-named for the chocolate candies on hand at the rest stops — fitting for a ride in and around Hershey, Pennsylvania). I really didn’t doubt that I’d be able to complete this one … I was still in shape from my preparation for the first century and this one was significantly less hilly.

On the Road Again

In the end, I think complacency got in the way of my great experiment. My family had a great vacation in mid-summer away from the bike and by the time I got home there were only about three weeks before the ride, so there wasn’t really a chance to build up the long rides like I did the first time around. I also frankly wasn’t as driven the second time around — it’s hard to get psyched up to do something you’re about 99% sure you can do. Still, there were some lessons learned.

The first lesson is that although the Penn State Chocolate Tour isn’t as hard as the French Creek Iron Tour, it’s still not easy. Yes, there was no point during the second ride that I considered bailing out and yes, I was able to complete it in nearly an hour less time (due to it being a fair bit flatter), but it was still over six hours in the saddle and that’s a long time to be riding. There’s no way I’d consider doing a century, even an “easy” one, without some serious preparation.

I also paid more attention to my snacks during this second ride. I generally don’t eat much on a bike ride, and if the ride’s less than a couple of hours I don’t feel like it really matters that much whether I eat or not. (Of course, I have a little more “on-board” energy reserves than a pro cyclist, if you know what I mean). After a couple of hours, though, your body is scrounging for energy in a way it’s never otherwise asked to. Well, maybe if you’re starving, but I’m not really into starving if I can help it. So this time I made a point of snacking on a fairly regular basis… I had a pack of gummies and a couple of GUs with me, and after mile 40 I ate a gummy every ten miles and had a GU somewhere around 60 and 80 miles, I don’t quite remember. This is still a lot less than the packages say I should be ingesting (maybe a third of what they recommend), but it did seem to help me keep my energy up.

The GUs were a bit of a disappointment. Their chocolate outrage is a great flavor, and I’d recommend it if you are ever frosting cupcakes. If you’re really just eating for the energy, though, it’s actually way too cloying to be pleasurable. Mandarin Orange is my new pick for when I’m actually exercising.

What they don’t tell you about finishing a Century

Finishing a century is a very satisfied feeling. You’ve been on the bike for hours and hours, and just not riding is a joy in and of itself at that point. Also, you have just spent a hopefully pleasant day riding around seeing the countryside, and if you remembered to put on the sunblock you should not be too toasty at the end. Plus, your Garmin congratulates you on exceeding 100 miles, which is pretty cool.

Lest you start to feel self-important in your accomplishment, though, there is a harsh reality check waiting for you at the end of the ride. I first experienced this at the end of the French Creek Iron Tour, when I walked my bike out to my car through an almost completely empty field, but it was rainy that day and I just wanted to get home and I didn’t give it much thought.

There are no photos of me finishing either of these centuries. The fact is, the photographers had long gone home. When I finished the Penn State Chocolate Tour the only people to greet me were the EMTs standing around the mandatory ambulance. There were no spectators, no photographers. Even the inflatable start/finish arch had been packed away. The dirty little secret of these centuries is that everyone has gone home by the time you’re finished.

And let me be clear: I completed the 100 miles (and 4400 feet of climb) in about 6.5 hours at a pace of 16 mph. Not Olympic numbers, I acknowledge, but this is by no means broom wagon territory, either. I really have no idea where I placed relative to the rest of the field, but there were plenty of people finishing after me. Nevertheless, the food was pretty much gone (I grabbed a few slices from the last pizza to save for my friend, who I regrettably dropped somewhere around mile 40, but that’s another story), the event T-shirts were gone (unless you’re an XXL, but how many XXLs are there doing the 100 mile route?) and the whole thing was pretty much already in the history books.

The problem is that these events have multiple distances (usually something like 25, 50, 65 and 100, for example) and often, if they don’t start all at the same time they start close to the same time (maybe the century riders get a 1/2 hour head start). So the bulk of the event participants have finished hours earlier, got their t-shirts and pizza, and are already home. When I finished the French Creek Iron Tour, I got my buffet lunch (they did a much better job of catering to the late (ie: century) crowd) and sat down, thinking, “Last year (when I did the 50 mile route) they had a band”. Well, they had a band this year, too, but the band was gone by the time the century riders finished. As far as the Chocolate Tour organizers were concerned, the century riders were on their own. It’s not that we are doing it for the fans, but a bottle of water and a banana at the end of the ride would be nice.

At the finish, with Jason who rode with me. Thank God his girlfriend came out to cheer him on, or we wouldn’t have even this photograph!

One more for the road

My last big ride of the season was the Main Line Animal Rescue Gran Fondo (a mouthful… there’s something to be said for their original name, “Handlebarks”), and I tried to apply my learnings from the centuries to my training. Due to some confusion regarding road markings (I will not point fingers, but I have photos to back up my claims… I thought to take photos the second time I passed through the Birchrunville loop) we ended up doing about 66 miles and over 5600 feet of climb, so it was on par with the Chocolate Tour in terms of effort. For this last ride, I really didn’t do any tapering (I felt after the centuries that the tapering I had done the week or so beforehand actually made me feel a little de-conditioned when the big day came). I think I took off the day before, and my rides for the week leading up were a bit more relaxed than usual, but there really wasn’t any tapering per se. In the end, I think that worked best, as I felt the most “myself” for that event. Whether that’s really the right approach if I found myself attempting something closer to the limits of what I can do, I am not so sure. Unfortunately, there’s probably no good way to find that out without actually doing more long rides, so don’t be surprised if I have more posts in the future about century (and maybe even century+) rides, as I try again to crack the code.

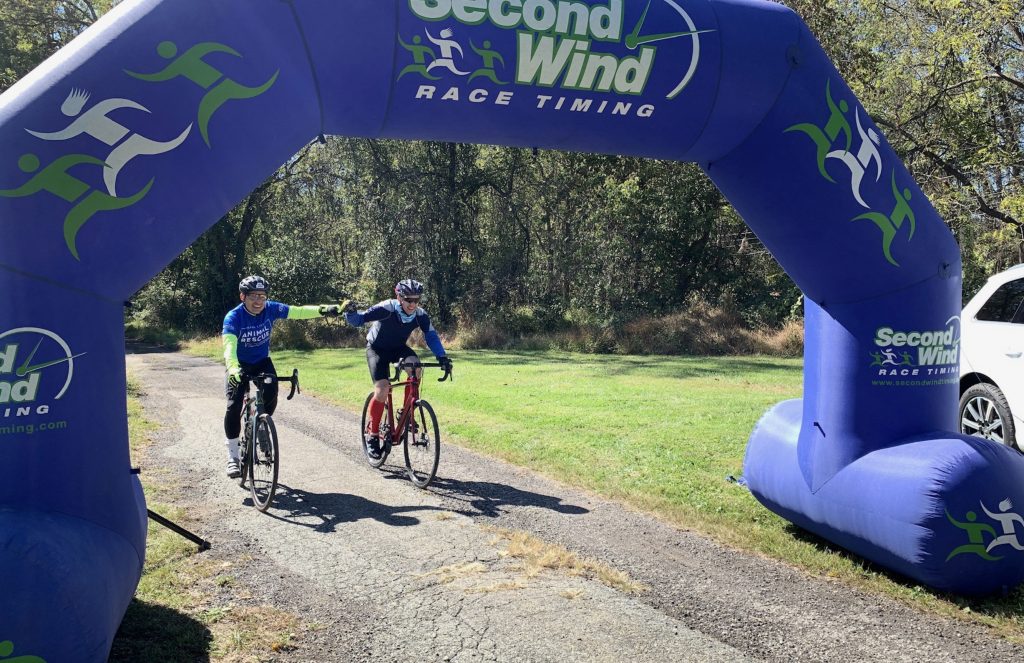
Fist bump with my brother at the end of the 2019 MLAR Gran Fondo. Due to our “detour”, I think we may have finished last at this event. Well, last and second-to-last.

Why I wear a Lumos Helmet

This is an objective, non-compensated review of the Lumos Helmet, which was purchased at retail. I have no connection to Lumos.

Santa gave me a Lumos Helmet for Christmas last year. My last helmet, a Giro Atmos II, made the ultimate sacrifice in a high-speed crash last October. I was so impressed with that helmet and how well it protected both my skull and my brain, I went right out and bought another, but Santa thought I could do better.

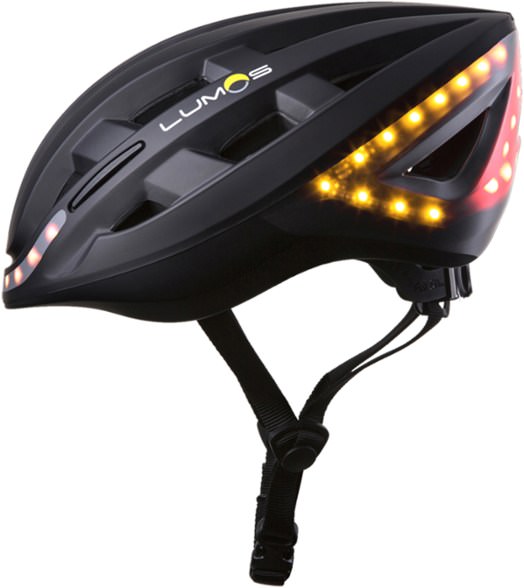
Strapping on my Lumos helmet

The main feature (you can call it a gimmick if you want) of the Lumos helmet are the built-in lights, and there are a bunch of them. There are white LEDs in the front which will help you stand out in a dark space, such as under shade trees or in a tunnel. In back, there’s a triangle of red LEDs that do the same job. They’re no substitute for a headlight and rear tail light, but a little extra lighting can’t be a bad thing. I think there’s enough data out there to show that lighting beats reflectivity or bright colors for safety.

The real differentiator of this helmet are yellow turn signals, front and rear, activated by either a set of buttons strapped to the handlebars (boring), or activated by your hand signals, facilitated by your Apple Watch (nerdy-cool). Since you can’t actually see these lights when you’re wearing the helmet, it beeps to tell you whether the turn signals are switching on or off, and the beeps for left and right are different, although you should hopefully know which one you’ve triggered.

Apple Watch / Lumos helmet integration

In practice, the Apple Watch integration works fairly well, but not so well that you aren’t going to get a few wrong signals on each ride. You need to calibrate your Watch, using the same gestures that you’d use while riding (that is, arm straight out for a left turn, held up for a right turn). To turn off the turn signal, you shake your wrist. Running over broken pavement can also trigger the wrist-shake gesture and turn off the turn signal, whether you want to or not. I haven’t check this with Lumos, but I believe that the turn signal turns itself off after some number of seconds, so if you had a feel for that you could learn to signal at the right moment and it would time-out when you wanted to. I haven’t used it enough to get that sort of thing down.

Calibration is a little tricky, and it’s possible I really haven’t done it quite right. You need to be in the same position you will be when riding — if you sit up in the saddle you’re not going to get the same effect. Essentially, you need to be riding while you calibrate (or have someone hold your bike while you get into riding position), which is tricky. Lumos has some suggestions about how to gesture for a turn that works best with the software.

Needless to say, you have to wear your watch on your left wrist for all of this to work. It so happens that I broke my left wrist in the same crash in which I broke my last helmet, so I usually wear my Watch on my right now. I have to remember to switch the Watch to my left if I want to use it with the helmet, which isn’t so convenient (switching wrists with the Apple Watch involved changing a setting on your iPhone). Not much Lumos can do about this, but it’s something to think about if you happen to wear your Apple Watch on your right wrist.

Let me talk pros and cons before I tell you how I feel about the helmet overall…

PROS of the Lumos Helmet

Lighting: The lighting adds just a little bit of visibility, which can’t be a bad thing. In my humble opinion, the helmet is good looking and I don’t feel silly with a bunch of lights on my head. The designers did a good job. I think the turn signals do a very good job of alerting riders and traffic behind you (if maybe just for the novelty of it) but since you have to make the hand gesture anyway, are there really circumstances in which you’re really communicating new information via the helmet lights?

Comfort: SPOILER ALERT — this is probably the #1 reason why I’m still wearing this helmet. It’s actually really comfortable to wear. I read a review of the helmet online in which the reviewer said the helmet was heavy compared to others, and that sounds reasonable given the additional battery and lights that it has. In practice, though, I can’t tell the difference. I haven’t weighed the helmets, but subjectively it feels no heavier.

CONS of the Lumos Helmet

False signals: As I said before, it’s really nifty that with a properly calibrated Apple Watch you can trigger the helmet turn signals just by using the ordinary hand signals, but it’s not perfect. Usually the gesture needs to be just so, and it doesn’t work every time. I’ve even had the helmet signal the wrong turn, not to mention all the times that vibrations from the road canceled a turn prematurely. It’s good, but it’s far from perfect.

Battery life: After about 3½ hours, the batteries in my helmet die, and at that point it’s just a helmet.

Cost: As of this writing, a Lumos helmet costs about $180, which is somewhat steep for a helmet. One crash, and I suppose you need to pony up another $180 for a replacement. Lumos should have a trade-in program that would let you send in your damaged helmet and get the electronics transferred to a new shell. You’d think that would cut the price for replacement somewhat, and it’d help with customer loyalty, too.

Would I buy it again?

In summary, let me try to answer the big question: if I didn’t have one of these helmets, would I spend the money to buy one? I don’t know if I would. After all, I was completely happy with my Giro helmet which was far cheaper, and I’m not convinced that the additional lights are that big of a safety feature. Still, the Lumos helmet is pretty comfortable, and I was just out on their website and saw the new models which look pretty slick. If they’re improving the software as they refine the design of the helmet as a whole, I’d definitely at least give it a look.

One open question

There is a beta feature of the helmet that I’m getting ready to try out, a brake light. As I understand it, the helmet (or maybe it’s your watch) detects your deceleration and makes an appropriate signal. When I got my helmet, the existence of this feature was practically an Easter egg, and wherever I could find reference to it Lumos was emphatic about this being a beta feature. Because of this, I haven’t tried it out, but I really should. If the helmet can detect and signal that I’m slowing, that would be useful. Not everyone (particularly non-bicyclists) recognize the “slow” hand signal, and this would be a novel feature. If I can make a determination of its effectiveness one way or the other, I’ll update this post.

French Creek Iron Tour

My First Century

At the finish line

For my first century ride, I chose the French Creek Iron Tour. Of the local events I know about, this was actually the hardest (over 6,000 feet of climb). I picked it for two reasons: one is that it was fairly close to home so I didn’t have to get up too early on a Sunday morning, and the other is that the ride is difficult enough that if I were to actually finish, I wouldn’t be left with the feeling that it wasn’t a “legit” century. There are more difficult centuries out there, I’m sure, but anything with over a mile of climb is the real deal As far as I’m concerned.

Well, how did I get here?

The road to this first century ride began in July of 2017, when I visited San Francisco and was amazed to see so many cyclists tackling the many steep hills of that city. I myself probably wasn’t logging more than a couple hundred miles a year on my bike, feeling like the rolling hills of Southeastern Pennsylvania weren’t conducive to cycling. Of course, San Francisco makes the county I live in look pool table flat. So, with my attitude suitably adjusted, I resolved to get back into cycling more when I returned home.

Part two of the equation was my purchase of a Peloton bike in August of the same year. My brother (#CrunchyFrog) and brother-in-law (#SaucyDawg) had them, and were singing the praises of the bike (and, in particular, an instructor they called “JJ”) at our family reunion. Back home, my wife (#ExcellentBird) and I checked out the bike, but it took us more than a week, two visits to the showroom and a sample class before we talked ourselves into buying one (and we each probably did it for the other!). It was not an easy sale, but I rationalized that I was buying it for her, and she did the opposite.

The Peloton bike quickly became part of my routine. In fact, a day doesn’t feel complete without a ride. I’ll even come back inside after a road ride and get on the Peloton bike! By October I tried my first organized bike ride, the Main Line Animal Rescue Gran Fondo. Joining it was a bit of a spur-of-the-moment thing. I really had no idea what my abilities were, so signed up for the 30-mile course (and managed to raise $500 in a week) and completed it on my hybrid bike, which was the only one I owned).

I had a great time on that ride, and decided that it would be fun to ride with my friends from work. To do that, I figured I needed a road bike, so I bought myself a 2017 Fuji Gran Fondo in November, taking advantage of the end-of-season sales.

5,000 miles on a bike that doesn’t move

It was pretty much all-Peloton, all-the-time that winter, but when the warm weather rolled around I tried a few events. One was the 50 mile course of the French Creek Iron Tour, which was hilly but do-able. Near the end of the summer I was invited to join a team organized by my company to do a three-day, 160 mile ride in Cape Cod. Modesty prevents me from telling you how I fared, but let’s just say I didn’t have to wait in line at the buffet at the end of the ride.

It’s hard for me to express how much the Peloton bike did to prepare me for that ride. Each day I got up in Cape Cod I felt like I hadn’t just rode for hours the day before. I actually felt stronger each day. And although I try to take care of myself, I was never what anyone would call an athlete… it’s just not in my genes. Nevertheless, thanks to the daily Peloton rides, I felt unstoppable on the road that weekend.

The last ride of 2018 was the MLAR Gran Fondo again. This time I had recruited my brother and brother-in-law and we did the 100K (64 mile course). Well, we did 40 miles of it. Unfortunately at mile 41 I got tangled up with another rider and crashed out of the ride. I had surgery a week later to put some things back in place, but once the stitches were out I was back on the Peloton bike. It was slow going for a while due to some broken ribs, but each week was better than the one before and I was putting up decent numbers again by January.

In mid-winter I started the “Game of Zones” PZ challenge (Pelotoner’s will get that). After that, I signed up for “Zone Wars”. Completing these really made me feel like I was back in the game. In early spring, I did a ~30 mile gravel ride which I did not enjoy with a mountain-biking friend who also did not enjoy it. Somebody enjoys gravel riding, but I’m not entirely sure who that is. Anyway, like a lot of challenges in life, I’m glad I did it, and glad I never have to do it again.

It’s Century Time

So, after healing up I find spring around the corner and I need a goal. One of the things I love about the Peloton bike is it allows me to set goals and to measure my progress. Of course I have the goal of completing the unfinished Gran Fondo this fall, but after my experience in Cape Cod I was already pretty sure I could do a 64-mile ride. So I decided I would do a century. I really had no idea whether I was ready for a century, but it seemed like a good goal. I selected the Iron Tour partly because of its bad-ass name, and partly because I had done the shorter courses before and knew it to be a well-organized event with good markings and well-stocked rest stops (complete with cookies).

If you’re not into cycling, understand that the “century” is sort of a benchmark of legitimacy. Road riders can be grouped by those who have ridden a century and those who haven’t. It’s a bit like what marathons are to runners: either you’ve done it or you haven’t. (I don’t know how other people feel about it, but it seems to me that a marathon is a lot harder than a century, but whatever…)

I downloaded a chart from Bicycling.com that showed how much riding I should do each week leading up to the century. Oops! It’s an eight-week plan, but I only had four weeks. Still, at week 5 the long ride of the week was 40 miles, easily do-able, so I figure I was on track … it’s not like I was getting off the sofa at week 5.

A little help from my friends

At this point I got some valuable help from the West Chester Cycling Club. I joined their Saturday group rides and thankfully not only are the people really nice, and not only are they good cyclists, but they have a number of rides each weekend (and some during the week if your schedule is flexible enough) so you can pick your distance and speed. On successive weekends I built up from 44 miles to 49 miles to 64 miles and then, on the weekend before the Iron Tour, an 86 mile trip to Chesapeake Bay. The last two were somewhat tiring but still very do-able, so I still didn’t have a good sense of how much I could really do. Plus, even the 86 mile ride had only 4,000 feet of climb, so the Iron Tour would be not only longer but hillier (if that’s a word).

I took it easy the last week, resting up for the Iron Tour. I did short (20 minute) low-impact Peloton rides and even didn’t ride at all on two of the days (very unusual for me).

Tackling the Iron Tour

I suppose it was the right move to rest so much, but I really felt out of sorts on the actual Iron Tour. I figured I would sail pretty easily through the first two-thirds and then venture into unknown territory, but I was actually already feeling somewhat tired by mile 40. At mile 70 I really started to get unhappy — at that point the hills are long and rolling, but you’re out in the farmland where there is no shade and the wind was blowing very strongly (the volunteers at the rest stop at mile 80 were literally holding onto the tent so it didn’t blow over). And of course the wind was a headwind, did you even need to ask?

Come mile 80 I was actually happy to get back into the wooded hills, even though it meant more climbing. I knew I was getting pretty sunburned (I was about six hours into the ride at that point) and the trees cut down on the wind somewhat. Around mile 75 I started to question how much I really cared about finishing this ride, but after mile 90 I knew I was going to finish.

One of the things you learn on a seven-plus hour bike ride is how long all of the batteries in your various devices last. My Lumos helmet (with built-in lights, a gift from my wife after my crash) ran down after about 3 and a half hours. My rear tail light / radar died after about six hours. And, worst of all, my Garmin itself started giving me low batter warnings at mile 100 (of 101!). This was a serious crisis. If the Garmin doesn’t record your ride, does it count? Would I get Strava credit? Would I be able to “Relive” my ride?

So, although I had planned to basically declare victory at mile 100 and coast to the finish, in the end I feel the need to empty the tank in order to finish the ride before my Garmin crapped out completely. Fortunately for me, the last mile or so of the ride was relatively flat, and I crossed the finish line just about 7 ½ hours after I started.

It was deeply satisfying to have completed a century ride (and this one in particular), but I was ready to be done. I wrote in my Strava notes, “anyone who draws up a ride with 6,000 feet of climb is a dick”, and I’ll stand by that assessment. Still, as I write this a few days later, I have to admit that I really enjoyed the challenge and it probably won’t be too long before I try another century.

In fact, I hear there’s one out in Hershey, PA where they give out chocolate at the rest stops.

See you there.

Relive ‘French Creek Iron Tour’