In December of ’21, I wrote my first WordPress plugin for something other than my own use. That plugin was “PetPress”, a plugin connector for PetPoint and WordPress. In January I submitted it to WordPress.org for inclusion in their catalog, and after a little back-and-forth (described below), it became the first and only plugin of its kind in the catalog, which I have to confess I’m pretty proud of.
Why I wrote a WordPress plugin
The PetPress plugin, which connects PetPoint to WordPress.
I had essentially three goals when I decided to create a WordPress plugin. The first goal was to extend the functionality of some code I had already written. I wrote a PetPoint / WordPress connector for an animal shelter that I volunteer for, and used a file-based mechanism to cache the pages that were generated. This was necessary because the interface isn’t particularly fast, and multiple calls are needed in many cases. By making a WordPress plugin, I knew I could leverage the MySQL/MariaDB database that the WordPress site uses to move caching to the database rather than having to use the file system. Plus, I wanted to be able to use WordPress tools (specifically, Divi) to format all of the parts of the site that aren’t generated by the interface. (My original site was all hand-written, which is very laborious when dealing with both variable content and the needs of responsive design).
My second motive for turning my PetPoint/Wordpress interface into a plugin was, believe it or not, to help out other people. PetPress is the #1 kennel management software in the USA (or, at least it was according to stats from 2014) and WordPress is the #1 content management system on the web (accounting for something like 40% of Internet sites). Being able to connect the two should make it dramatically easier for many, many animal shelters to provide pet listings directly on their websites (without having to use the more rudimentary tools offered by PetPoint). These are organizations that never have much money, and it was pretty cool to think that I could help potentially hundreds of shelters out.
My third motive was to hopefully generate some income. I’m hoping that some of the users of the plugin will want help either integrating it or help with the broader challenge of creating or updating their websites. There happens to be “donate” links all over the place, but as of this writing (nearly two months since release) the donate links have generated exactly $0, and I’m not hopeful that that will change. It is such a common model on the Internet that software and information is given away “for free” in exchange for advertisement revenue or data collection on the (often unsuspecting) buyer that people have just come to expect that Internet software is free.
Submitting the WordPress plugin to WordPress.org
Anyone can write a WordPress plugin that can be installed fairly easily without submitting it to WordPress.org, and in fact if your primary goal is to sell your plugin then you probably want to avoid the WordPress.org catalog completely. However, there are some unique advantages to having your plugin in the catalog.
Probably the biggest reason to put your plugin into the catalog is that it’s the easiest place for people to find it. The WordPress administrative interface for plugins allows a site builder to search the catalog directly from the admin section. If the plugin isn’t in the catalog, the next option is to install a plugin manually. That’s not difficult: it’s just a matter of uploading a .zip file, but of course you have to have the file to upload, which means finding it on your own.
Having WordPress.org include your plugin into the catalog also confers a certain authority to it. A rather strict set of tests are made to (hopefully) ensure that the plugin doesn’t pose a security threat for the site it runs on and that the plugin will not interfere with others. All things being equal, it’s reasonable to trust a plugin from the WordPress.org catalog over one that is sourced elsewhere.
One of a couple of highly detailed feedback emails from WordPress.org regarding my plugin submission.
The first time I submitted my plugin, I fairly quickly received a reply with a short list of corrections that had to be made. It took a couple more tries to get it all right, but within a week or so of starting the process, my plugin was accepted.
What I learned
The first lesson from submitting a plugin to WordPress.org was about their use of namespaces. Every function, variable, etc. in a plugin must be unique, and I suppose that means that every plugin on your site can theoretically call every other plugin. This is at the same time fascinating and pretty worrisome. It’s hard to see this sort of thing flying in the present day, but it is the reality in WordPress land. It certainly makes plugins powerful, that’s for sure.
Another lesson had to do with how serious they take the sanitizing of I/O. There were a number of functions in my plugin which seemed completely safe to me, but whose output still needed to be run through various WordPress functions to sanitize. These folks have been at this a long time, and it’s hard to argue that they aren’t doing things the right way. It’s a little extra trouble for the developers, but one does need to be careful these days.
I was extremely impressed with the communication I received from WordPress.org during the submission process. I think my code must have been run through some automated checkers, just based on how quickly I received my feedback (usually the next day). I’d be inclined to suspect that the code was only run through some automated checkers, but when things got very granular at the end I did receive some highly personalized feedback from the reviewer. Somebody really did take the time to answer my questions and provide feedback. And the lengthy emails I received were highly informative even when a lot of it must have been boilerplate. All in all, I certainly felt better shepherded through this process than I was years ago with my first iOS app submission (though maybe that’s better these days, too).
Would I do it again?
I’m not sure when I’ll have the opportunity to write another WordPress plugin. The main reason is I’m not sure when I’ll really have something that I think would be a worthwhile contribution. There are a zillion plug-ins out there, and I can usually find one that does what I need it to without having to write my own code. Still, if I do come up with some idea that would make a great plug-in, I would definitely go for it. I might spend a little more time thinking about how to monetize it, though, because the donations concept is not a winner.
In closing, if you have a killer idea for a plugin and would like to hire me to build it for you, you know where to find me!
If there is one thing that Zwifters using the Apple TV have been able to agree on, it’s the frustration of trying to use the horrible Apple TV remote with the Zwift interface. While I think part of the blame can be placed on Zwift for not being better able to optimize their app for the hardware available, the Apple TV remote’s touchpad is notoriously difficult to use (as anyone who has tried to enter a complex password into and Apple TV app will attest) and is nightmare for Zwifters.
Trying to switch bicycles in the middle of a ride using the Apple TV is excruciating. Here I am, with a heart rate north of 160, trying to calmly scroll just one bike down in the list — and scrolling down three instead. Back up one, back up three, down two… and all the while other riders passing you by as you sit at the side of the road in your misery.
The Olympic biathlon should consist of Zwifting and using an Apple TV remote. That is far more difficult than aiming a rifle after cross country skiing at top speed for a couple of miles.
Alternative Remotes to the Apple TV remote
The first remote I tried to replace my Apple TV remote was the Channelmaster CM7000-XRC remote, which I was attracted to because it has honest-to-goodness arrow keys instead of a touchpad. My kingdom for an arrow key!
Unfortunately, this remote did not work with Zwift, and had trouble with other apps on my Apple TV as well. Basically, any interface that didn’t have items lined up in a very neat grid (like the Home Screen) was just too hard to navigate with the Channelmaster.
The Real Problem
Now that the Apple TV remote isn’t a complete design disaster, there is only one thing between Zwifters and being able to actually navigate the Zwift menus, and that is the Zwift menu interface itself.
The problem with the interface is that the UI elements are often stacked one on top of another, and there is no clear way to signal that you (the user) want to interact with an element or go to the next one. For example, there are many scrollable elements (selecting a route, a pace partner, a workout) on the menu screen, and although you can scroll up and down through the list, there are also UI elements below (and often above) the list. It becomes frustratingly difficult to navigate the list without accidentally navigating to those other items. With the new remote, you can “click” the outside wheel to navigate, but in Zwift doing so always selects the next UI element, not the next item inside the UI element you are working in. If Zwift could organize the elements so that they are in a grid (which is how Apple’s own on-screen interfaces all work), working within their menus would be infinitely easier.
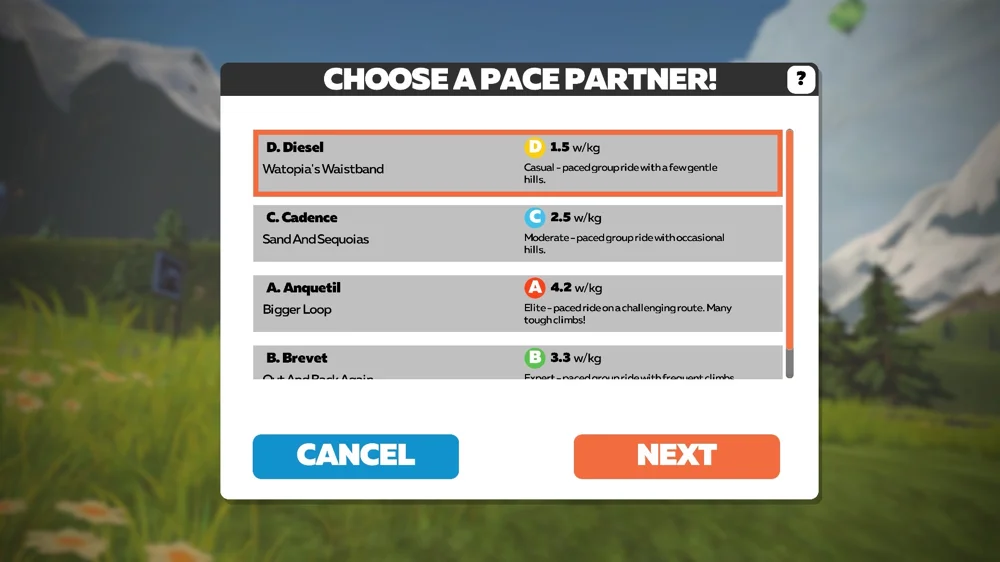
It is extremely difficult to scroll down this menu. Clicking the bottom of the scroll wheel doesn’t pick the next item in the list, rather it jumps down to the “Cancel” or “Next” buttons.
Siri Remote for Zwift?
I was very enthusiastic to see that Apple had redesigned the remote for the new Apple TV, and put in my Father’s Day request right away (Happy Father’s Day to you all, BTW). I’ve just tried out and here’s what I found.
[sad trombone sound effect]
Unfortunately, the “click wheel” arrow buttons on the Siri Remote do not allow me to scroll through menus in Zwift, which was the one thing I was desperately hoping for. You can scroll up and down using the wheel (basically, the edges of this new, round trackpad), but there’s no way to go “up one” or “down one”, which is what we really need. I haven’t tried it out while actually Zwifting yet, so I can’t say if it works better than the old remote, but I can tell you that it doesn’t do the thing I really was hoping it would do.
As a small consolation prize, it does seem like a much better thought-out device. It has a better shape, you can tell the top from the bottom without really examining it too closely (unlike the old remote, which gave you a 50-50 chance of picking it up with the touchpad on top), and seems better in nearly every way. I should also say that there isn’t anything about this new remote that seems to get in the way of Zwifting, so if you go this route at least you don’t have to have one remote for Zwift and another for all the rest.
It’s up to you, now, Zwift
OK, Zwift, the ball is in your court. Apple just redesigned their remote, and it’ll probably be years before they do it again. You are our best bet now. Please find some way to allow us to pick routes, change bikes, etc, without the agony of the touchpad! How about a closet in the Zwift garage where I can put all those bikes that I’m never going to ride (who needs more than three or four bikes in this game?), right next to the fifty jerseys I’m never going to wear?
It’s a great game, and it’s been great watching it evolve over the last couple of years, but that doesn’t mean it hasn’t been frustrating, too.
I am uncharacteristically perturbed by the recent announcement by NASCAR that the “NextGen” car in development will do away with the familiar five bolt wheels in favor of a single lug nut. I tell you, take your eye of these guys for a minute and they think we’re in France, or something.
Here’s what happened…
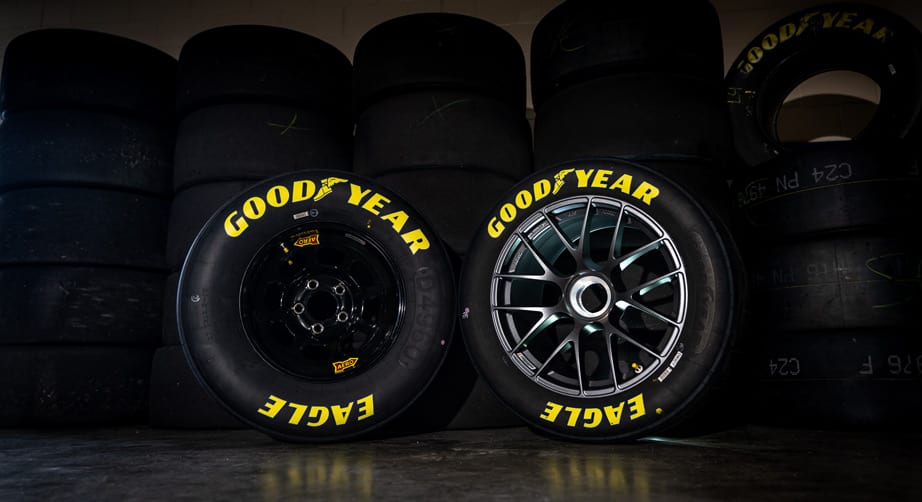
Good old American steel stock car wheel (left) and the hoity-toity aluminum wagon wheel with the spinner hub.
NASCAR is moving from the time-honored 15″ wheels to enormous 18″ ones, I guess because the ride of a NASCAR race car wasn’t harsh enough, they decided to shorten the sidewalls. It’s bad enough our road-going cars have 18, 19, 20-inch wagon wheels that make them jittery, bend in every pothole, and get scraped up on every curb. Now, NASCAR has to follow suit. Well, at least they’re doing something to emulate true stock cars, which they’ve really seem to have abandoned over the past decade or so.
That’s not all, though. This new 18″ wheel isn’t made out of good old steel –which I shouldn’t have to mention was plenty good enough for Richard Petty and Dale Earnhardt– but rather a fancy, exotic metal: aluminum. ALUMINUM! I’ll bet they pronounce it “al-yoo-MI-ni-um”, like the English. Aluminum wheels –like the people who design them, no doubt– react badly if the lug nuts aren’t all torqued down to the correct specification, so they’re prone to failure if the tire changer doesn’t fully tighten all of the lug nuts.
You got that right… you won’t have any problems unless the mechanic failed to make sure that the nuts were put on just right. On an American car. Why are we even worried about that? When was the last time an American car had a quality control problem?
The solution to the problem, apparently, is to have one giant lug nut, just like on this car:
When you think of NASCAR, do you picture an Aston Martin with euro-style roundels and wire wheels? Maybe you should, ’cause it feels like that’s where we’re headed.
Come on now, guys! I’m fine with the six speed transmission you have planned. After all, I can’t remember the last non-vintage four speed I’ve seen. Ditto with the independent rear suspension. And I’m not going to grumble about your carbon fiber tub and moving the driver more to the center of the car because you pretty much have to do what you have to do for safety. But eliminating 75% of your lug nuts is just going too far. This isn’t Formula One or any of those fancy-pants European series. This is ‘Murica. Not only has the humble lug nut been THE fan souvenir for decades, but having them spat out and flung around, hither and yon, by the spinning wheels of cars racing out of their boxes always gave Pit Road a dynamic, war-zone feeling.
Save the lug nuts, NASCAR. It was bad enough when you got rid of the Catch Can Man. I can’t believe that was ten years ago already. Next thing you’re going to tell me is that you’re going to lose the whole gas can idea and run gas hoses out to the cars during pit stops, just like they do it over in Europe.
If you’re a Zwifter, chances are that you’re running (or wish you were running) the Wahoo Kickr smart trainer. The Kickr, which is now in its fifth generation, may not be the absolute best trainer out there, but it is the established leader in the space, and when you’re dealing with a system such as Zwift that has components from so many different manufacturers involved, there is safety in numbers.
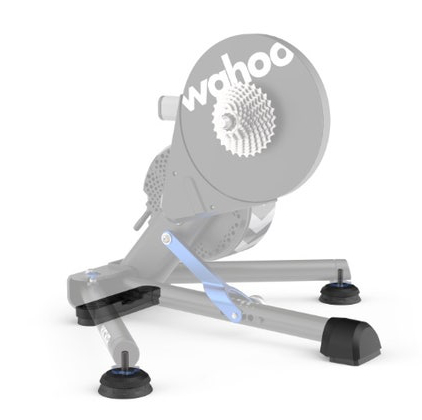
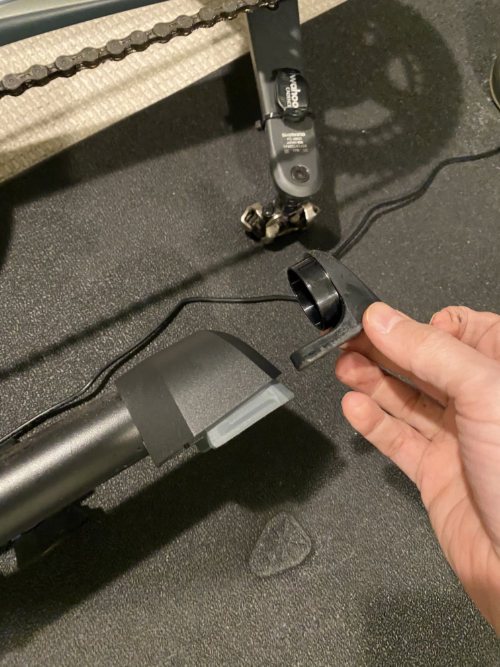
Photo from Wahoo showing the new parts (in black)
Competitors are always trying to find an edge, of course, and some of those competitors started to explore bikes that lean, something the Kickr does not do. Saris introduced the MP1 Nfinity Trainer platform, a $1200 boogie board for your bike, which I am going to try out as soon as $1200 doesn’t seem like a ton of money to me. (Attention Saris: I’m an influencer! Send me one of these!) Manufacturers like RealRyder and Bowflex have bikes that lean (though, notably, Wahoo’s own $3500 Kickr Bike doesn’t), and although those machines aren’t direct competitors to Wahoo’s Kickr, you have to imagine that all of these cycling products will converge over time and that market share matters.
I don’t have any insider information, but it certainly seems to me that Wahoo felt the need to respond to this trend, and their response comes in the form of AXIS Action Feet, a product whose very name seems like a desperate bid to generate excitement.
What are the Kickr AXIS Action Feet?
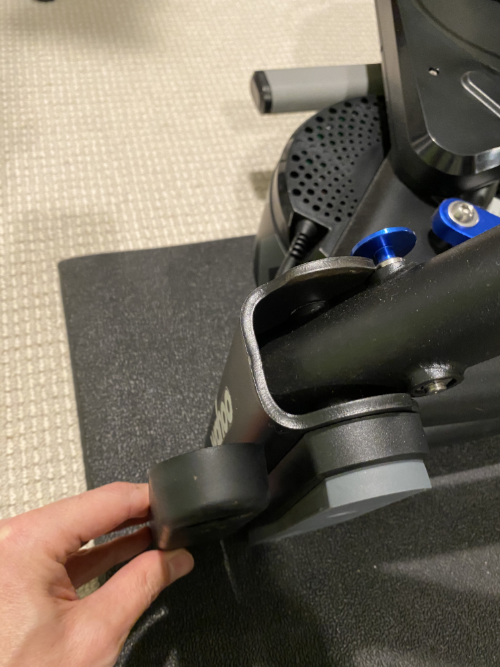
The biggest difference with the AXIS Action Feet are on the sides, where larger, thicker feet (shown attached to the Kickr replace the much smaller original feet.
The AXIS Action Feet are standard issue for the new Wahoo Kickr devices, and available as a retrofit for older models, at a not-insignificant price of about $80. Still, after one spends a couple grand on a bike and at least a thousand dollars for a Kickr setup, an additional eighty bucks might seem like a trivial amount to pay for an improvement in the experience. Still, eighty dollars is eighty dollars.
The AXIS Action Feet (I’ll just call them “Feet” with a capital “F” from now on) is a replacement set of feet for the Wahoo Kickr.
installing the Kickr AXIS Action Feet
Installation of the Feet is very simple, and can even be done without removing the bike from the trainer, if you’re lazy. Just push one of the Kickr arms back to the center and lay the whole assembly on its side. You might get a bit of grease on your fingers but it’s not a dirty job.
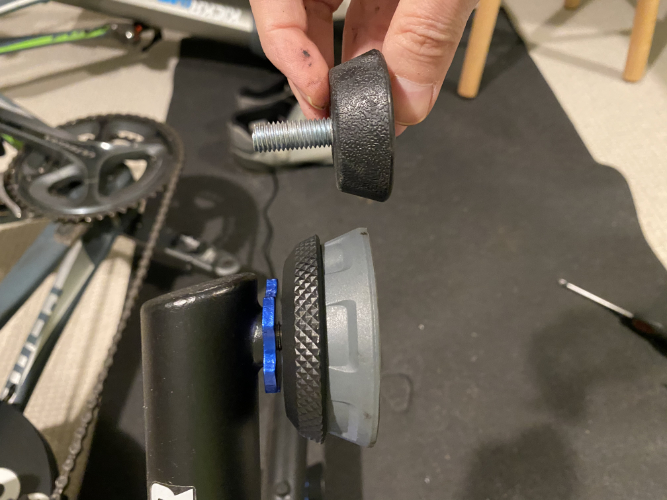
The front and back replacement feet require a Phillips screwdriver. The side Feet just screw in. The blue aluminum retainer is a stock piece and you can just swap them over to the new feet. Installation is a ten minute job, and there is very low risk of damaging anything or injuring yourself, as long as you’re careful.
The difference between Action Feet and the stock feet
The front replacement foot (seen attached to the Kickr) is much beefier than the stock foot, but functionally isn’t really any different.
Two of the feet are along the centerline of the bike and are basically needed only because the other two feet, the ones that are attached to the arms, are taller requiring the centerline feet to be taller as well. So, the forward and aft centerline feet aren’t very remarkable, they’re just slightly beefier versions of the stock feet.
The only Feet in a position to make any difference (literally and figuratively) are the two Feet attached to the stabilizing arms of the Kickr. These replacement Feet are, as you can see from the photo above, considerably beefier than the ones they replace. They are also bigger in surface area, so they will perhaps help a bit in keeping your Kickr from sinking into the carpet or your mat. As with the stock feet, you can height-adjust the two “side Feet” to level the bike.
Do the Wahoo Kickr AXIS Action Feet make a difference?
Answer: No.
Oops. That’s far too short an answer considering I’m making a whole blog post out of this topic, so I’d better elaborate, and maybe provide some caveats.
I’ll start with the caveats. One is that I didn’t perceive a noticeable difference, and that doesn’t mean you won’t. Second, my bike is on top of a thin mat which itself is on top of a reasonably thick carpet. I think that if the bike were directly on a cement slab, then maybe I’d have a better chance of detecting a difference. As it is, I really don’t think I can tell the difference.
The rear foot (seen installed on the Kickr) is, like the front foot, pretty much just a spacer lift the trainer a bit to accommodate the thicker side feet.
The Action Feet ride experience
As I said, in my experience, the experience of riding with the Feet isn’t noticeably different from the experience of riding with the stock feet, but I don’t know if altering the feet of the Kickr ever really had a chance of success. The front of the bike is not anchored at all, of course, so when I am really mashing the pedals for a stiff uphill (which is where I think one would see the most side-to-side stress), the sensation of having the front of the bike relatively free and the back of the bike much more rigidly fixed is very unnatural. It’s not as though Wahoo could have made this product much better and didn’t, this type of trainer architecture just seems to have this limitation that the back end of the bike is sort of anchored to the floor while the front is free to move, and I don’t see how one can really get around that.
Unless you have the Saris trainer platform, maybe. That thing seems prohibitively expensive to me, but it’s very existence suggests that the engineers over at Saris recognize this problem with the trainer architecture and are betting company R&D money that the best way to fix it is to put the entire assembly on top of a movable platform.
The Saris training platform retails for $1,200. If you save money by not buying the Kickr AXIS Action Feet, then that cost is a mere $1,120, which still feels a lot like twelve hundred dollars.
Well, after reading more about the psychology of free-to-play games, I’ve finally given up Sim City BuildIt once and for all (… but probably not for long). (For the record, SCB wasn’t by any means the worst offender in the free-to-play world, but it’s an enormous time-suck nonetheless). However, after being subjected to maybe a hundred online ads (sitting through online ads is a shortcut to certain goals in the game), there’s one image that still stuck in my mind:
This is a scene from the ad for a game called “Age of Z” (or, at least I think that’s the one). From what I’ve seen in the ads, I can tell you that this game involves killing many zombies and building your home territory (which, I believe starts as a reclaimed junkyard) into a thriving city.
This image, which appears near the end of the ad and seems to show a pretty well-established city bordered by a tall wall topped with machine gunners who fire non-stop into approaching waves of zombies, always (at least for the few seconds the scene appears) killing enough to keep the leading edge of the wave at bay.
(Aside: it’s curious that the wave of zombies is squared off the way the city is. You’d think that the shape of the zombie wave would be dictated by the firing arc of the machine guns, in which case it would have the shape of a square with rounded corners. But I digress…)
Welcome to America, circa 2020
Maybe I’m reading too much into this, but this scene strikes me as a metaphor for the way many Americans view their world? Inside the walls, it’s a pretty nice place. Let me call your attention to a few details:
The buildings inside the compound have strikingly appealing architecture. They have landscaping, paved roads, sidewalks. This particular building seems to have advertising and a neon sign. At the moment, no one seems to be on the streets because they are all on the wall shooting zombies, but presumably at some point at least some of them can climb down and enjoy maybe a movie or an art show or something.
Outside, though, there are waves and waves of zombies, coming to… well, I don’t really know. Eat everyone’s brains? I’m not really a zombie expert, but I think it’s safe to say that the zombies pose a threat to the resident‘s lives, or at least their way of life. They are storming the walls, and it certainly seemed to imply that if they were ever to make it through, well, that would be the end of civilization.
Frankly, that’s how I think a lot of people see America today. Remember that couple in St. Louis who pulled guns (including a machine gun, if you can believe it*) on Black Lives Matter protesters who walked down their private road en route to a demonstration? What a scene! Rich people standing in their beautifully manicured lawns, staring down the barrels of their guns at outsiders who had literally come through the gates. I can’t help but wonder if, after the protesters dispersed and the guns were back in the locker, those two defenders of liberty and freedom went back to playing their game of Age of Z.
From another game in the series. The homeowners are enjoying a cookout in their front yard while the automated defense system slaughters the zombies beyond the fence.
OK, I think I’ll stop now. I’m not really trying to get political with this blog, but I do wonder if I’m the only one who looks at this game and sees the “defending our way of life” fantasy fairly obviously embedded in it. If many video games are a form of wish-fulfillment, what does it say when our wish is to live in a nice place we can call our own and open fire on anyone who tries to get in? Castle Doctrine as escapist entertainment.
In any case, it’s not a game for me. I’d rather be flinging birds at green pigs and their absurdly poorly built homes. Though I have to confess that I do wonder at what point the birds and pigs really should just sit down and talk. Where does it end?
* And of course you can believe it, which is pretty awful in and of itself.
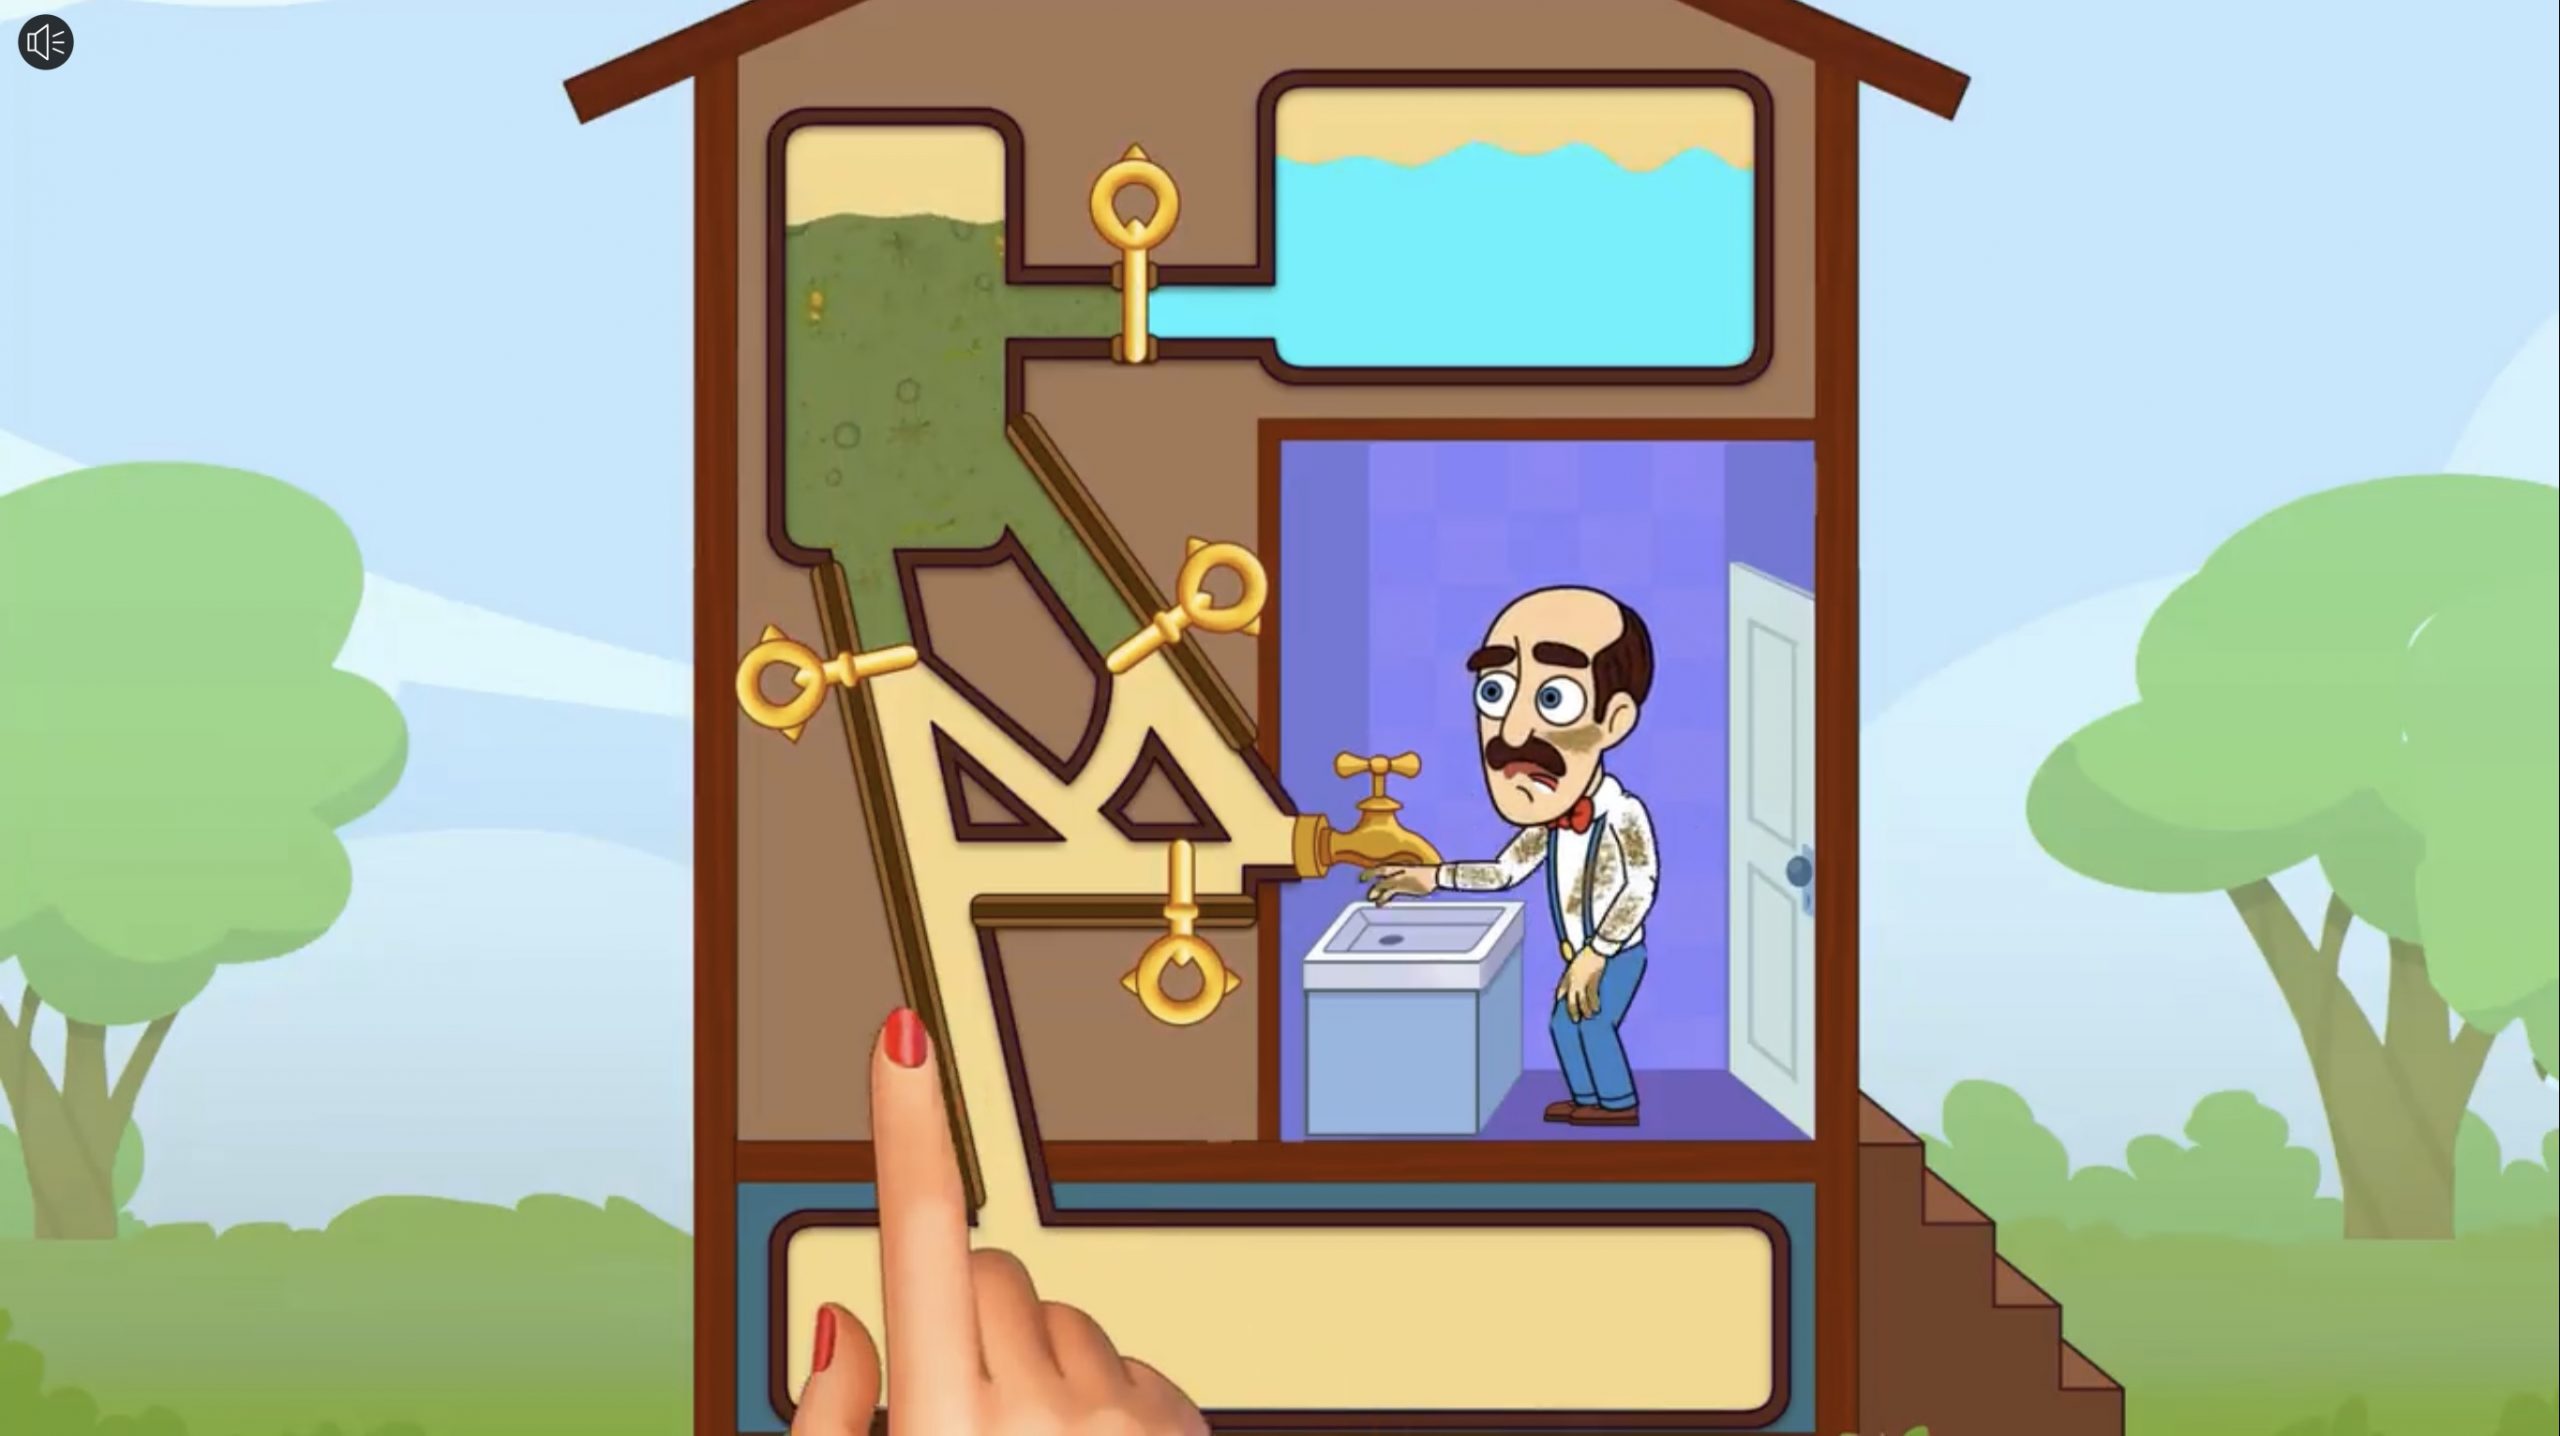
There is a game called Homescapes whose ads subject you to an endless loop of an animated hand attempting —and failing— over and over, to solve a simple logic problem.
There are tons of games like this out there, each of which asks you to manipulate a series of gates so that your nemo-fish escapes a shark, your adventurer gets the gold, your sheep escape the terminator-like advance of a combine harvester, or whatever. It doesn’t really matter. There are gates, there’s something you want and something you don’t want, and your job is to manipulate the gates to avoid disaster.
Another thing that these games all have in common is an animated demonstration of how to manipulate the controls. And they invariably show you how to do it wrong. The wrong switch gets tripped and the lava falls on the fish, or the toxic sludge drenches the homeowner or whatever. It is, frankly, infuriating to watch. Over and over again, the disembodied hand moves the lever that obviously spells doom for the sheep/fish/damsel, and you find yourself thinking, “Move! Let me do it.” It’s almost if it’s by design.
I haven’t actually played any of these games, mostly because it would feel like giving in. So, I say “sorry, little fish, good luck with that lava.” I just can’t afford to get involved with what is clearly someone else’s problem.
I do have questions…
Speaking of other people’s problems, the winner in that category has to be the poor guy who lives in the game “Homescapes”. That’s him in the picture above. The disembodied hand is clearly tasked with getting the fresh (blue) water into the sink and avoiding the disgusting, toxic water. What I want to know is, how did this house get a certificate of occupancy in the first place? How can it be to code to have the fresh water and the toxic water flowing through the same pipes? Clearly, even if the disembodied hand can figure out how to drain the toxic water from the system (it can’t, by the way) the fresh water has to run through the same pipes. I certainly wouldn’t be washing up with that water after knowing where it’s been!
And how did that toxic water get there in the first place? Was there an architect who sat down at his blueprints and said, “we’ll keep the toxic water up here, and attach it to the sink and the fresh water. That’ll save us some copper!”
The whole setup reminds me of the Schitt’s Creek episode “The Drip”, in which Johnny Rose is awakened by having “brown sewage water” dripping from the ceiling into his bed. What struck me as odd is that the Rosebud Motel is only one story. If the water was indeed sewage water (which seems to be implied, though it’s only Johnny’s conjecture), why would it be above them? That would mean that somewhere in the Rosebud there’s a pump that sends sewage up, not common except in basements and other subterranean areas. (Anyway, the show gets a pass because it’s hysterically funny, but some people notice things like that.)
Only 5% Can Solve This
As if watching someone fail over and over to solve a very simple logic problem isn’t enough, the ads want to make sure that you’re well and truly on the hook. So it ends with this phrase: “Only 5% can solve this”. Now the gauntlet has really been thrown down. Now I’m thinking, “Really? Only 5% (of people, I’m guessing) know not to drop the gas can on top of the kitchen fire? I must be some kind of genius, because that occurred to me right away!” Somewhere out there, no question about it, there’s someone who downloads this game just to prove to the world (as if the world is watching and this isn’t just the spotlight effect) that they’re in that elite 5% of thinkers. Me, I’m too smart for that. Besides, I’m too busy playing Sim City BuildIt.
Sim City BuildIt: The Tar Baby for Completionists
You may wonder where I’m seeing all these ads for mobile games. Why, I see them when I’m playing a mobile game, of course! The one that I have sadly fallen victim to is Sim City BuildIt which is, as far as I can tell, the modern incarnation of the much-loved Sim City.
It’s sort of “Sim City Lite”, though. There is much less strategy as far as I can tell. Because you can move things around easily and you get refunds on things that you’ve built but now want to bulldoze, you don’t really need to think ahead. Also, there seem to be many fewer options you have to influence the outcome of your city. Basically, you build stuff, and the stuff you build generates money so that you can buy the stuff you can’t build. It’s actually really basic, but it’s a total trap for completionists like myself.
See, I’m almost ready to send the cargo ship at my port off to some far off land. I just need to load one more shipment of cabinets onto it. Of course, to make a cabinet, I need lumber, so I have to load up my furniture factory with lumber. Where does the lumber come from? From wood, of course. I need to make sure that the building supply store has enough wood (which, in turn, comes from a factory). Each of these stops has a finite number of items that can be put in the queues, and production times that range from minutes to hours. It’s an endless list of cascading dependencies, and the more you accomplish, the more complex the items you need to make become (oh, the days in the beginning when you could just dump a bunch of raw metal onto a building site and get a house!). You can, of course, pay real actual money to speed up the process (and it’s that feature that makes the game “free to play” because it subsidizes all of the development costs), but that feels like cheating. No, I’d rather pay in time, lost minutes and hours waiting for that hunk of cheese to be finished at the farmer’s market so I can get it over to the fast food place to make cheese fries. Seriously, though, it’s enough that I’m giving over so much time to a game, but I still can avoid becoming a whale for free-to-play apps.
Easy to quit, I’ve done it many times!
This morning I deleted the Sim City app from my iPad. Of course, I’ve done that a few times before so it’s hard to know if this is really it or not. At this point, though, I’ve spent enough time in the game that it has gotten almost insufferably repetitive, and each time I quit I feel a bit less pull to go back. Of course, the city itself (”Buddyton”, if you were curious) lives in the cloud, so all I have to do is download the game again and run through the tutorial before I’m back to tending to my residents complaining that I really need to build that solar farm because the coal plant is killing them.
So, for now, I’m done with that stupid game. Will I ever go back? I might, but if I do I probably won’t say, because all that would do is confirm that I actually am as easy to manipulate as they think I am.
(Incidentally, I’m not including links to any of the games I mention here. You just don’t need them. You’re welcome.)
(PS: Apologies to anyone who are offended by the use of the phrase “tar baby”, which in recent years has been regarded by some as a derogatory reference to Africans (or Maori, Wikipedia tells me). Hopefully from context you can see that mine is not a racial commentary of any kind. Frankly, I was hesitant to even use this idiom, but I don’t know another that captures the meaning, and writing “a problem that is exacerbated by attempts to struggle with it, or by extension to a situation in which mere contact can lead to becoming inextricably involved” is a little wordy.)
Which is harder, a 100-mile century ride on the road or a 100-mile century ride in Zwift? Is zwift harder than riding outside? Riding 100 miles isn’t particularly easy even under the best circumstances, and involve many hours of cycling, but there’s definitely a difference between Zwift and riding outside. Having done both, I thought a quick comparison might be of interest to someone who has done one and is contemplating the other. This isn’t a scientific comparison, and I don’t claim that I’m an authority on Century rides, but I think maybe I can provide some insights…
The Road Century
For me, at my level of fitness and in the moderately hilly area I live in, a road century is about a seven-hour affair, when rest stops are factored in. I wrote about my first and second centuries in this blog, and I found the experience to be fairly similar in both. I was better prepared for the first one, but the second was easier, and in the end they both felt like they took more or less the same effort. Anyway, please check out those blog entries if you haven’t done a road Century and want to hear a little more about that experience.
The Zwift Century
The Zwift platform (along with technologies such as the Wahoo Kickr and Climb) does a lot to bridge the gap between riding on, say, rollers and riding outdoors. It’s certainly not the same experience, though, and after having done a metric century on Zwift, I was curious to see what the full Century experience would be like.
Well, when I said I was curious, I mean I was curious in the sense of “I wonder what that would be like?”, not in the sense that I really planned to find out. Still, as a completionist, that black Zwift jersey —exclusive to those who’ve done a 100 mile ride— did beckon to me. Then again, I knew that even if it was easier it was still going to be several hours on the trainer, and that part wasn’t terribly enticing.
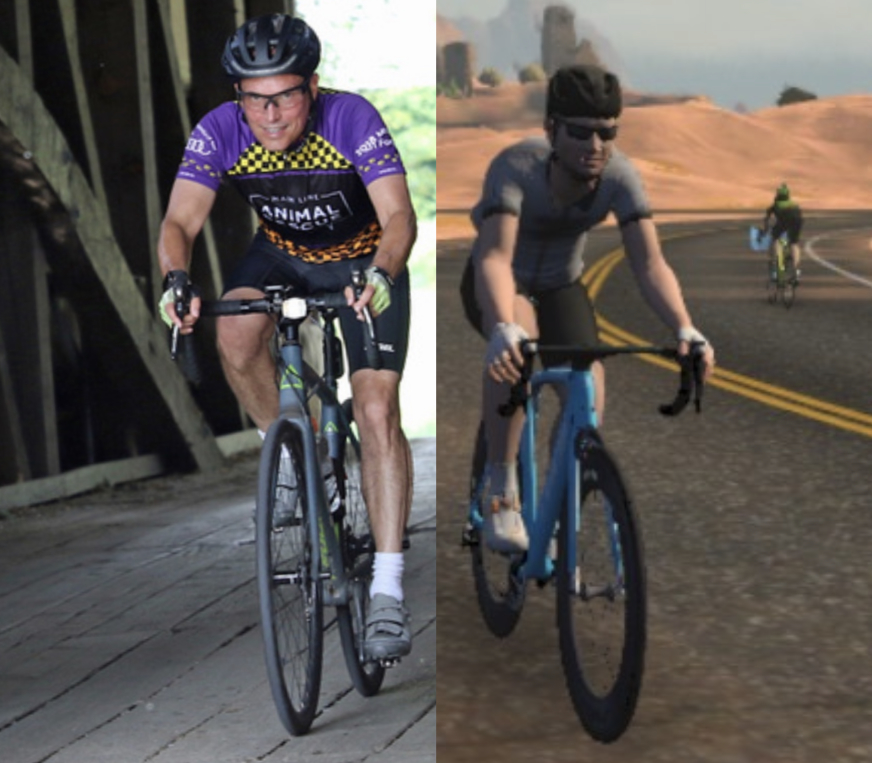
Finally, fate intervened, and the indoor Century plan was back on. The Main Line Animal Rescue bike event went “virtual” this year (2020), and they moved it up to June to boot. Although this is the event for which I do all of my fundraising, I have to admit that this year I nearly sat it out. I was getting tired of all of the usual outdoor events being canceled or converting to “virtual” events (“virtual” basically means “do whatever you want to do”), and with the local bike club canceling their group rides I was really having trouble finding any motivation.
There was about a week to go before the event when I realized that if I did take a pass this time, I would certainly regret it when October rolled around and there wasn’t a big bike event fundraiser for me to get involved in. After all, the dogs and cats still needed care, and with so many people out of work and/or afraid to leave their homes, it hasn’t been a great year for fundraising in general. So although I usually spend a couple of months fundraising, this time I had a week and I had to figure out what to do as my virtual event.
My first thought was to do a Century ride in Zwift, mostly because it seemed like a kooky idea that would appeal to donors and also felt like the sort of thing that wasn’t really as hard as it sounds. And I hadn’t really trained for this, so I was definitely looking for something that wasn’t as hard as it sounds!
Back to Fuego Flats
At the risk of suffering an even greater level of boredom than I experienced in my metric century, I decided that my 100-miler would be done on a route called “Tempus Fugit” in the Fuego Flats area of Watopia, Zwift’s main bicycling paradise. Fuego Flats is, like it sounds, just about completely flat, with grades ranging from -1% to 2%. There are no stop signs, no stop lights, no traffic (except other bicycles and runners that you cannot collide with) and no weather except the weather in my basement. This should be just about optimal for a long ride.
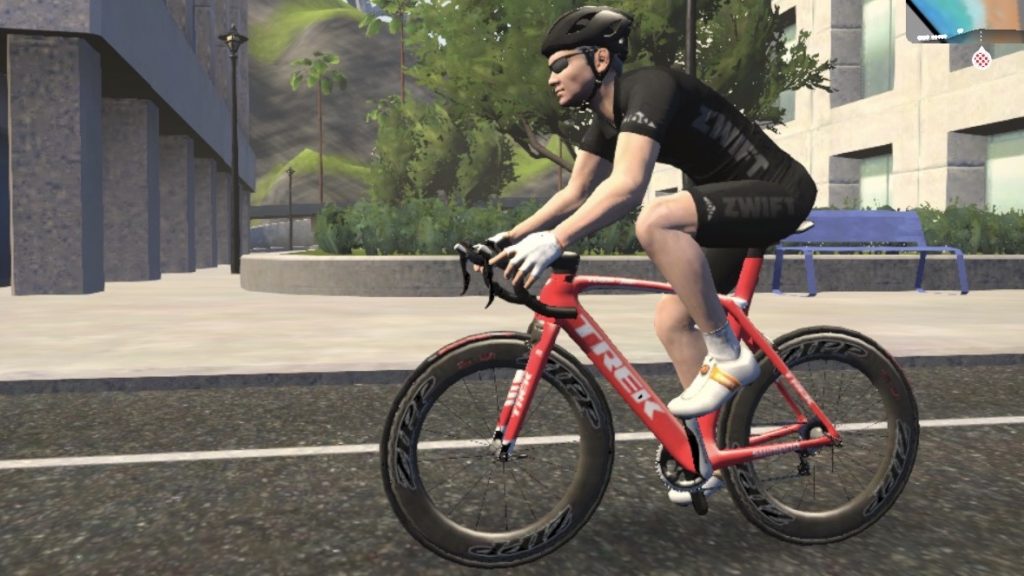
Unlike the metric Century Zwift ride, I opted not for the TT bike but for my regular (Zwift) bike, the Trek Madone with the Zipp 808 wheels. My thinking was that on a Sunday morning (particularly with most of the world still in pandemic lockdown and riding indoors) there would be a lot of other cyclists on the route and it wouldn’t be so hard to find another person or two to draft off of. Also, since the TT bike does not benefit from the draft and you cannot crash into other bikes, when you’re riding the TT bike the others on the road are completely irrelevant, and that was just a little more boring than I was ready to deal with. I am not entirely sure whether riding a TT bike or a bike like the Madone in the draft is faster, but did try a little experiment in the week leading up to this ride and I believe the regular bike in the draft is faster.
As it turns out, on the day of the event I got even more help than anticipated. My brother joined me on the ride and rode the first segment (the first forty miles) as my domestique, so I always had someone to draft off of. That was, predictably, my fastest segment, averaging somewhere between 23-24 mph. Nowhere in the real world have I ever gone that fast for that long. I’ve never had the opportunity to cycle in a Fuego Flats type of environment with people to draft off the whole way, so I have no way of knowing whether I’d be able to pull off speeds like that in the real world, but suffice to say this seemed like pretty much ideal circumstances.
Speed and output for the Tour of My Basement
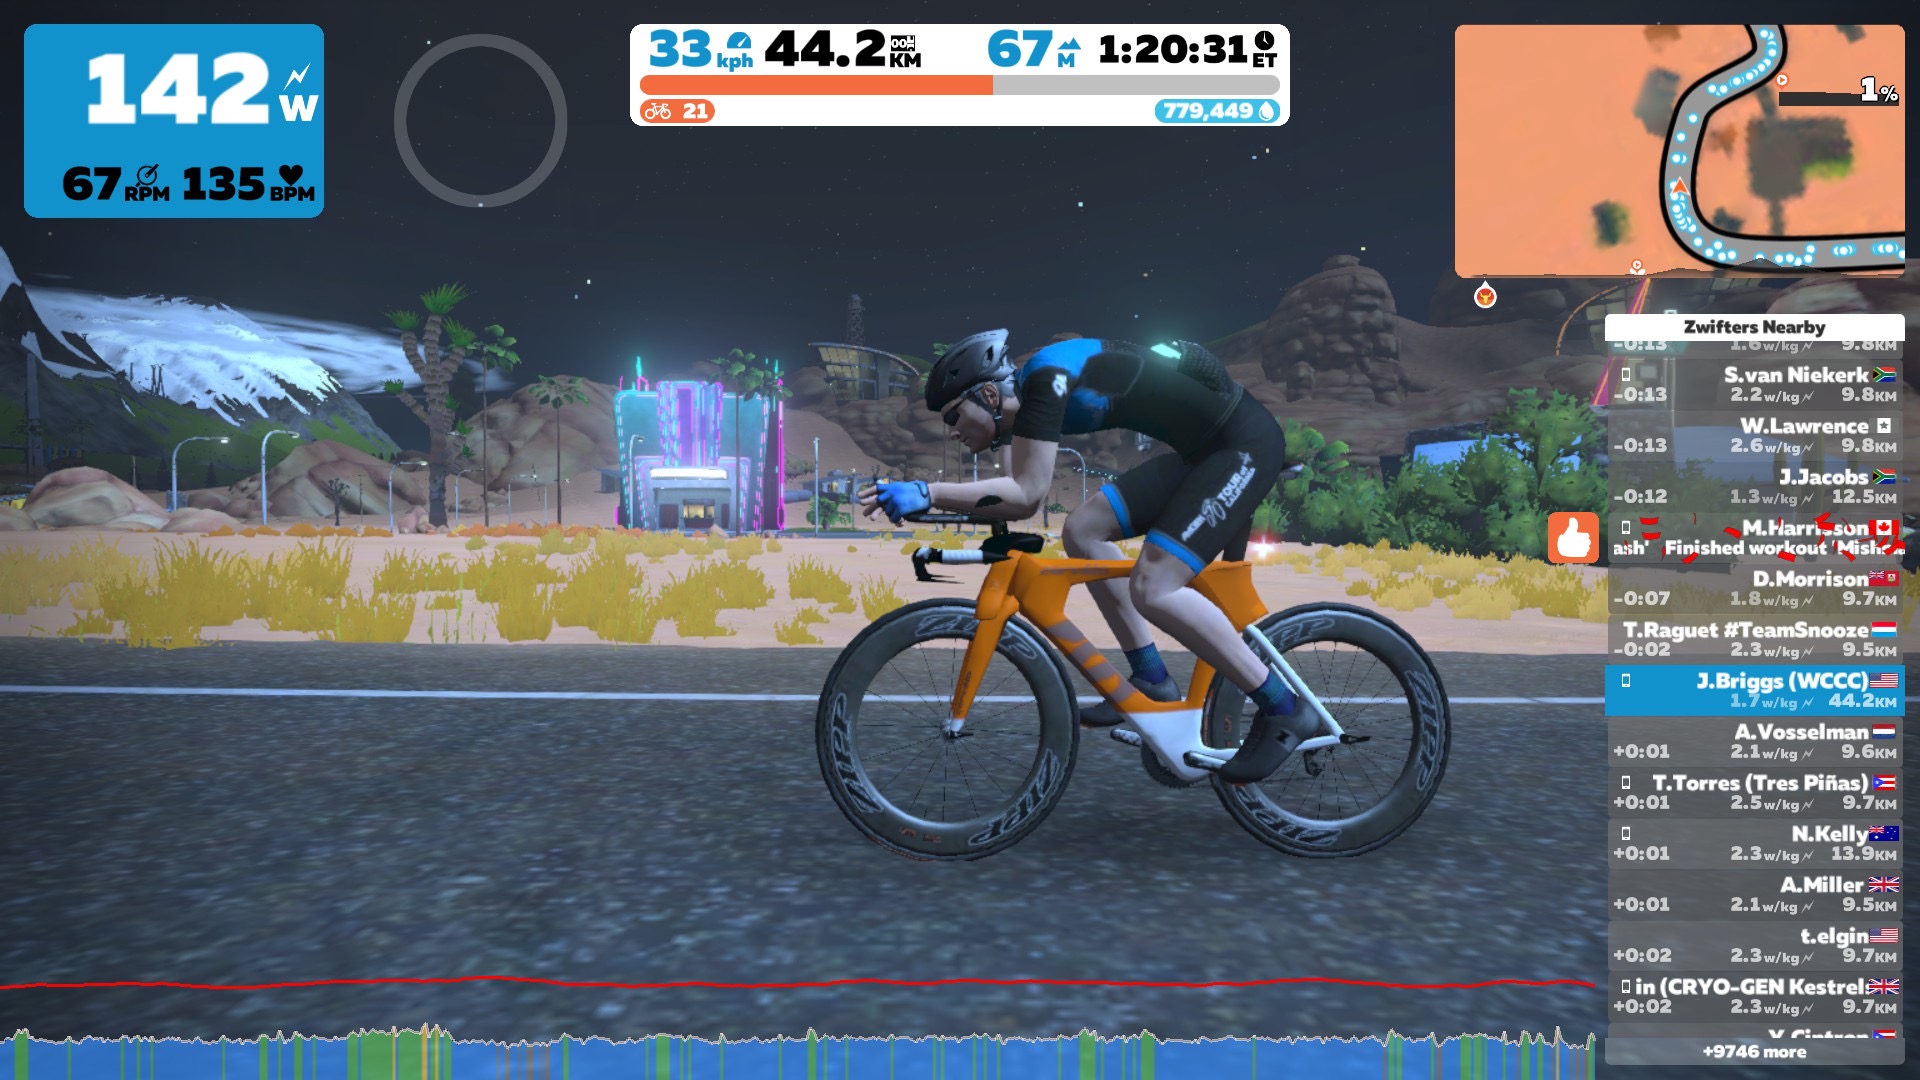
I took a ten minute break at the 40 mile mark, where I lost my domestique (strangely, he had other things to do that day than sit in his own basement and spin, but I thank him greatly for the help). I re-started much the same as I had left off, but to stave off boredom I started watching one of the ESPN 30 for 30’s (the Lance Armstrong one, naturally. Spoiler alert: this guy has no self-awareness). Since I couldn’t watch TV and try to find people to draft off I switched then to the TT bike for the remainder of the ride. Slower than the Madone had been, but probably faster in clean air. You can see from the chart that my speed drops off noticeably after the 40 mile mark, but I can’t really say how much of that is aero and how much of that is just good old fatigue.
The Mile 70 Wall
I have noticed that on each of the Century rides I’ve done there’s a psychological barrier at the 70 mile mark. Miles 70-80 are the worst, and although I am not entirely sure why that is I suppose it is because at that point I’ve been riding long enough to be feeling sore, but I’m not close enough to the end to start focusing on my post-ride meal(s).
Just like the outdoor centuries, the mile 70 wall was still a thing. I didn’t really contemplate quitting as I have done before, but it is definitely the psychological low point of the ride. I had decided on breaks at 40, 70, and 90 miles (and I was happy later with those choices) to give myself a little break before the stretch at 70 miles, and I’m happy I did. I grabbed myself a bread roll and started rationing my Bloks. I had one GU left over for this ride, but it was one of the chocolate outrage ones, and those things are like candy and best saved for the end of a ride.
The break at mile 90 was similar to the last rest stops on my outdoor Centuries, just long enough to reset. At that point in a ride, it’s pretty hard to get re-started, so you don’t want the break to be too long. Plus, at that point you’re only 10 miles from the end, and I was definitely ready to be done.
As the graph shows, I was gradually slowing down. This ride is a little over 9 laps of Tempus Fugit, I think, and Zwift gives you a time for the lap (1/2 lap, actually) so I was quite aware during the ride that my last few laps were each about 2-3% slower than the one before. I was slowly running out of gas. Additionally, although the grade on the route only varies between -1% and 2%, at this point in the ride I didn’t even have to see the screen to know what the gradient was. When I hit the 2% section I thought to myself “oh, no, the hill again!”
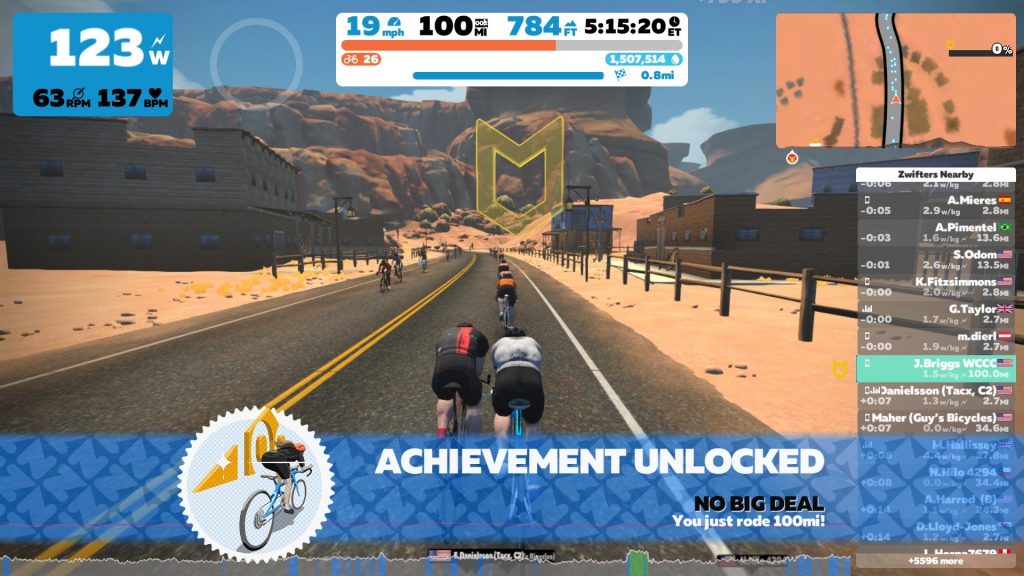
But then, with fairly little fanfare (just the banner announcing that I’d gotten the badge for the hundred mile ride, which Zwift calls the “No Big Deal” badge), it was over.
So, now the question you’ve been waiting to be answered…
Is riding a Century in Zwift harder or easier than riding a Century outside on the road?
Based on my limited experience, I’d have to say it was easier. Definitely easier, and for one major reason: because there are no stop signs, stop lights, blind corners, traffic, or any other reason why you’d need to stop, your average speed in Zwift will be way faster than anything you could achieve on normal roads. In fact, my time for the “Tour de Mon Sous-Sol” as I call it was more than an hour faster than my fastest outdoor Century. After five plus hours on the bike doing this, I was very happy to not have to ride for another hour or more. Plus, my ride was climate controlled and I had complete discretion over the rest stops, etc. (and my wife came down every now and then to take photos for our social media posts — this was a fundraiser, after all!)
All of that said, if I were properly trained up I think I would pick the outdoor Century every time. The indoor ride was boring, and I don’t think it would have been significantly less boring if I hadn’t chosen to do 8 or 9 laps of Tempus Fugit. Outdoors there is scenery, navigational challenges to exercise your mind, comraderie, all the things that make cycling fun. Plus, this indoor century was almost completely in the saddle, and it is considerably less comfortable than the variability you get when riding outside. (I’ve spoken in earlier posts about the way the bike is clamped to the trainer and the unnatural feeling that results.) I’m very happy to be a Zwifter, but it’s still second best to riding outdoors.
Final Thoughts after the Zwift Century
In the end, I raised $1060 for Main Line Animal Rescue, which I was super-excited about. I even had donors who found the fundraiser through this blog! It’s a great feeling to be able to help out the dogs and cats of MLAR, so on that account alone it was definitely worth it.
Plus, I now have the coveted black Zwift jersey. My avatar is never going to take it off.
This morning I decided that the time had come to snag that cool gray jersey that Zwift awards you when you do a 100km ride. Here’s how I went about it.
Before I start, let me be clear that this post is not about preparing for a metric century in Zwift … you can prepare for it just the same way you’d prepare for an on-the-road MC. I’ll talk a bit about the difference between the “real” metric century and the Zwift version, but as far as preparation I think there are a lot of resources out there to get you prepared (including Zwift’s own Fondo training courses). This post is about the decisions I made about how to approach it in-game, and the experience of actually doing it.
I’m a 100 mile/week rider (if you count the Peloton in there) and have done a few centuries, both the metric and full 100-milers. I’d started a couple of Zwift rides in the past intending to go 100km, but for one reason or another I never actually went the distance. With the local weather somehow locked into a cold, rainy pattern for the past few weeks and not a whole lot to do at home during the lockdown, I decided that today would be the day.
The easy way or the fun way?
I had considered two strategies for tackling the MC in Zwift. One was to pick a longish course such as the Uber Pretzel and just ride it. That was how I had started my last 100k attempt, but after I saw how long it took me to do the first 30k or so I bailed out, figuring it’d take most of the day to do the rest. I am not entirely sure how long it would take me to do that ride… there’s a fair bit of climbing, but in the real world if you begin and end a ride in the same place the ascents and descents are literally equal so the extra effort going up is rewarded by rest coming down. I’m not sure that the same can be said for Zwift. I never really seem to coast through sections like Titan’s grove the way I can through similarly hilly areas near my home. I feel like Zwift cheats me on the downhills… not a big deal since I’m on the thing to train, but still I don’t think the ascents and descents cancel each other out on Zwift nearly as much as they do in real life.
The other approach to doing 100k, the one I chose, was to set things up for myself so that I could complete the 100k as quickly as possible. So the course I chose was Tempus Fugit, the flattest, fastest route in Watopia, and a favorite of people who just want to maximize their MPH (or KPH, as the case may be). 100k on Tempus Fugit has only about 500 feet of climb.
After selecting the course I had to decide on the bike, and I had a conundrum. Should I pick a TT bike for its aero, or should I pick a fast road bike and rely on the draft? You may be aware that in Zwift, you get no aero advantage from drafting behind other riders (they may draft you but you can’t draft them). So if you go TT you’re on your own. With other bikes, you can take advantage of a healthy aero boost when drafting behind a rider (and even more if the group is four or more riders), but that means that others dictate your pace to some extent. Today, being quarantine day #1zillion, there were so many riders on Fuego Flats it was, as they say, a conga line. Finding drafting partners would not be a problem.
After some thought and fruitless googling, I decided to go the TT route, just to simplify things. I selected the Cervélo P5 for the ride. Why that bike? It happened to be in my garage. It was probably the best bike I could afford the last time I did a TT ride and considering how few TT rides I do I wasn’t going to buy another just for this. So the P5 it is.
Getting ready
Although I generally don’t like to eat before a bike ride, most of my Zwift rides are an hour or less so it hardly matters. For what was fixing to be a 3+ hour ride, I was going to need some fuel, so I made myself a breakfast of oatmeal and an orange, and was ready to go. (NB: I am very far from being a sports nutritionist, but this worked for me).
Riding Fuego Flats on a TT bike is just about as dull as Zwift can get. Fuego Flats is, as the name would suggest, pool-table flat, with gradients between -1° and 2°. It’s so monotonous that I could actually feel the one degree changes in gradient, which normally are imperceptible. Add to that that the TT bike cannot draft behind others, and you pretty much can completely ignore the other riders. After all, you can’t crash into them, and you can’t draft off them, so it really doesn’t matter where they are. Riding alone or in a pack of a hundred riders, it’s exactly the same experience. Pick a gear, grind out the miles, and that’s about it. I chose a 33-34 kph pace so I could finish in three hours and settled in.
I took a break around the 50k mark. Just like in real life, I’m looking for a bio-break after about hour #1. I decided to hold out until I was past mid-way, because I wanted to have more behind me than ahead of me when I got back on the bike. I grabbed a bread roll (it was the only thing I could see in there that I could eat while on the bike) and got started again before I got too comfortable not pedaling.
Around the 80k mark, I opened up a pack of Gu. I’m not really into snacking on my ride, but it may just be that I don’t know what I’m doing. I did notice that my time on “Fuego Flats Reverse” seemed to drop about 2-3% each time through, so I was definitely running out of gas. Would the right snacks help? I really don’t know. I do like Gu, though, it’s like candy. My favorite flavor is Chocolate Outrage, but if you’re actually in the middle of a big ride it’s a little hard to get down, so I generally go for the salted caramel. (In case you’re wondering, I am not compensated by Gu for this mention, though at about $1 per gel, I certainly wouldn’t mind them throwing some free product my way)
The 100k mark came and went without a whole lot of fanfare. There was the usual blue banner saying that I’d gotten the badge, followed by the orange banner saying that I unlocked the Metric Century jersey (the whole reason I was doing this, to tell the truth). I was getting close to finishing the timed Fuego Flats Reverse, so I went ahead and finished that. Then I was close to getting 105 km, so I did that, too. (If it weren’t for completionism, I’d probably have half as many Zwift miles as I do!)
Final thoughts
So, after all that, how does a Zwift metric century compare to the real thing? I suppose in terms of effort, it was about the same. I live in a fairly hilly area, so the metric centuries I have done have usually had 3-4000 feet of climb to them, which both requires extra effort at times but also provides some relief. I’ve never just sat and cranked out three hours at a constant pace, and it’s hard to compare.
I think I found it a little less comfortable doing a distance ride on the trainer because the trainer has the bike more or less locked in place. On the road, the bike can sway just a little from side to side as you pedal. That’s particularly noticeable on hills but you still feel it on the flats as well. The trainer doesn’t give you the same jinba ittai that you get on the road, which is a shame. I am not sure I ever plan to do a full 100 mile century ride indoors for just that reason. Then again, if it doesn’t warm up soon around here I will probably be looking for new things to try.
One other thought: if you’re doing an organized event, then the rest stops are set at intervals of the organizer’s choosing, but of course on Zwift you’re making that decision for yourself (assuming you’re not in a group ride), and that may change things a little bit.
In summary, I think I can safely say that if you have completed a metric century in either Zwift or the real world, you probably wouldn’t have trouble doing one in the other. Jumping on your TT bike and heading for Fuego Flats is probably the fastest way to get in your 100k, but exciting it is not.
For your indoor-riding money, which is better: Peloton or Zwift? I have both, and although Peloton riders and Zwift riders each have more or less the same goal of getting a good cycling workout, they almost could not be more different. After about 1,000 Peloton rides (just about every day for a couple of years), I switched entirely over to Zwift a few months ago, but am now splitting my time between the two. I’ll explain why…
The author, riding the Peloton bike with a broken arm and multiple broken ribs. The Peloton bike is heavy and stable, more so than my Zwift setup, and it’s pretty hard to crash when you’re riding indoors!
The Peloton Experience
For this comparison, I am going to by relying on my own history with both the Peloton bike and the Zwift experience, and talk about the pros and cons of each. You’ll see that sometimes the comparisons are apples-to-oranges (after all, one is hardware with streaming content and the other is an app to which you bring your own interface) but I think it is possible to make some valid comparison since at the end of the day it’s all variations on indoor cycling / spinning.
My Introduction to the Peloton Bike
I bought my Peloton bike a couple of years ago after hearing my brother go on and on about how the Peloton had improved his fitness. It was hard to miss that he’d lost 70 pounds in the year he’d owned it, and that summer when members of our extended family climbed Mt. Mansfield he certainly did seem to be up to the task (we rewarded him by making him carry the backpack). Even so, my friends who know me as a cheerleader for the bike that goes nowhere might be surprised to learn that I left my first visit to the showroom unimpressed.
In August of 2017, my wife and I went to our local Peloton showroom (yeah, we live in a place like that) where we got to sample the bike. The salesperson showed me that you watch the class on the screen and turn the resistance knob when the instructor tells you.
“If the bike knows the resistance should go up, why do I have to turn the knob?” I asked. This was a dumb bike. Nicely made, and super smooth action (thanks to a drive belt instead of a chain), but just plain dumb.
Eager to please, she showed me a feature called “just ride” that featured beautiful movies of rides on trails and roads that I could just follow, bringing my own soundtrack if I wanted to. “So, if the road goes uphill in the movie, does the ride get harder?” I asked. “No,” she replied. The fact is, the experience on the bike has nothing to do with what you see on the screen. Again, dumb.
My wife and I left without buying a bike. I am not sure exactly how she felt about it at the time, but I was disappointed. I wanted a bike I could ride in the winter, and this didn’t seem to be it. I had never taken a spin class and wasn’t all that enthusiastic to, either. And, for all the hype, the Peloton experience is just a spin class beamed to you over the Internet. I mean, let’s keep some perspective.
The Peloton is not a biking simulator
Over the next few days, I actually found myself starting to reconsider my first impression. I had been disappointed in the Peloton bike because wasn’t the indoor bike simulator I wanted, but then again, it wasn’t trying to be. I realized on reflection that a big factor in my disappointment was my expectations and not anything to do with the bike itself. The following weekend, my wife and I went back to take a sample class on the bike.
This time, I started to think of the Peloton as a training tool, a piece of equipment that could make me a better cyclist not though a true simulation, but by focusing on very specific elements of the experience, namely building up my cardiovascular endurance and my leg muscles. The Peloton bike is a direct-drive setup (like a fixie) and there is no coasting on the Peloton — something that took some getting used to… I felt like George Jetson on the treadmill sometimes! With no coasting, there really isn’t any “downhill” on the Peloton, either. You can lighten up the resistance to next to nothing, but you are still spinning even when your are in so-called “active recovery,” which is the closest thing to rest that you’re ever going to get as long as class is in session.
This is what happens when you coast on your Peloton bike.
Given how happy I am with my Peloton bike today it’s funny to think that purchasing it was such a close call. Even after the second visit, I was still on the fence. After all, start-up cost for the bike was north of $2,500, and I’d pretty much agonize over that sort of spend if I didn’t end up using it. My wife seemed interested, though, and in the end each of us rationalized the purchase by telling ourselves that we were doing it for the other.
Does the Peloton really work?
Yes. Yes it does. You have to actually ride it, though. Get yourself on a schedule where you’re doing, say, three or four 45 minute rides a week and I can’t imagine how you won’t see a difference. And cycling is one of the lowest-impact exercises there is, so if you’ve got the motivation you can do it every day.
On the topic of the Peloton’s effectiveness, I’d say that for building cardiovascular fitness it’s probably even better than actual cycling out on the road. On the Peloton, there really is no downhill-as I mentioned before there is no coasting. You also don’t ever need to stop for traffic lights or stop signs or anything like that. It is one continuous workout. In fact, the only way I’d say the Peloton bike was easier than the road bike is that on the Peloton you choose your own resistance and can increase or decrease it at any time, whereas on the road bike the hills are what they are, and although you get to select your gearing you still have to get up the hills on your route.
So, if you love your Peloton, why did you pony up for a Zwift setup?
After about two years riding (generally daily) on the Peloton, I was starting to wonder if there might be more in life. We had a couple of great years, and at the end of it I was in excellent shape, maybe twenty pounds lighter, and able to keep up with riders half my age (and drop them on the hills — priceless!). The Peloton is a low-impact exercise and it’s something you can do every day, and I really couldn’t ask for more. Still, I had started seeing the Zwift demo bikes set up in the bike shop and was being bombarded constantly on YouTube by Zwift ads, and I started to think, “it really would be fun to actually do a bike riding / racing simulator.”
I didn’t take the plunge right away. After all, although I owned a road bike I didn’t have the other equipment needed to get started. For the uninitiated, it’s important to know that Zwift is an internet service / app(s), and not a hardware/software/service combination the way Peloton is. The hardware component of Zwift is BYO, and the cost can be significant, particularly if you don’t have a bike. (On the other hand, if you do have a bike some Zwift setups can be relatively inexpensive.)
Since I didn’t already have an indoor trainer, I used Zwift’s website for guidance and settled on a Wahoo Kickr / Wahoo Climb combo. I already had an Apple TV and (as I mentioned) a bike, so I wouldn’t have to purchase anything else, but the Wahoo gear ran north of $1500 all by itself. Zwift is a subscription service with a monthly fee, too, so if depending on what equipment you have already the Zwift experience cost can rival that of the Peloton (though over time the much higher Peloton subscription cost will make a big difference). Setting up Zwift wasn’t too difficult, but unfortunately that is only half the battle in this case, because the trainer itself needs to be set up. Getting my bike connected to the Wahoo (I bought the wheel-off model) and dialed in took a fair amount of time, so advantage Peloton in the “getting started” matchup.
Closer, but still not a perfect simulator
Heading to the top of Mt. Zwift on a climb known as the “Epic KOM”. A mountain goat greets you at the finish line.
Although I enjoy the Zwift very much, it is sadly not a perfect bicycling simulator, either. Now, I’m aware that most of the shortcomings I’m about to detail have to do with the (Wahoo) hardware and not the Zwift program, exactly. But you can’t Zwift without hardware, and I’m using what seems to be their preferred setup, so at the end of the day I don’t think it’s really off the mark to call these things issues with Zwift.
The first shortcoming that becomes obvious is that there is no braking in Zwift. I think there’s a keyboard key for slowing down, but practically speaking there’s no braking. That’s not nearly as big a problem in the virtual world as it would be in the real one, because Zwift has no collision detection so there is no chance of colliding with your fellow riders or obstacles, and there is no chance of you not being able to make a corner due to excessive speed. Still, drafting is a thing in Zwift (and some opine that it’s an even greater force there than IRL) and it can be tricky to tuck in behind another rider when you can’t actually tap the brakes. Complicating things is the subtle latency between the trainer and the app, and positioning yourself for drafting becomes an art form.
Along the same lines there is no steering in Zwift. You can make route-level decisions such as turning left to go to the volcano or turning right to climb a mountain, but that’s as far as that goes. As I mentioned, there are no collisions in Zwift, so you don’t have to worry about steering all that much (in fact, sitting in the middle of a pack of fifty riders is no big deal in Zwift!) but as Zwift is trying to expand into dirt and gravel simulations, the lack of steering is a barrier to having any sort of technical riding. For road riding, I don’t find it a big deal.
Another shortcoming, and the one I still notice on a daily basis, is that the feel of the bike isn’t the same, particularly when pedaling hard. Because my bike is locked into the trainer, it has none of the natural rocking from side to side that is part of pedaling. This isn’t so noticeable at pace speed, but when sprinting or climbing it feels very restrictive.
Speaking of climbing, that, too, is somewhat unnatural. While I appreciate the Climb’s ability to raise the front fork of my bike to change the geometry for climbing, if I get out of the saddle to make it up a particularly steep grade the whole assembly gets to be a bit unbalanced, and sometimes the rear end lifts a little. It’s not terrible, but it’s not “normal”, either, and inhibits all-out efforts at climbing.
As I said before, these things could easily be called shortcomings of the trainer rather than of Zwift, but since they’re part of the Zwift experience I think it’s fair to include them. Wahoo has recently released their own Wahoo bike (which, at over $3000, is more expensive than my road bike!) and Saris (among other companies) have introduced wooden “bike surfboards” to allow for more natural motion, so it’s clear that the issues are known and people are hard at work trying to find solutions. Indeed, it seems to be a badly kept secret that Zwift is working on it’s own trainers, if for no other reason than to standardize a feature set. As of this writing, though, there is still work to do.
So, with those gripes out the way I have to say that I do love riding on Zwift. It doesn’t take the place of riding outdoors, but it’s a fun diversion. Zwift races are fun, and Zwift group rides (which everyone just understands are races, too) are great. I even did a “meetup” with about a half-dozen of friends from the cycling club and we ran one of the courses together (using discord to chat). It’s a great way to spend a couple of hours, and I am very much looking forward to seeing the platform grow over time.
Even though I’m really enjoying Zwifting, that doesn’t mean I’ve turned my back on the Peloton. In fact, in recent weeks I’ve been spending even more time on the Peloton than on the Zwift. I’ll explain below…
Why Zwift is better than Peloton
Zwift is more fun. I think I can say that without reservation. On Zwift you climb mountains (including a faithful reproduction of the Alpe D’Huez, which is close to an hour and half of unremitting uphill), ride underwater (through a see-thru tunnel, though I suppose in the game even that isn’t needed), past dinosaurs and volcanos. There is visual interest in the landscape, and it doesn’t get boring any more than your local outdoor rides do.
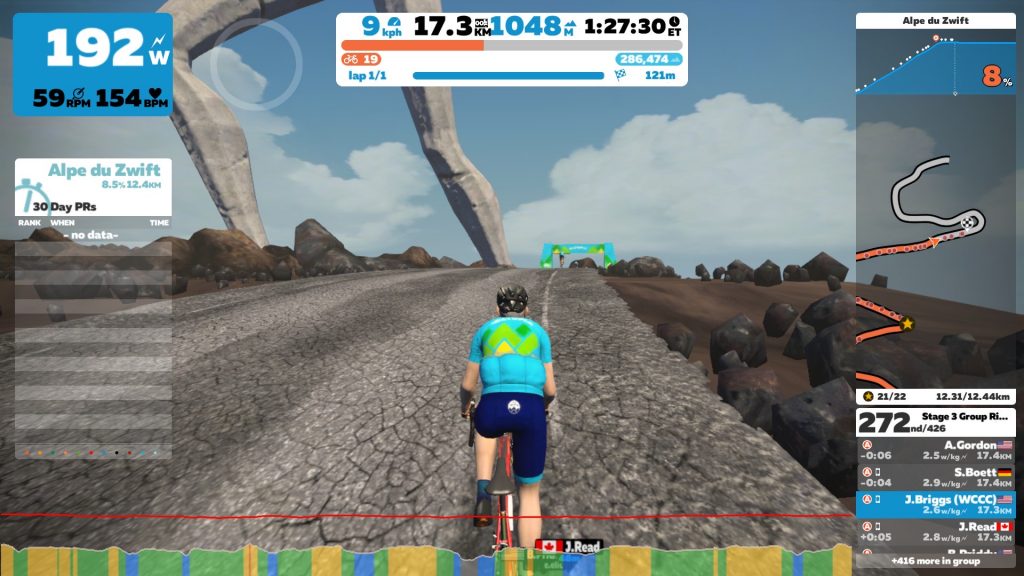
The summit of the Alpe du Zwift. There is nothing on the Peloton as satisfying as reaching the top of a Zwift mountain.
I also think that I work a bit harder in Zwift. On the Peloton, I may be asked to pedal for thirty more seconds at a high resistance, but on the Zwift I know I’m pedaling hard because I’m near the top of a hill — I can even see the mountain goats hanging out at the summit. On the Peloton, I may be chasing the person above me on the leaderboard, but it’s really just by following a number (the number of kilojoules they’ve output as compared with me) which is dry to say the least. In fact, Peloton very deliberately de-emphasizes competition while in Zwift even the group rides are races. And when you’re chasing someone in Zwift you literally see them up the road, and you can viscerally feel the gap closing or widening. Dropping a friend in Zwift is every bit as satisfying as dropping them in the real world.
So, if Zwift is more fun and I get a better workout, why ever go back to the Peloton? Well, Peloton does have its own strengths.
Why Peloton is better than Zwift
I find the consistency of the Peloton workouts to be an advantage. Although there are different types of rides (tabata, hills, intervals, etc), one forty-five minute class seems to me to be much like another, so I can compare outputs and distances across rides much more evenly. By contrast, on the Zwift, I might be trying to compare a thirty-minute climb of Mt. Zwift this week to an hour on the desert flats last week and really have no idea how they match up. On the Peloton bike, I find that the consistency of the challenge makes it easier for me to gauge my efforts and to track my progress.
I also find the Peloton experience a bit more civilized than the Zwift experience. Of course, my choice of bike and Wahoo trainer is not Zwift’s doing, but since I’m using the preferred setup I think a comparison can be made. The Peloton bike is heavy and sturdy, easily adjustable for things like seat height and handlebar height, and nearly silent in operation due to its belt-driven mechanism. By contrast, my Zwift setup seems exceedingly cramped and noisy. It’s my own bike that I selected and set up, so you’d think that’d be perfect for me, but because it is clamped into the Wahoo trainer it feels unnaturally rigid. The chain and derailleurs are considerably more noisy than the Peloton’s belt, and that noise is amplified by the indoor setting — I never thought of the bike as noisy when it was outdoors.
Another big advantage that the Peloton has over the Zwift is that there is less involved at the start of each workout. Even if I have to adjust the bike after my wife’s used it (sharing a bike is not really even an option in the Zwift world unless both riders are exactly the same size) I can jump on the bike and be ready to start a workout within a minute or so. With Zwift I need to turn on the TV, turn on the Apple TV, choose the Zwift app, launch the Zwift companion on my phone (because of the limited Bluetooth connections on the Apple TV), start my Kickr and Climb, pair the bike to the companion app, and choose a ride using the horrible Apple TV remote (which is a lot like dialing your phone from five feet away using a pool cue). It takes several minutes. And, because every Zwift “event” is a race, I’d better be good and warmed up well before the official start! What it all comes down to is that when I have limited time it is far easier for me to grab my chest strap and my shoes and jump on the Peloton. Sometimes, there is something to be said for freedom from choice.
So, Peloton or Zwift?
Not many people are going to want to invest in both Peloton and Zwift. After all, you are getting the same sort of exercise with each, and you obviously can’t ride both at the same time. I’m going to answer this question with an “it depends”, which feels like a bit of a cop-out, but I’ll try to explain myself.
The Pelotoner wants to work out. It’s a pure workout machine. It may not be as much fun as the Zwift, but there is an enthusiastic instructor and (hopefully) good music, and as long as you challenge yourself you can get the best bang for your buck for the time you have to spend riding.
The Zwifter is the cyclist, who is driven indoors either by weather or expediency. The workouts are quite varied, and some can be much more challenging than a typical Peloton class (and Zwift does have a “workout” mode with intervals pegged to different power zones), but it’s a little more difficult to do a Zwift workout if you have a hard stop at the other end (most Zwift rides are distance-bound, rather than time-bound).
So, if I had to choose, which one would be my pick? Because I ride outdoors during the season (and whenever I can), I think I’d pick the Peloton. It helps me maintain my fitness, and because the classes are all time-bound I can more easily fit the workout into my schedule. If, for some reason, I somehow found myself unable ride in the real world (which is what got me into all this in the first place), I’d pick the Zwift as the platform that can hold my interest better.
Final Thoughts
After I finished this blog post, I realized that there was one angle I really hadn’t discussed, and that is, which of these two platforms can best simulate the other? The answer, I think, is clearly Zwift. There is a training mode in Zwift which lays outs an exercise plan based on power zones, just like the Peloton Power Zone rides. There is an FTP test and then the zones are used for the training courses. In fact, the Zwift training courses have a cool feature where, if you are doing a multiple-workout course, after finishing one the next might not be available for a day or two, forcing you to rest (or at least encouraging it). There is also a limit to how long you can wait to do the next workout, so not only do you have to rest but you can’t rest too long and still complete the course as it’s prescribed.
By contrast, the Peloton doesn’t have anything that really simulates an actual bike ride, and because it’s up to you to set the resistance, it never will. It’s just not baked into the DNA. I am still a big Peloton fan, but the fact is it rather unapologetically does just one thing. If that one thing is the one thing you want, then there’s your answer to whether Peloton or Zwift is the right pick.
I wasn’t completely sure I was going to be finishing the French Creek Iron Tour until I passed mile 80. Around mile 70 the course heads out of the wooded hills into farmland where the sun and the wind start to make you think, “how much do I really want this?” I really do enjoy cycling, and I enjoy the long rides… there is a peacefulness that you discover after a couple of hours of riding that just can’t be found on shorter rides. That said, there comes a point after five or so hours where it ceases to be fun, and I was there.
So when I did finally reach the finish line, about seven and a half hours after starting, I was pretty sure this was going to be both my first and last 100 mile bike ride. As much as I enjoy a nice, long ride, there really isn’t anything (except maybe for sleeping) that I really want to do for seven and a half hours straight. Riding a century is like climbing a mountain: you don’t particularly enjoy doing it, but you enjoy the satisfaction of having done it. As such, it doesn’t seem like there’s a whole lot of incentive, once you’ve done a century, to want to do another one. (I’ve climbed a few mountains in my life, and I can’t recall ever climbing one twice).
Never Say “Never”
Still, within just a few days of finishing the French Creek Iron Tour, I found myself reviewing the way I’d prepared … my eating, my workouts, and most of all the tapering phase in the week leading up to the ride, and I began to wonder if I really had done it right. Specifically, I was surprised during the century that I didn’t feel a bit stronger early on. Some fatigue started to set in around mile 40 that I really didn’t expect until mile 60 or so, and even though I had done several rides longer than a metric century, I felt more tired at the 60 – 80 mile distances than I thought I would be.
Each time I set out to do a ride that is longer than the previous one I had trouble knowing how to prepare because I had no frame of reference to tell me whether I should be doing more or less of this or that. Even when I could call upon similar experiences, there usually weren’t enough of them that I could make any real conclusions. Still, now I had a century under my belt, and I began to wonder how much easier it would be, then, to do it again.
It just so happened that a friend wanted to attempt his own first century a couple of months later, so we signed up for the Penn State Chocolate Tour (so-named for the chocolate candies on hand at the rest stops — fitting for a ride in and around Hershey, Pennsylvania). I really didn’t doubt that I’d be able to complete this one … I was still in shape from my preparation for the first century and this one was significantly less hilly.
On the Road Again
In the end, I think complacency got in the way of my great experiment. My family had a great vacation in mid-summer away from the bike and by the time I got home there were only about three weeks before the ride, so there wasn’t really a chance to build up the long rides like I did the first time around. I also frankly wasn’t as driven the second time around — it’s hard to get psyched up to do something you’re about 99% sure you can do. Still, there were some lessons learned.
The first lesson is that although the Penn State Chocolate Tour isn’t as hard as the French Creek Iron Tour, it’s still not easy. Yes, there was no point during the second ride that I considered bailing out and yes, I was able to complete it in nearly an hour less time (due to it being a fair bit flatter), but it was still over six hours in the saddle and that’s a long time to be riding. There’s no way I’d consider doing a century, even an “easy” one, without some serious preparation.
I also paid more attention to my snacks during this second ride. I generally don’t eat much on a bike ride, and if the ride’s less than a couple of hours I don’t feel like it really matters that much whether I eat or not. (Of course, I have a little more “on-board” energy reserves than a pro cyclist, if you know what I mean). After a couple of hours, though, your body is scrounging for energy in a way it’s never otherwise asked to. Well, maybe if you’re starving, but I’m not really into starving if I can help it. So this time I made a point of snacking on a fairly regular basis… I had a pack of gummies and a couple of GUs with me, and after mile 40 I ate a gummy every ten miles and had a GU somewhere around 60 and 80 miles, I don’t quite remember. This is still a lot less than the packages say I should be ingesting (maybe a third of what they recommend), but it did seem to help me keep my energy up.
The GUs were a bit of a disappointment. Their chocolate outrage is a great flavor, and I’d recommend it if you are ever frosting cupcakes. If you’re really just eating for the energy, though, it’s actually way too cloying to be pleasurable. Mandarin Orange is my new pick for when I’m actually exercising.
What they don’t tell you about finishing a Century
Finishing a century is a very satisfied feeling. You’ve been on the bike for hours and hours, and just not riding is a joy in and of itself at that point. Also, you have just spent a hopefully pleasant day riding around seeing the countryside, and if you remembered to put on the sunblock you should not be too toasty at the end. Plus, your Garmin congratulates you on exceeding 100 miles, which is pretty cool.
Lest you start to feel self-important in your accomplishment, though, there is a harsh reality check waiting for you at the end of the ride. I first experienced this at the end of the French Creek Iron Tour, when I walked my bike out to my car through an almost completely empty field, but it was rainy that day and I just wanted to get home and I didn’t give it much thought.
There are no photos of me finishing either of these centuries. The fact is, the photographers had long gone home. When I finished the Penn State Chocolate Tour the only people to greet me were the EMTs standing around the mandatory ambulance. There were no spectators, no photographers. Even the inflatable start/finish arch had been packed away. The dirty little secret of these centuries is that everyone has gone home by the time you’re finished.
And let me be clear: I completed the 100 miles (and 4400 feet of climb) in about 6.5 hours at a pace of 16 mph. Not Olympic numbers, I acknowledge, but this is by no means broom wagon territory, either. I really have no idea where I placed relative to the rest of the field, but there were plenty of people finishing after me. Nevertheless, the food was pretty much gone (I grabbed a few slices from the last pizza to save for my friend, who I regrettably dropped somewhere around mile 40, but that’s another story), the event T-shirts were gone (unless you’re an XXL, but how many XXLs are there doing the 100 mile route?) and the whole thing was pretty much already in the history books.
The problem is that these events have multiple distances (usually something like 25, 50, 65 and 100, for example) and often, if they don’t start all at the same time they start close to the same time (maybe the century riders get a 1/2 hour head start). So the bulk of the event participants have finished hours earlier, got their t-shirts and pizza, and are already home. When I finished the French Creek Iron Tour, I got my buffet lunch (they did a much better job of catering to the late (ie: century) crowd) and sat down, thinking, “Last year (when I did the 50 mile route) they had a band”. Well, they had a band this year, too, but the band was gone by the time the century riders finished. As far as the Chocolate Tour organizers were concerned, the century riders were on their own. It’s not that we are doing it for the fans, but a bottle of water and a banana at the end of the ride would be nice.
At the finish, with Jason who rode with me. Thank God his girlfriend came out to cheer him on, or we wouldn’t have even this photograph!
One more for the road
My last big ride of the season was the Main Line Animal Rescue Gran Fondo (a mouthful… there’s something to be said for their original name, “Handlebarks”), and I tried to apply my learnings from the centuries to my training. Due to some confusion regarding road markings (I will not point fingers, but I have photos to back up my claims… I thought to take photos the second time I passed through the Birchrunville loop) we ended up doing about 66 miles and over 5600 feet of climb, so it was on par with the Chocolate Tour in terms of effort. For this last ride, I really didn’t do any tapering (I felt after the centuries that the tapering I had done the week or so beforehand actually made me feel a little de-conditioned when the big day came). I think I took off the day before, and my rides for the week leading up were a bit more relaxed than usual, but there really wasn’t any tapering per se. In the end, I think that worked best, as I felt the most “myself” for that event. Whether that’s really the right approach if I found myself attempting something closer to the limits of what I can do, I am not so sure. Unfortunately, there’s probably no good way to find that out without actually doing more long rides, so don’t be surprised if I have more posts in the future about century (and maybe even century+) rides, as I try again to crack the code.
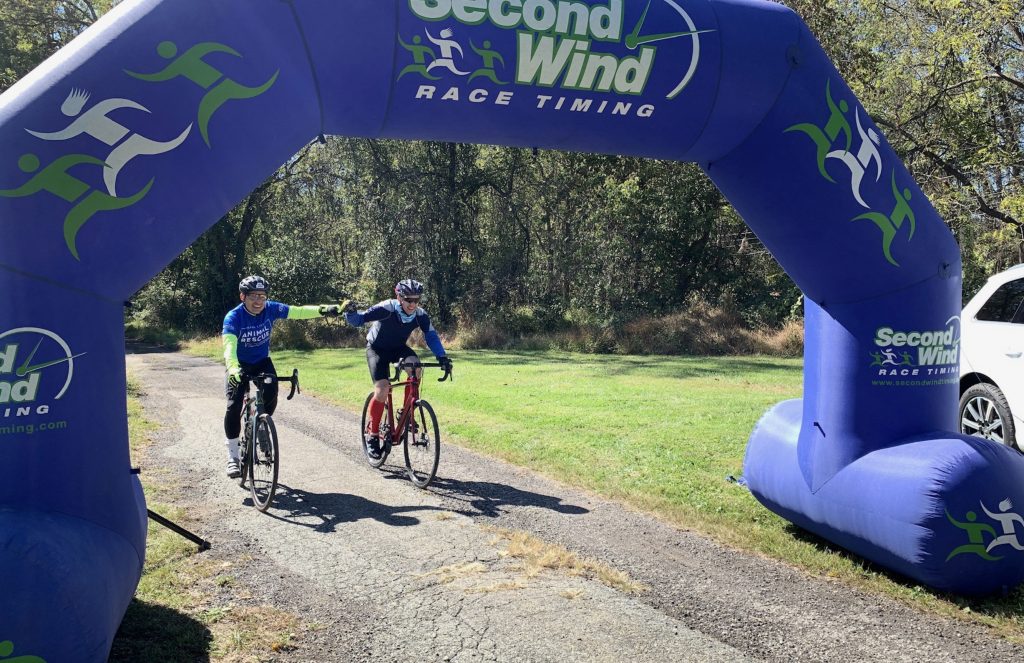
Fist bump with my brother at the end of the 2019 MLAR Gran Fondo. Due to our “detour”, I think we may have finished last at this event. Well, last and second-to-last.